As a meeting organizer, you can split your students, or meeting attendees, into multiple separate mini-meetings, or as they are most known, breakout rooms. Breakout rooms in Microsoft Teams can be used for smaller discussions and brainstorming sessions. These rooms can be set up before your meeting actually begins and edited during the meeting. For all the tricks to use this feature smoothly, follow along!
Step 1: Create a Meeting
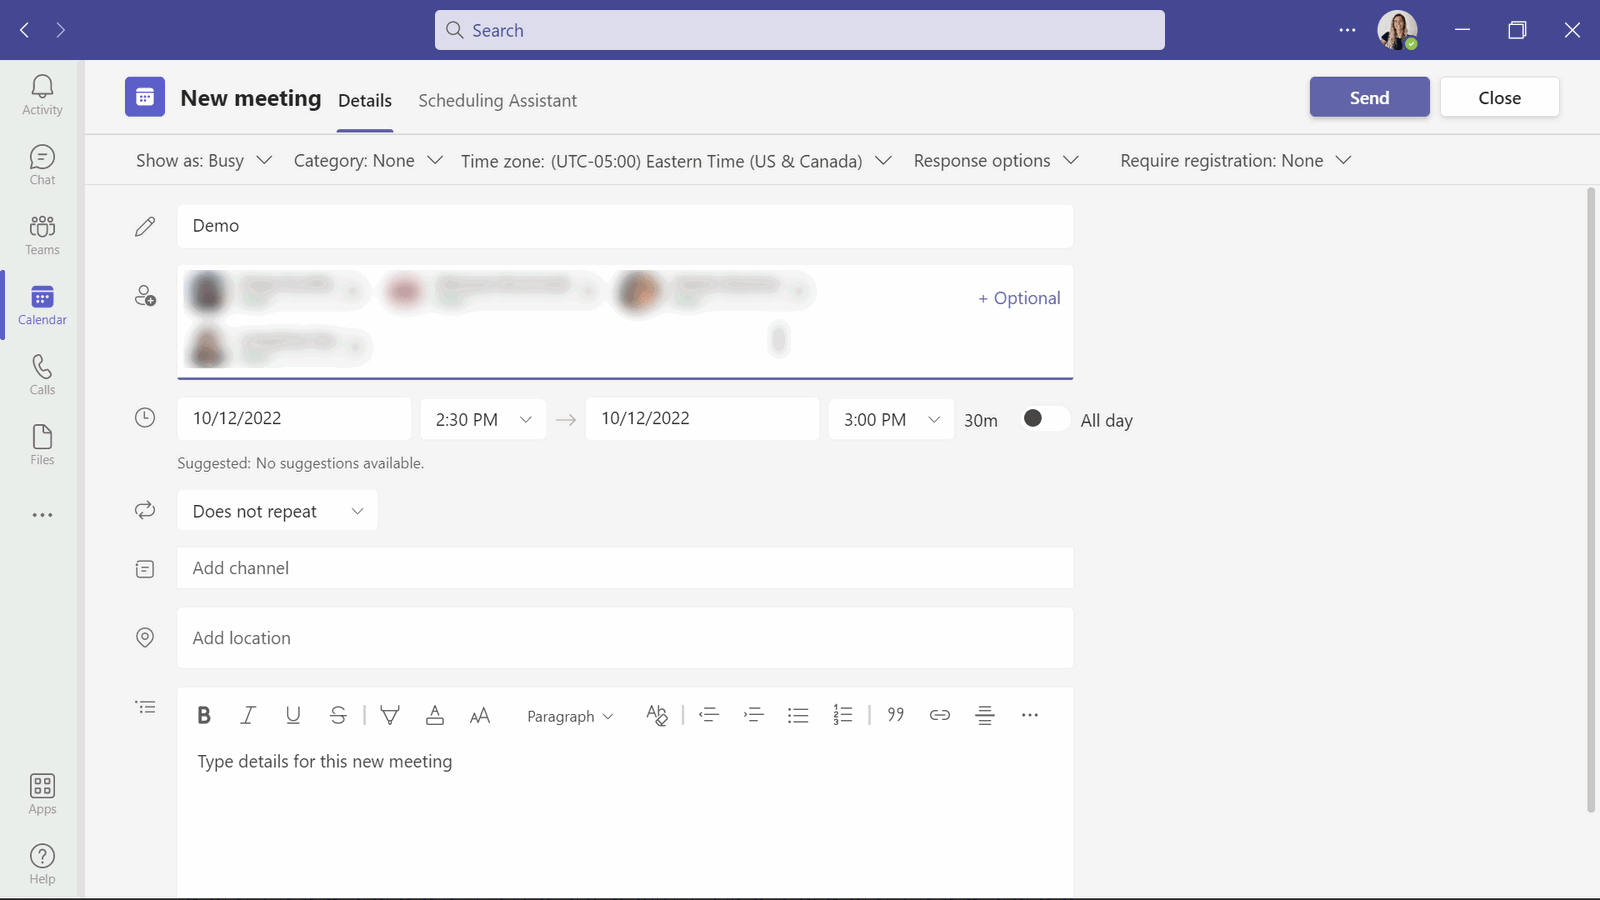
Set up your breakout rooms in Microsoft Teams before your meeting begins. This will save you time for admin tasks during your meeting! To set up the rooms beforehand, we need to schedule a meeting.
Head into your Teams calendar, and schedule a meeting with participants. Once you have participants invited, and the meeting set, you can now set up the rooms.
Step 2: Set Up the Breakout Rooms in Microsoft Teams
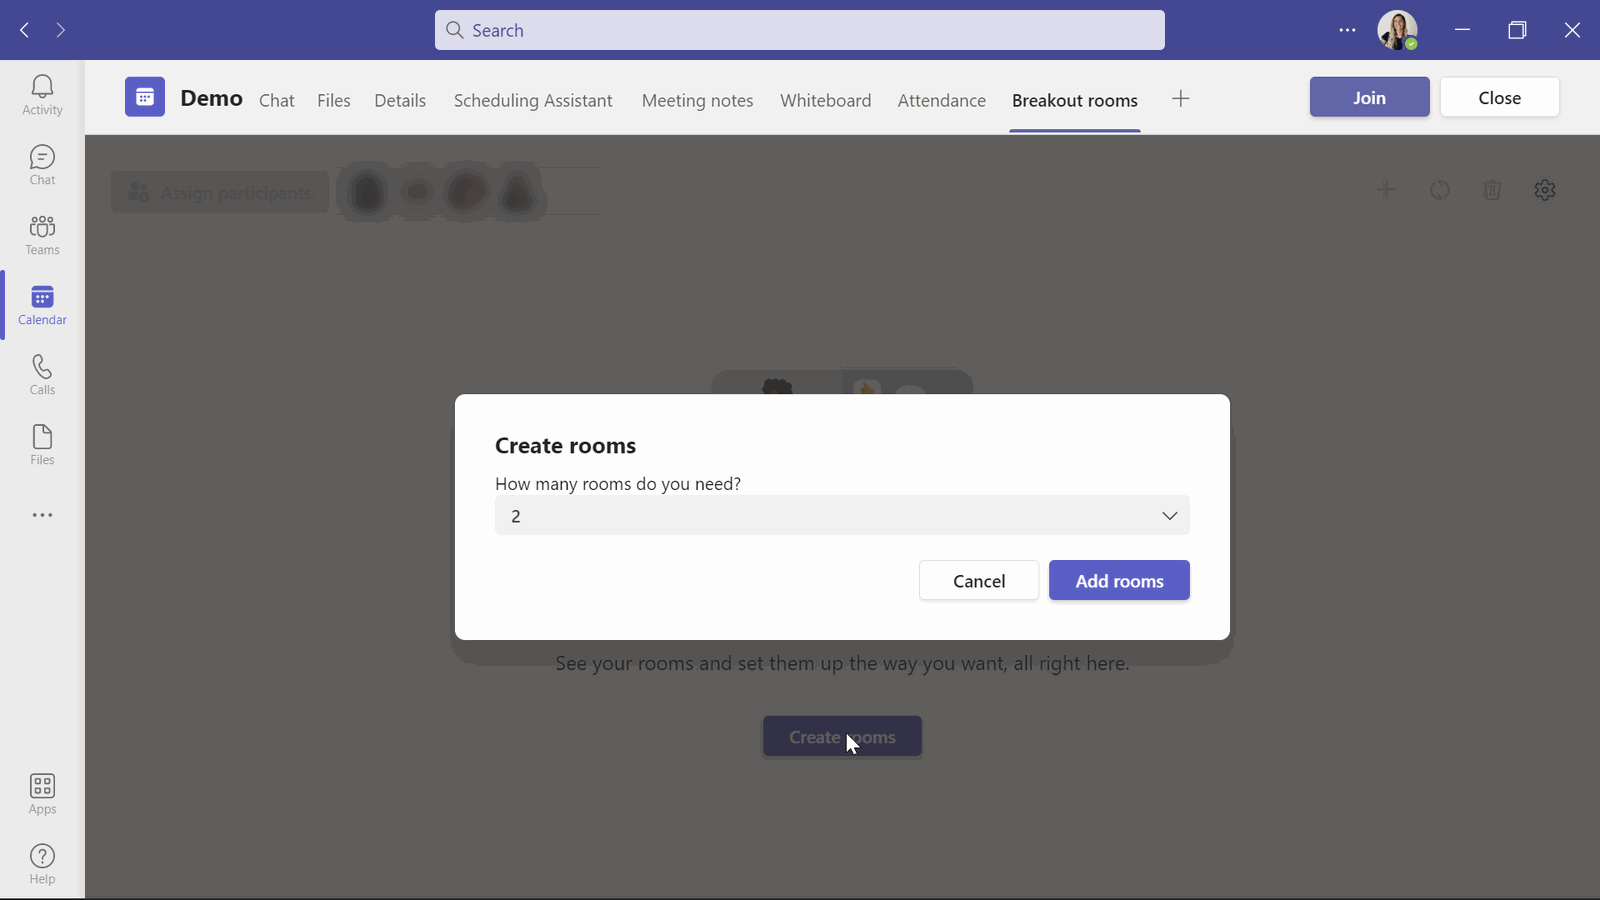
Begin by editing your meeting and going into the Breakout Rooms Tab. From there, click Create Rooms and select the number of rooms you want. Up to 50 rooms can be selected!
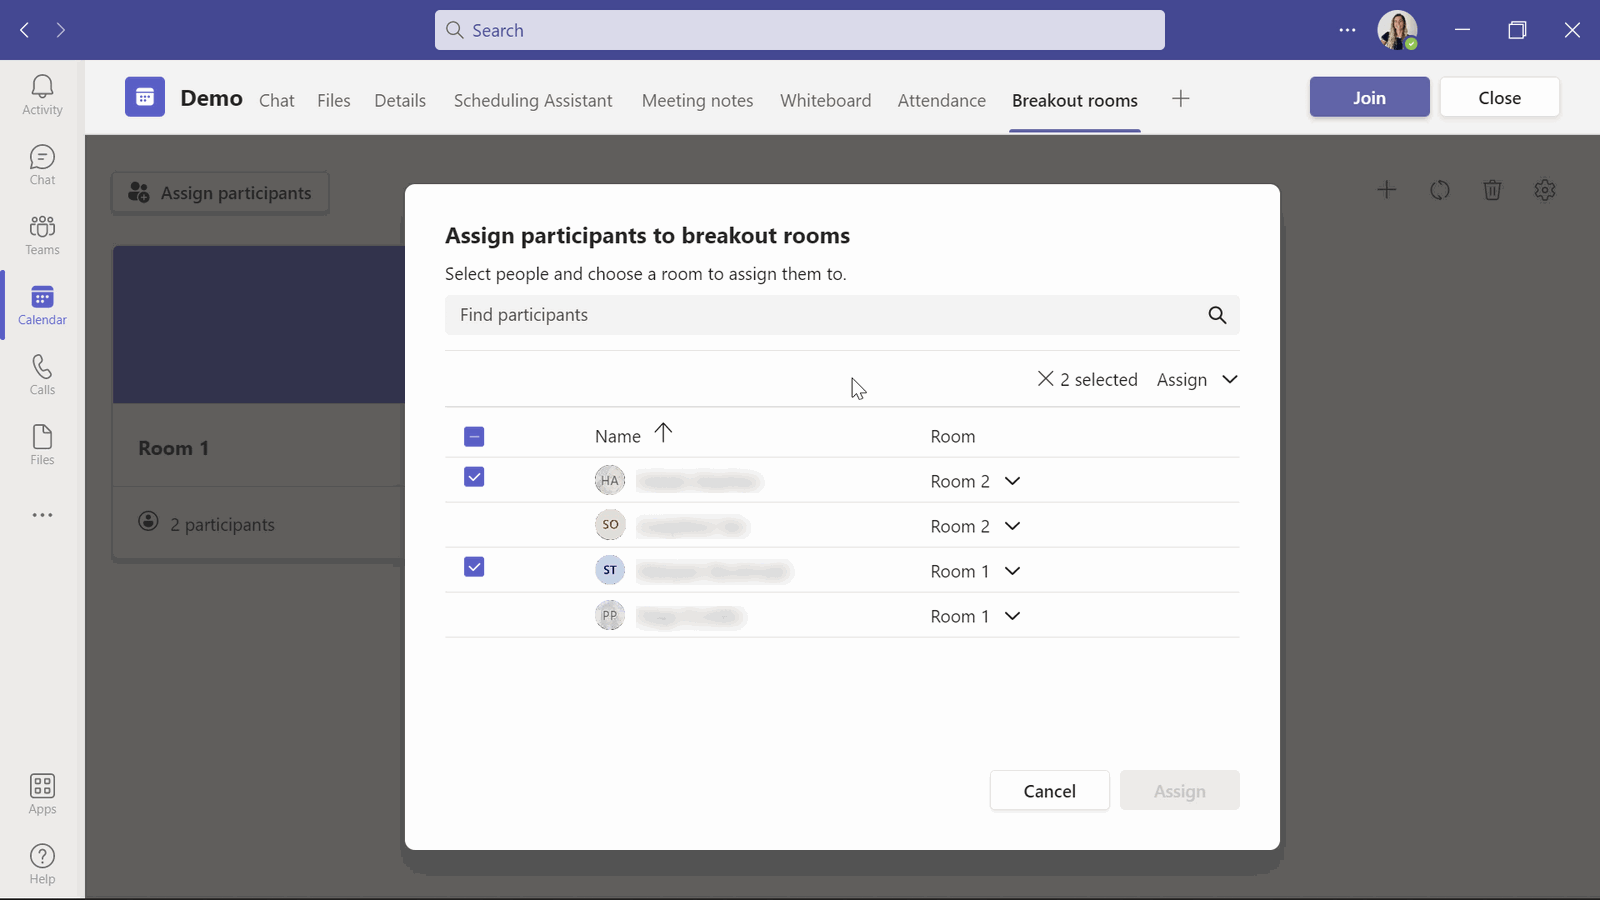
From there, click Assign Participants and decide if you want Teams to automatically assign your students to a room, or if you want to manually assign your students. It doesn’t take long to manually assign them, so do not be afraid of this option! You only need to click the student’s name and click assign to choose which room they will be a part of.
As of right now, Teams doesn’t have a feature for you to save your Breakout Rooms. So, for each meeting you have you will have to reassign your participants to a room. If you have groups that don’t change regularly, you can still create channels, and do breakout rooms that way.
Once all of your students are assigned to a room, check out all the different settings you can customize for your Breakout Rooms.
Step 3: Breakout Room Settings
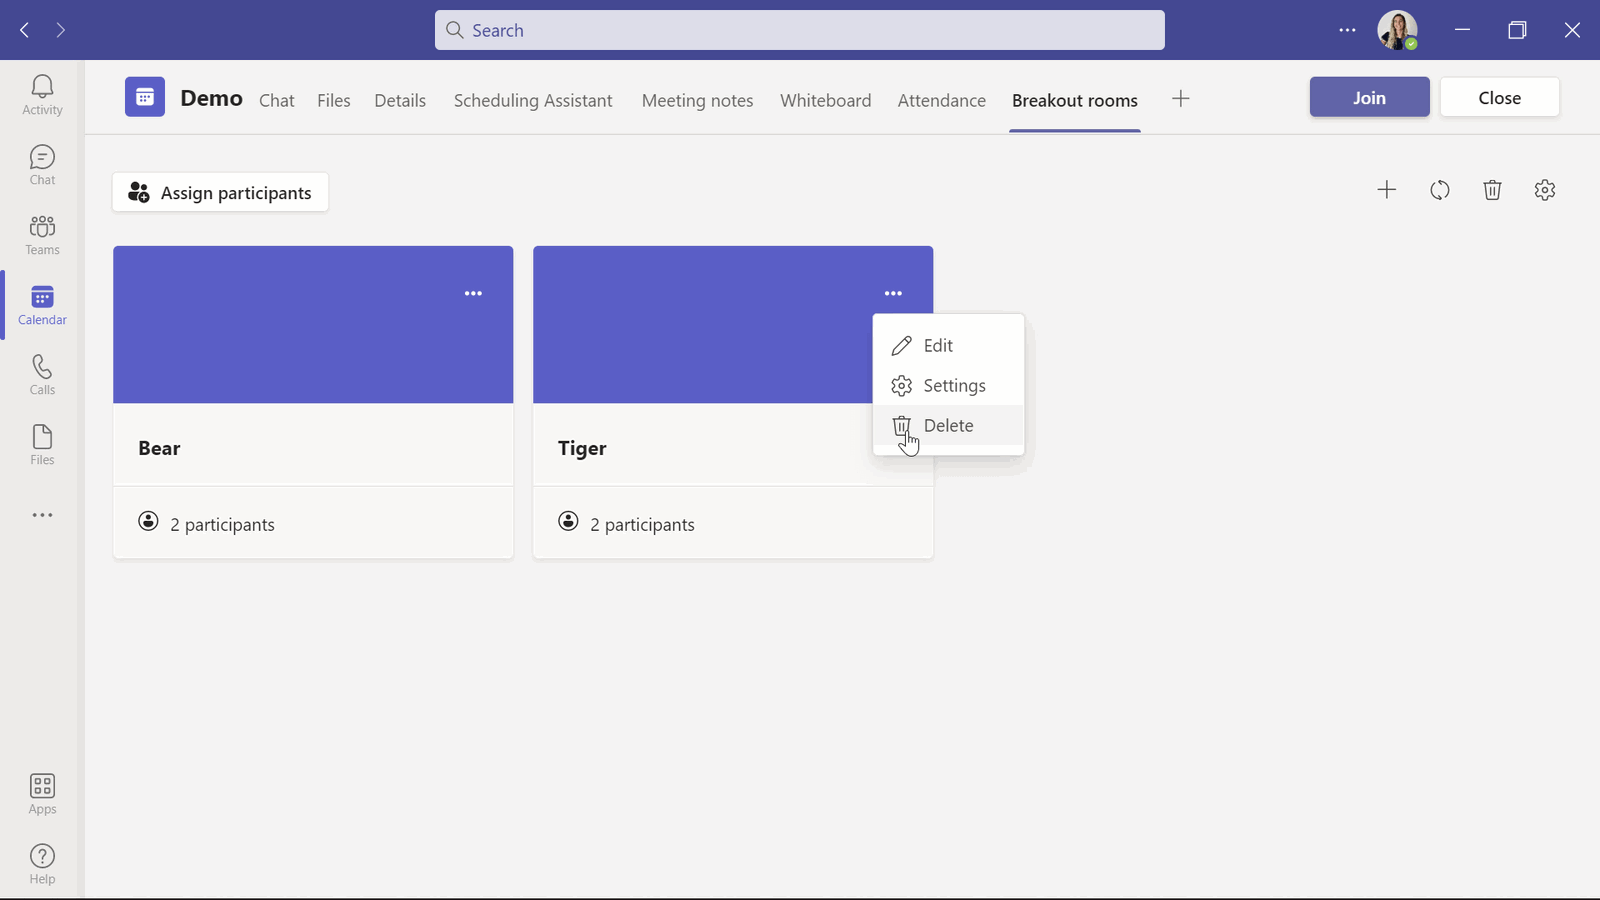
First, give your Breakout rooms their own names. You can quickly rename each room in accordance with the subject or group names of the students. It will also help students remember which room they are supposed to be in. Click click on the three dots on the top-right of the room name. In the same menu, you can Edit that room, change the Settings, or Delete it.
If you want to start over, you can Recreate Rooms with the button on the top-right corner. This will delete all the rooms you currently have, and bring back the beginning setup window. If you only need to Add a Room at any point, you can quickly do so with the Add Room button. Or, if you no longer need any of the rooms, just click the Tash can in the top corner, too.
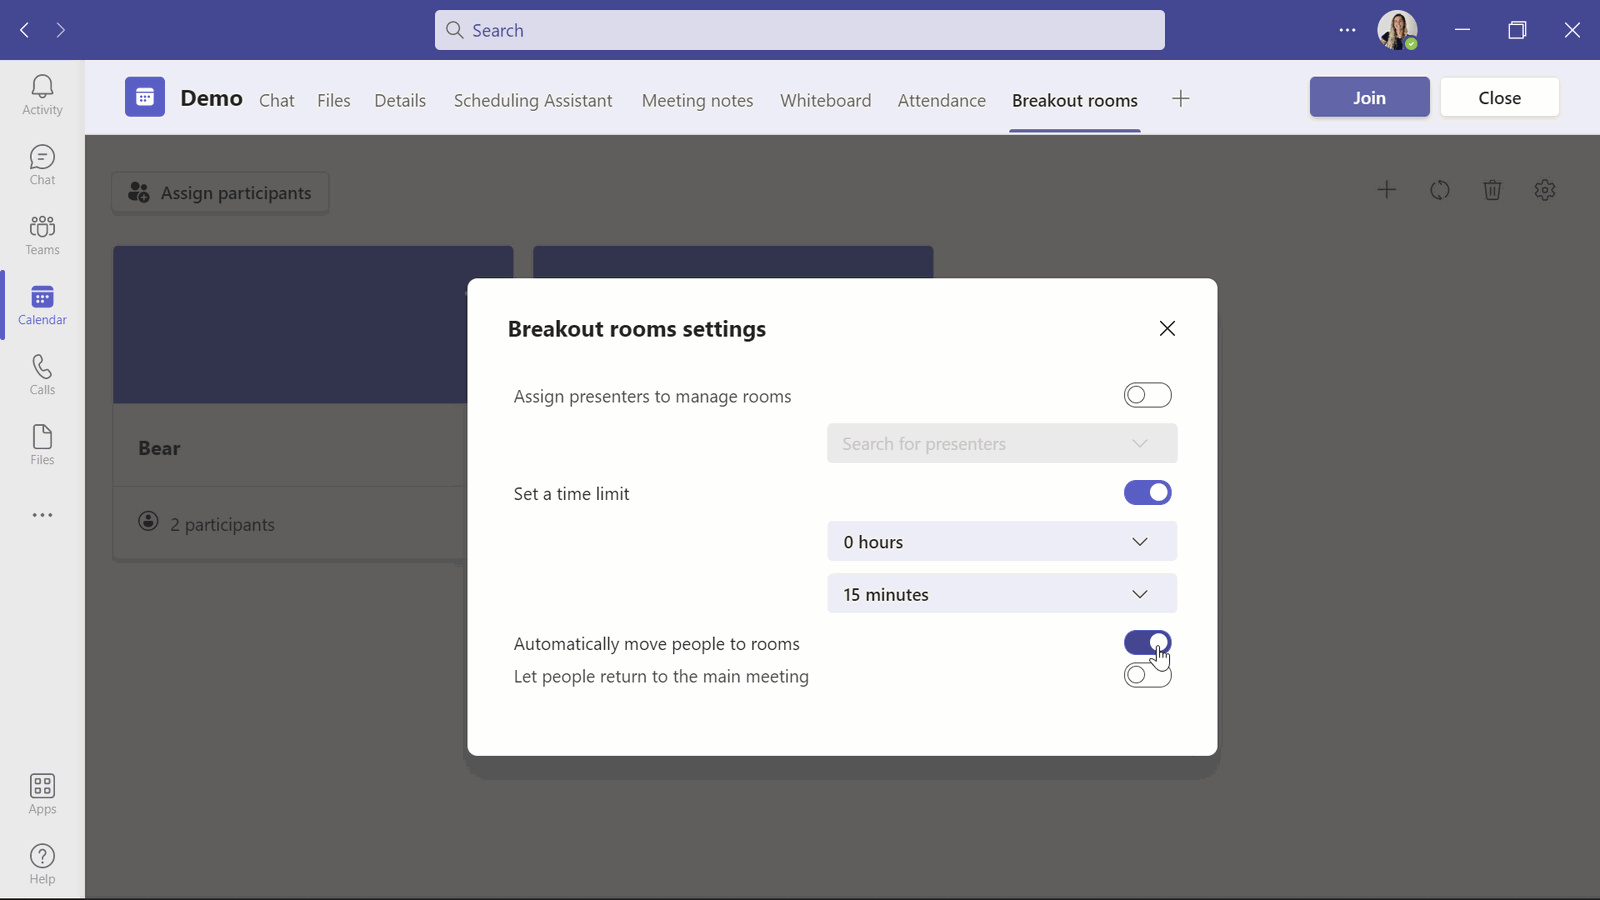
Lastly, in the Breakout Rooms Settings, found by clicking the gear icon next to the trash icon, you can choose to automatically move your students into the breakout rooms. This means, when you open the rooms, your students will be put into those rooms right away, instead of them having to go there on their own.
Also in those settings, you can choose if you want students to be able to come back to the main meeting. This means you can allow participants to come back to the main meeting when their breakout session is done. Or you can leave this off, and call students back when you are ready, this way they do not leave their session early.
Now that all your settings are complete, we can open up these Breakout Rooms and let our students get chatting!
Start Using the Breakout Rooms
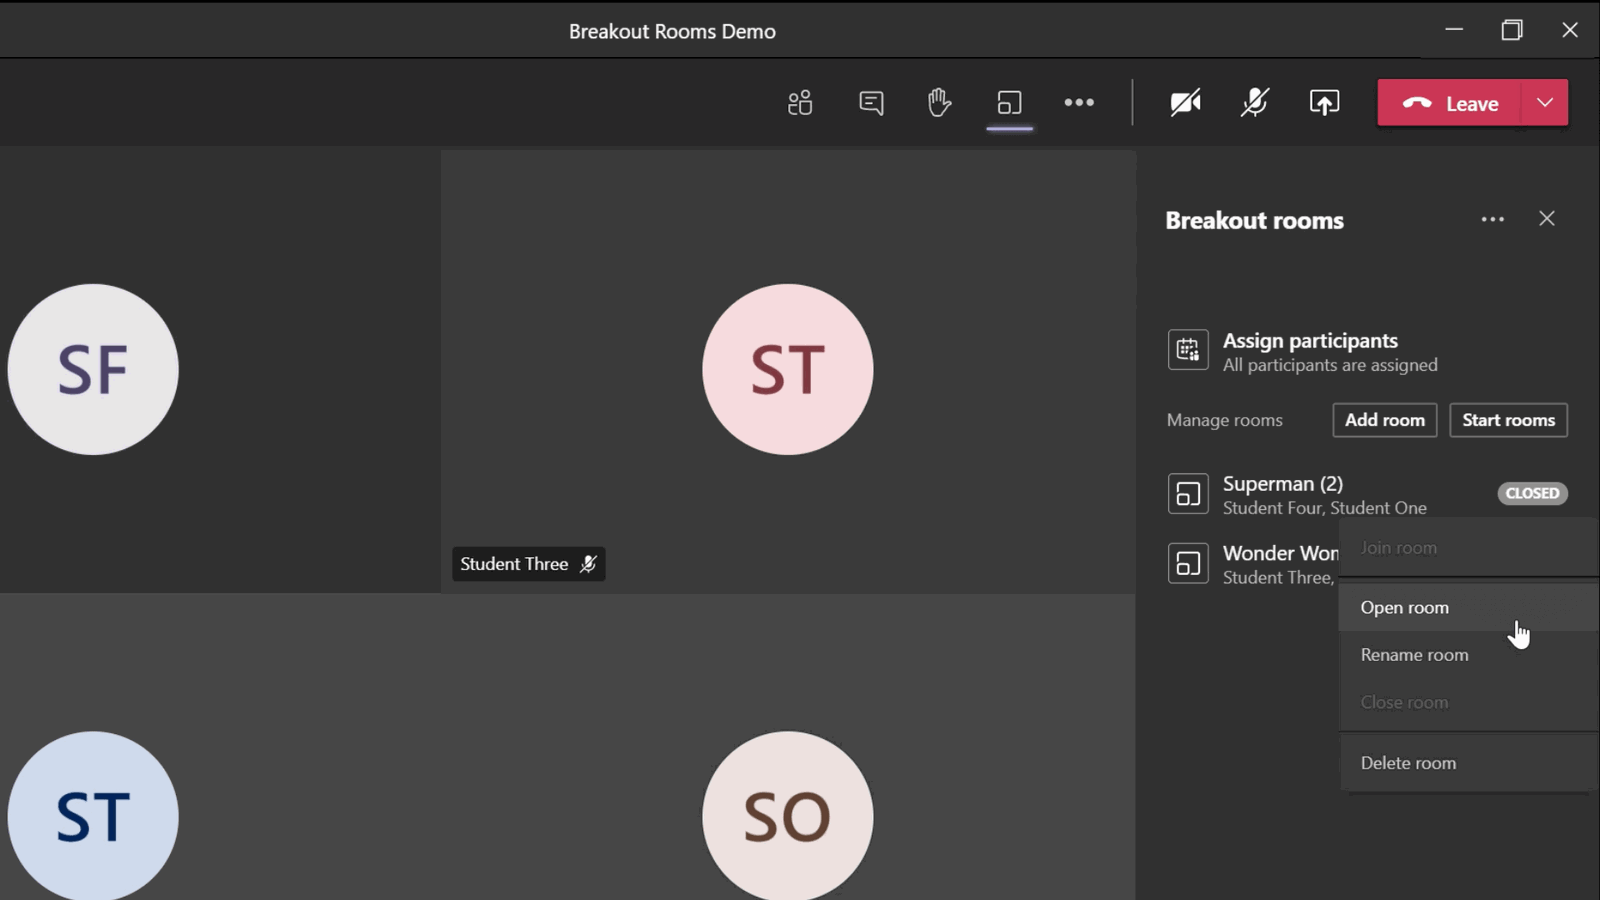
To start using the Breakout Rooms in Microsoft Teams, you can open each room one at a time by going into that room’s settings, or open them all at once. Once the meetings are open, you will be alone in the main meeting because all of your students have been placed into their breakout rooms.
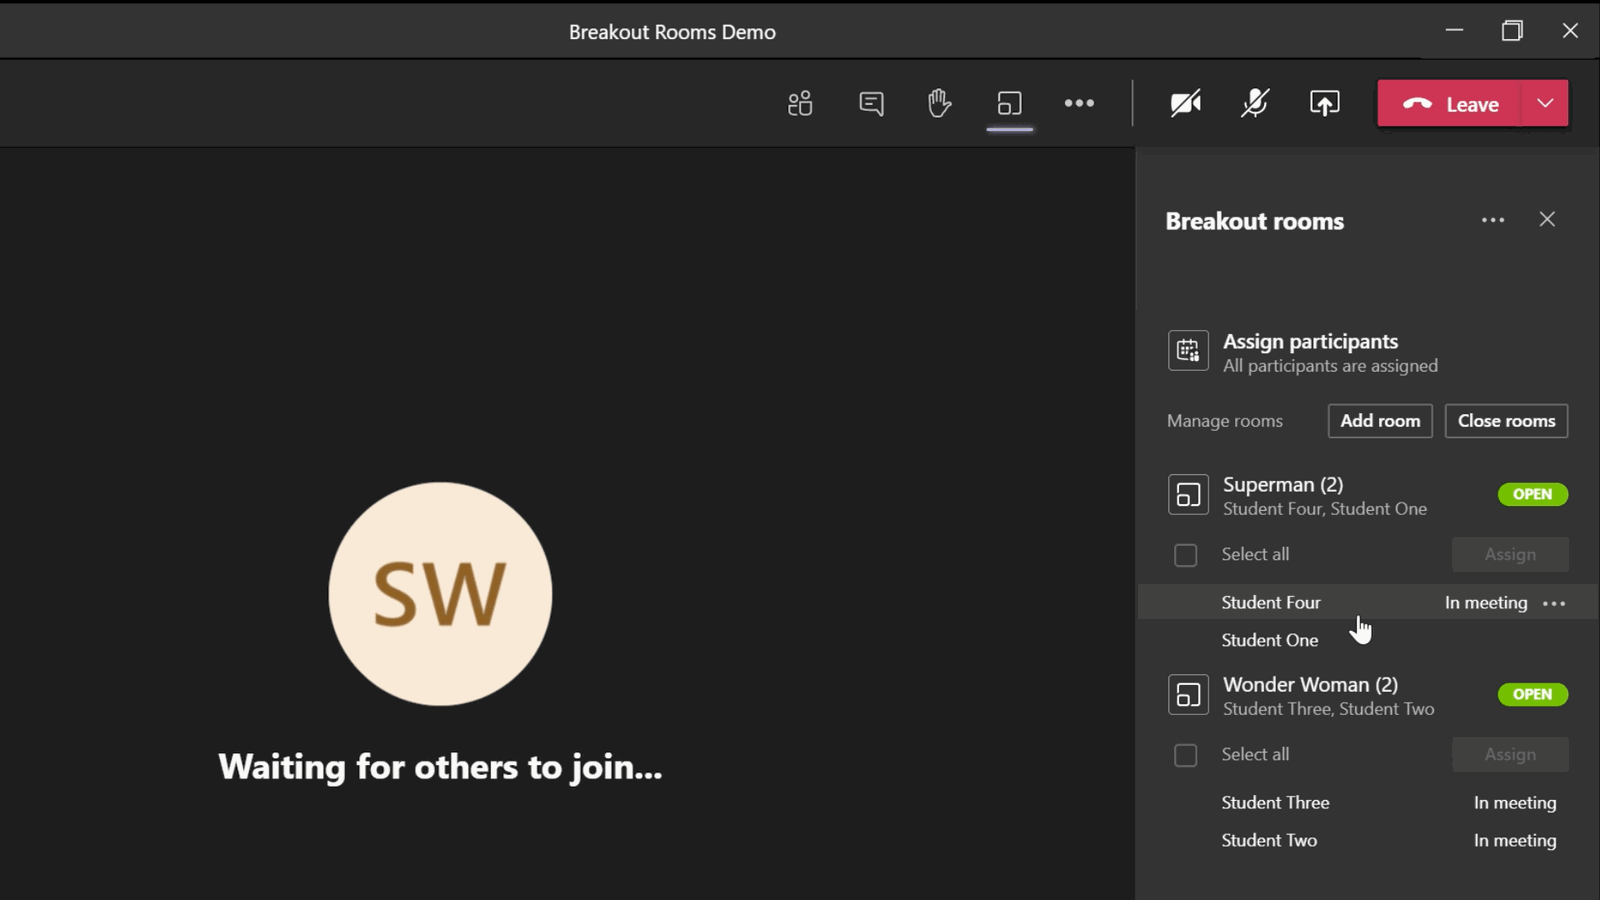
If there are students that joined the class late, their names will appear in the drop-down to Assign Students. Then, you can assign them a room from here. At any time, you can move your students to a different Breakout Room if you made a mistake with the three dots at the end of their name too.
You can make sure each student is in the meeting by dropping down the menu for each room. There, it shows if a student is in the meeting or has not made it there.
As a teacher, you can jump between each of your breakout rooms. When you enter a breakout room, you can see that it has all the same features as any other Teams meeting. Students can chat, present, and share files. You can change the Meeting Options in the breakout rooms to switch students from presenters to attendees. The Meeting Options are found in the Extra Features menu.
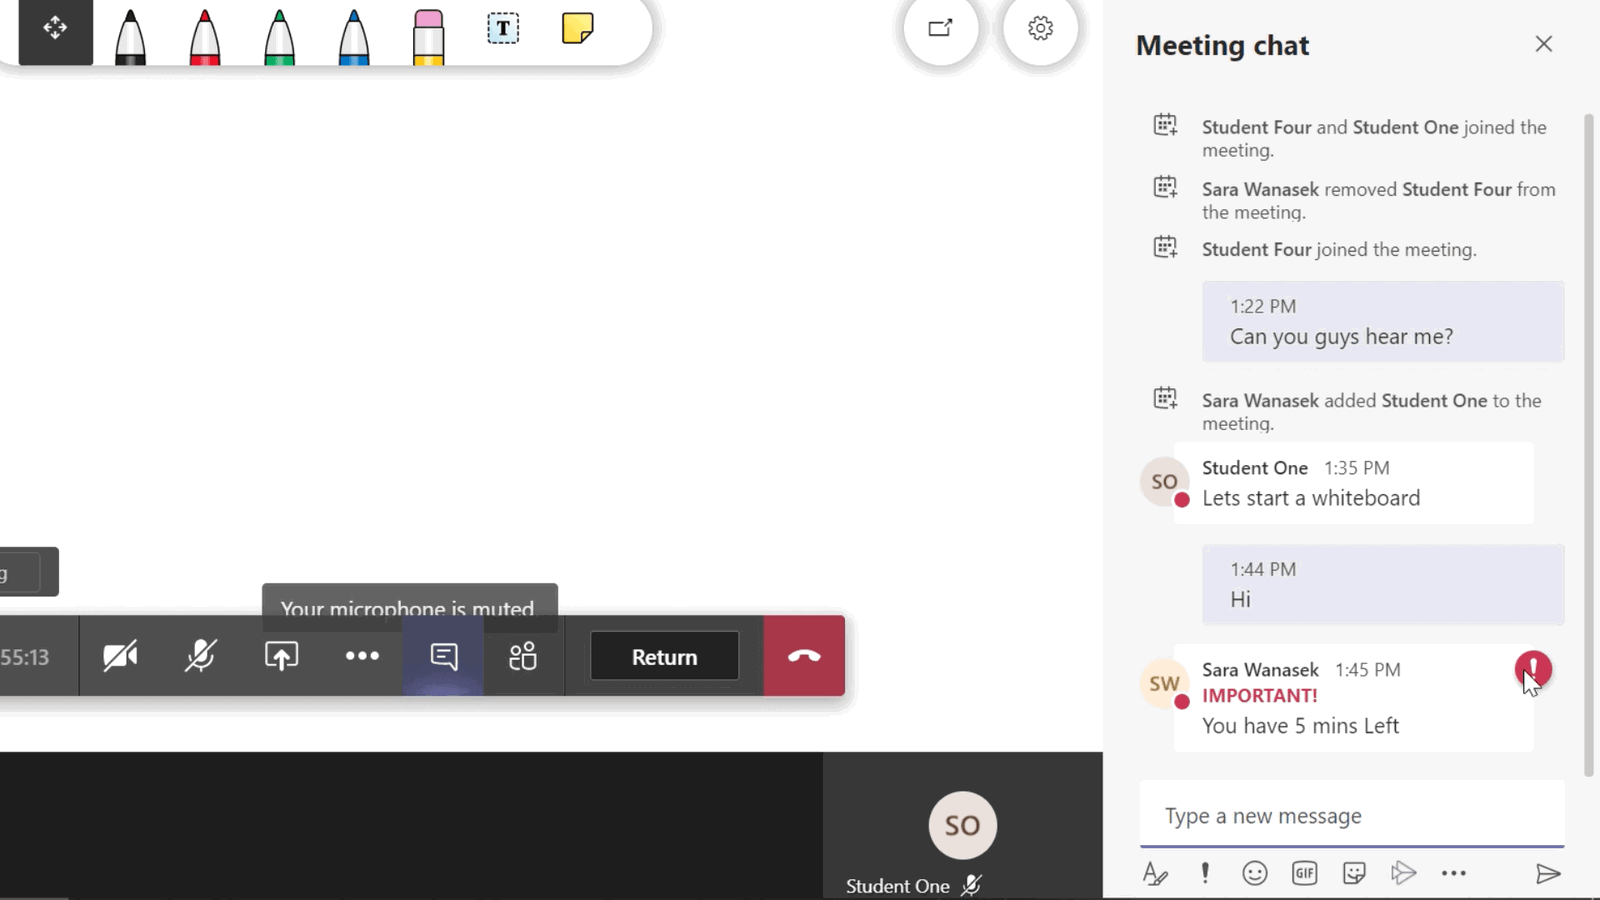
Back in the main meeting, you can make an announcement to each of the groups. In the Breakout Rooms drop-down menu, select the Make an Announcement feature. Type out your announcement and click Send. Then, every student will get a notification in their chat that you have sent a message. Announcements are marked with a red exclamation mark and highlighted as important.
Close the Breakout Rooms
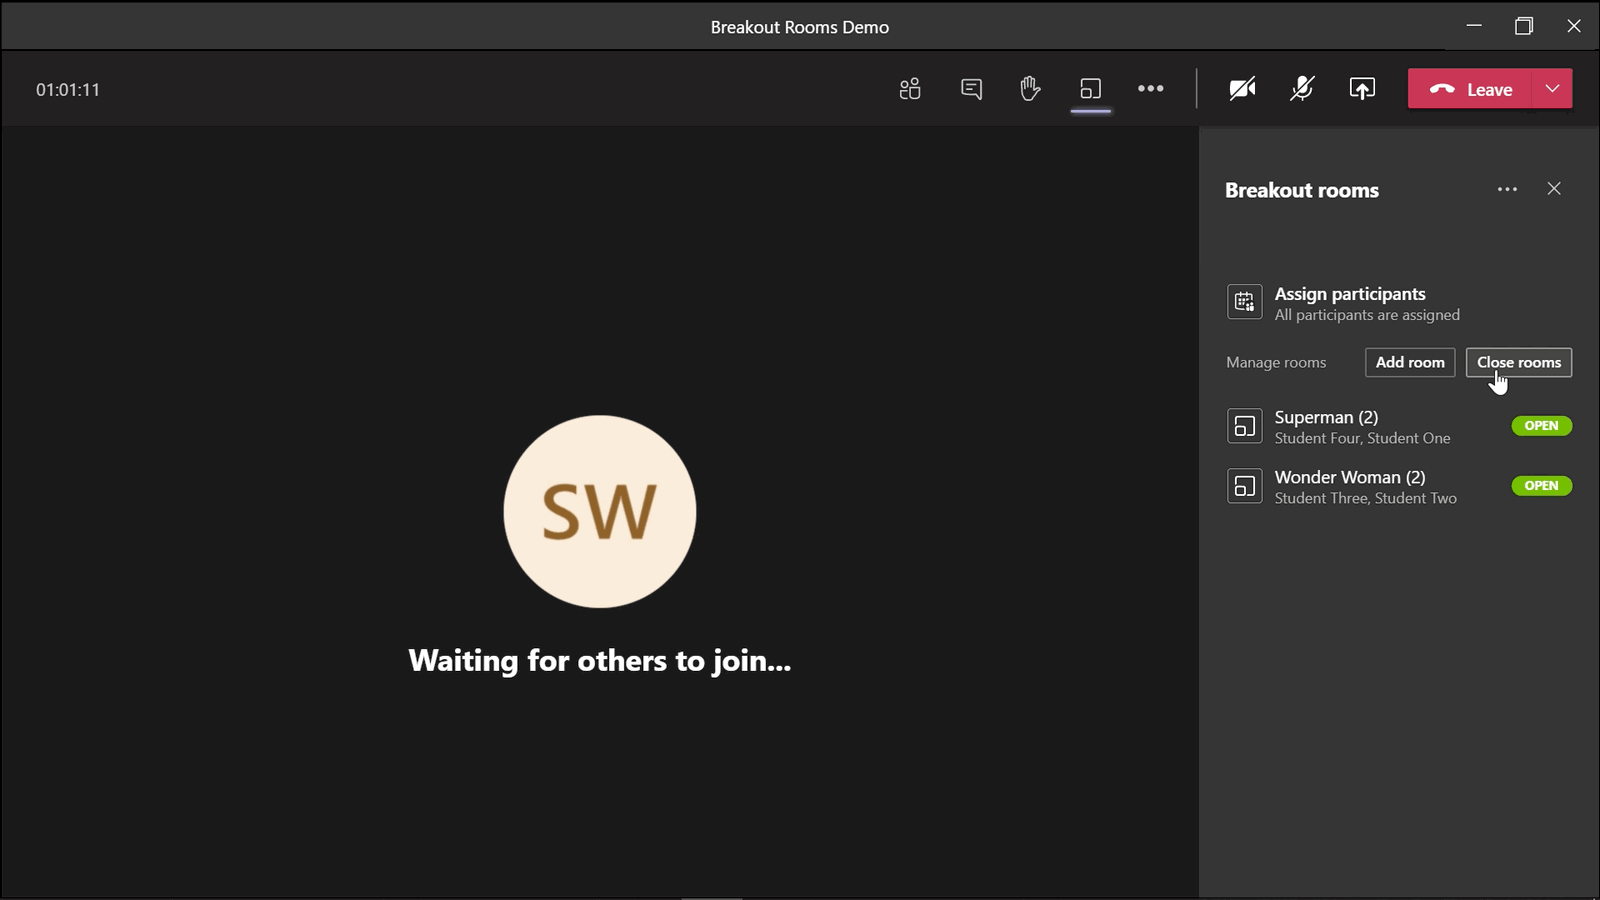
When it is time to finish up with the Breakout Rooms in Microsoft Teams, you can Close the Rooms. If there are students that have not joined back into the main meeting, this will force them to rejoin. Then, you can continue with the rest of your class.
When it is time to end the call, you can End the Meeting for everyone so that students cannot stay on the call longer than you.
To view the chat, and all the files, meeting notes, and whiteboard your students created in their Breakout Rooms, you can go to the Chat tab from the Teams side toolbar. Here, you can view all the information for every Breakout Room. Students are only able to see their own Breakout Room, but as a teacher, you have access to every room.
Breakout Rooms in Microsoft Teams FAQs
Now you are a Breakout Rooms in Microsoft Teams expert! But just in case you have more questions, we’ve made a short FAQ list of the most common questions about Breakout Rooms. If you have any more questions, please feel free to leave us a note in the comments below!
How do I enable the Breakout Rooms feature in Teams?
To use Breakout Rooms, make sure you have the latest version of Teams downloaded and are using the desktop application. Check which version you are using from the User Profile. If it is not up to date, fully close Teams for 2 minutes, then reopen and check again.
Can I save my Breakout Rooms to use in my next class?
Not yet. Hopefully, this is a coming update. For now, you will have to recreate them every time.
Can my students share their screens in the Breakout Rooms?
Yes, students are able to share their screens. In the Breakout Rooms, go into the Meeting Options, and make sure everyone can present.
Continue Reading:
- Microsoft Teams For Online Teaching – A Guide For Teachers
- How to Poll in Microsoft Teams: 2 Ways for Teachers
- 3 Microsoft Teams Assignment Updates for a Better Back to School Experience
- Best Ways To Use The Collaboration Space in Class Notebook
- Quickly Schedule a Post in Microsoft Teams – A Guide for Teachers
- 15 Microsoft Teams Tips and Tricks for Teachers
