Looking to make your PowerPoint presentations more visually engaging? Adding quick animations can quickly elevate your presentation and capture the attention of your audience. PowerPoint animations can also reinforce your main points and help students visualize different parts of your lesson if used correctly and creatively.
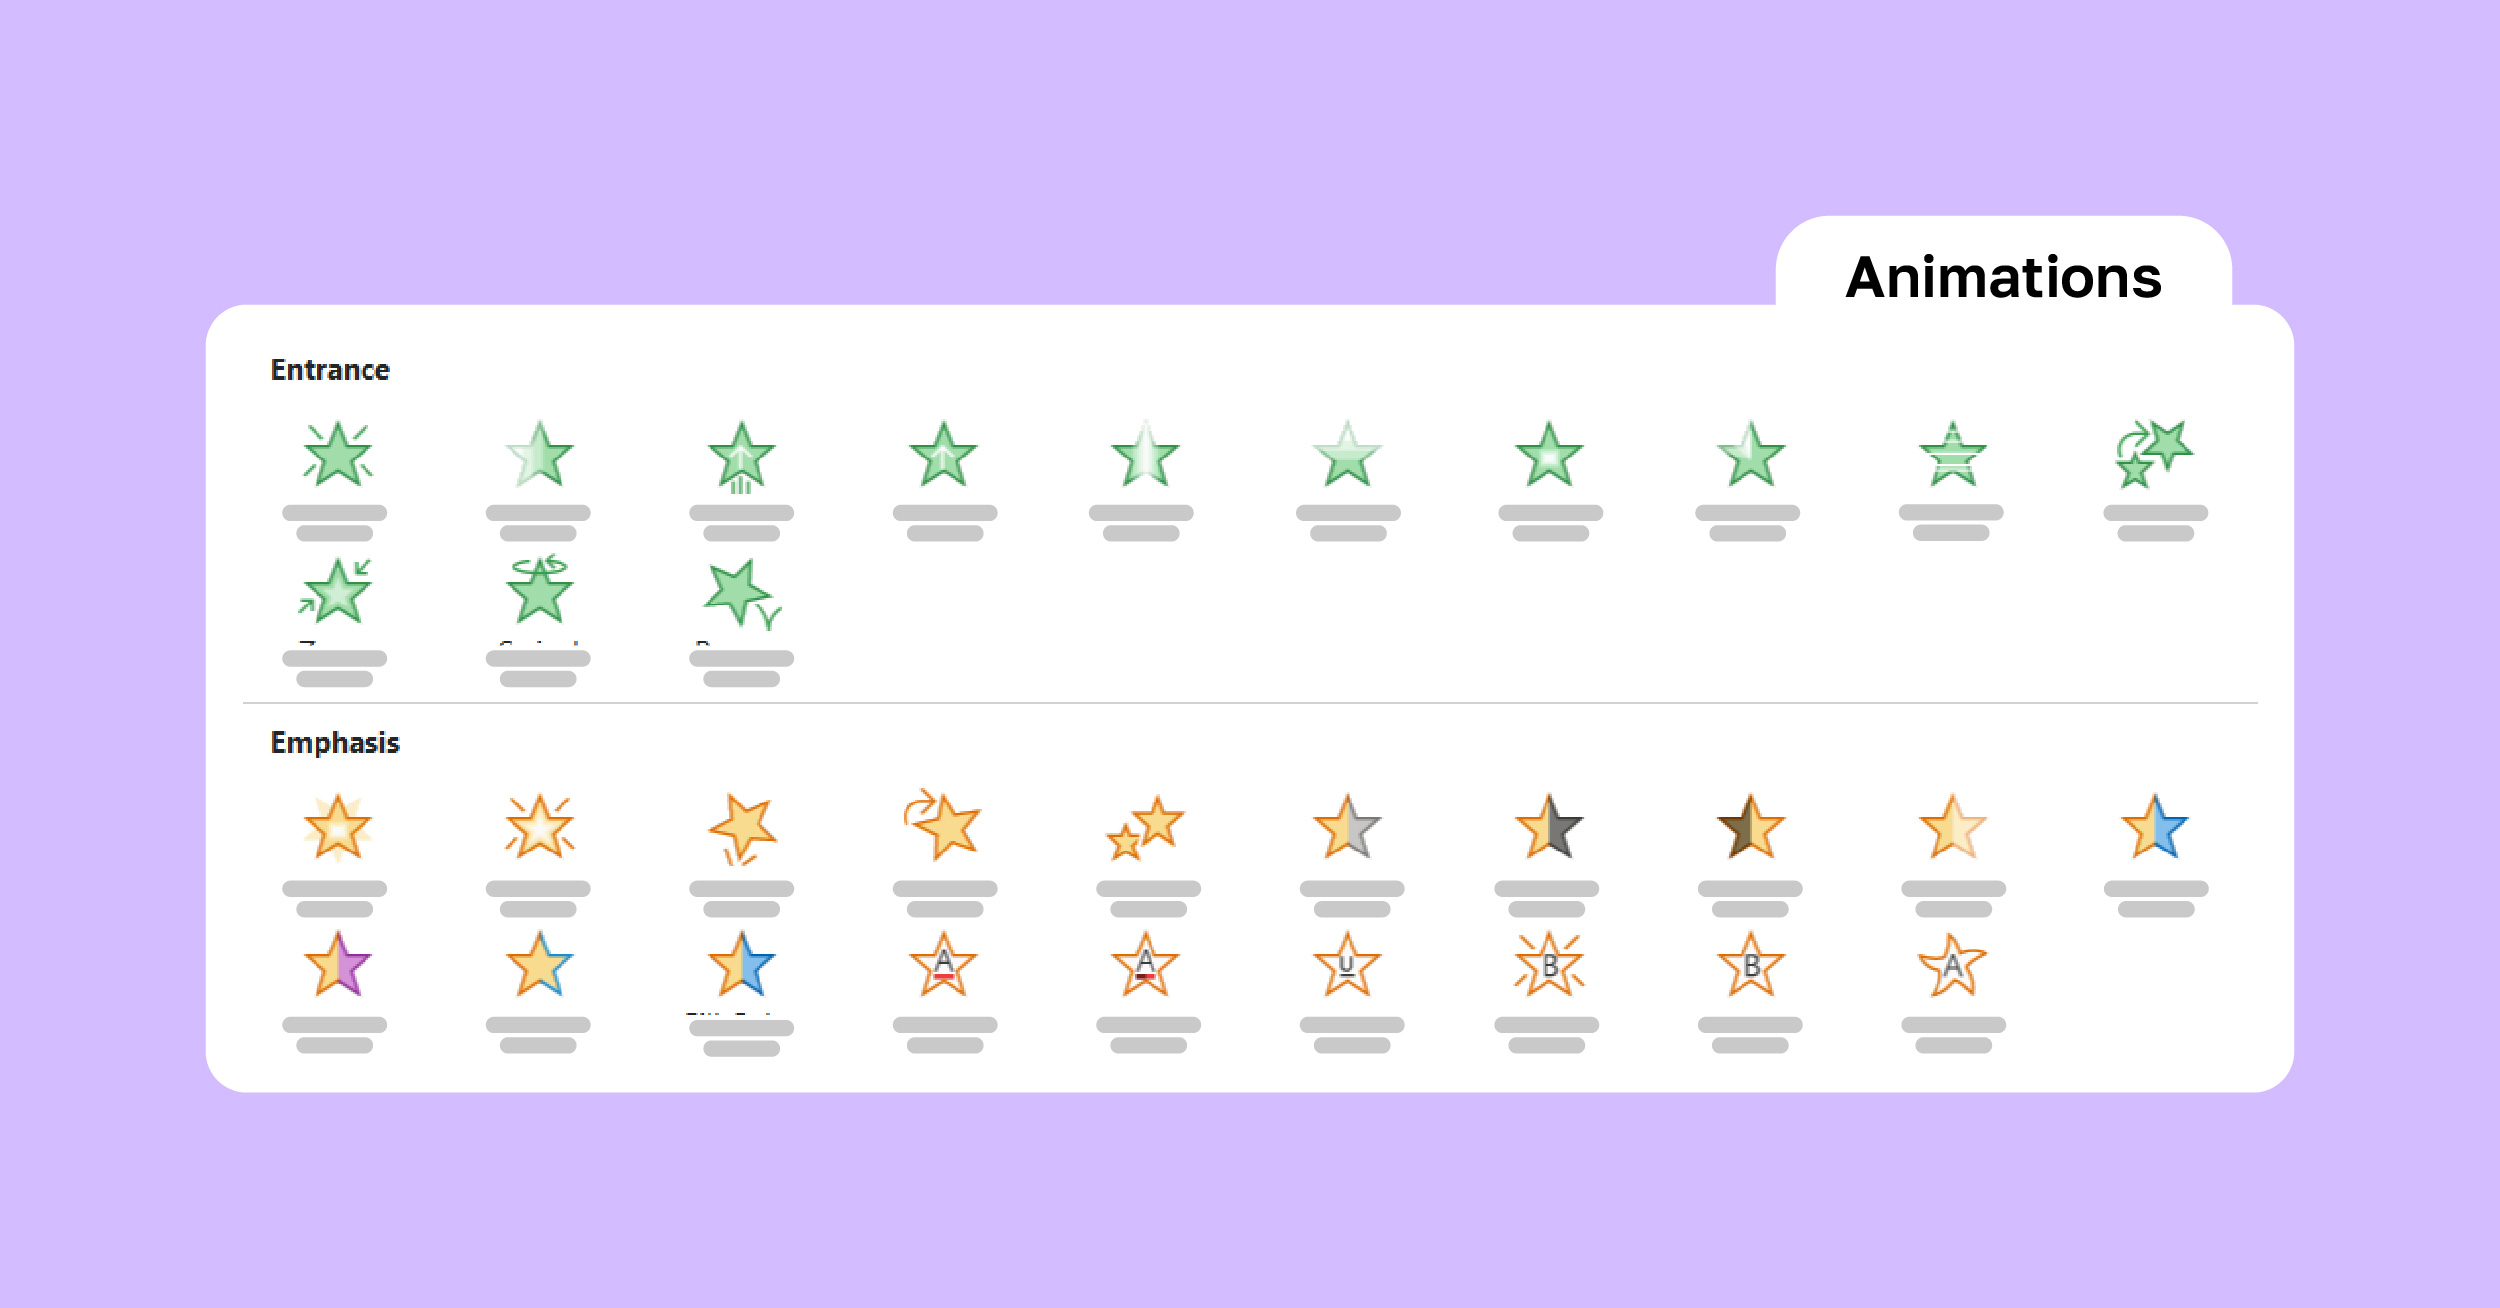
There are many types of PowerPoint animations to use, and you can animate text, shapes, images, or even tables! But some are more beneficial than others, and it’s important to not go too crazy with animations and to choose the best ones that work for the context of your material. These animations are meant to enhance your presentation – not add distractions.
If you are interested in enhancing your PowerPoint, here are eight animations in different contexts that are simple, yet attention-grabbing, that can make your material more memorable. Watch the video for further information on each of these animations and their creation process, or read along. Let’s go!
Animation 1: Appear
Let’s start with a basic entrance animation. This is an animation for text, images, or shapes to enter onto your slide. The simplest entrance animation is the “Appear” effect. This will just delay the time your chosen piece appears on the slide.
This simple transition works great when you have a lot of information on your slide. You can break up your information into bite-sized pieces for students so that they are focusing on one piece at a time, before moving ahead.
How to Add the Appear Animation
Step 1: Group Objects that you want to appear together.
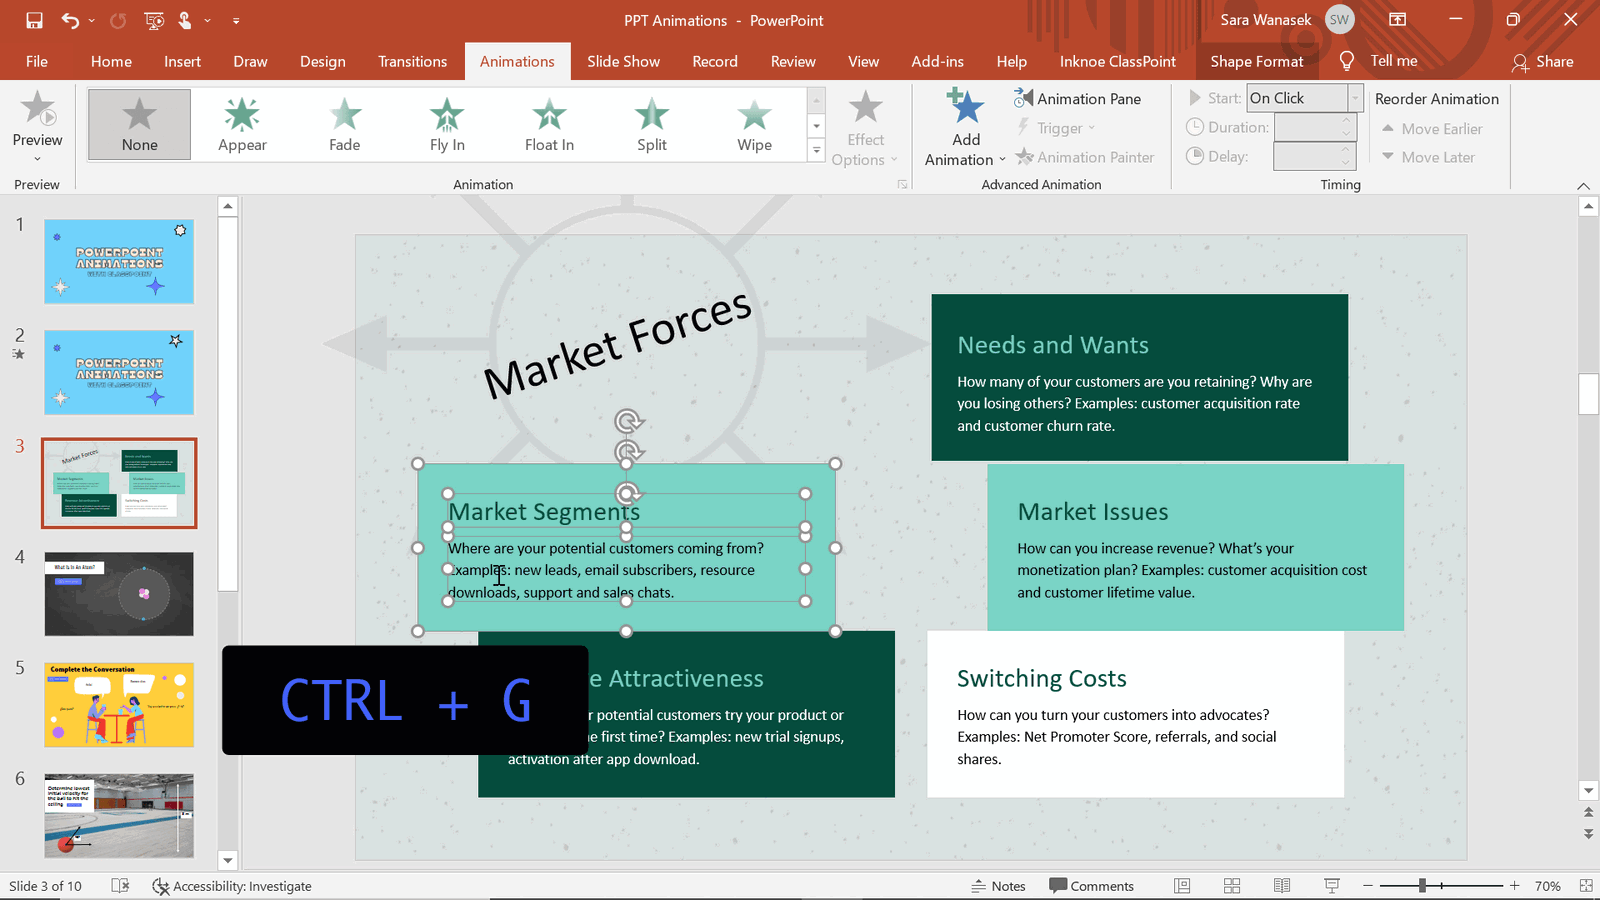
In my example above, I wanted the text inside the corresponding shape to appear together on the screen. To make this happen, they need to be ‘grouped’. To group your objects, hold down the Shift key while clicking all the objects you want to group together. After they are all selected, click the Control + G keys to automatically group them.
Step 2: Add Animation
Click on the object you want to add the animation to. Then, click the Animations tab in the PowerPoint ribbon. We are using the first Entrance animation, Appear, that you can see in the box.
To explore other Entrance Animations, click the drop-down arrow in the right corner of the Animations box.
Step 3: Preview Animation
When you select an animation, you will see a short preview of it. With the Appear animation, it is hard to see the preview, so I suggest going into presentation mode to check it out!
Step 4: Repeat!
Repeat this process for each object you want to animate. It is helpful to set up the animations in the order you want them to appear, but if you made a mistake or something needs to be changed, open the Animations Pane. Click and drag to reorder the animations.
Step 5: Edit Animations
The speed and duration of the animations can be changed if the automatic settings do not fit well. Right-click on the animation in the Animations Pane and click Timing. Here, you can change the length of the animation and add any repeats if necessary.
Pro Tip: The duration of your animation has a huge impact on the experience of your animation! Generally, animations should be fast; I recommend 0.5 sec unless there is a reason to slow down your animation -such as my next example!
Animation 2: Spin
Next, you can add an Emphasis animation to items on your slide. This type of animation adds a little oompf to objects on your slide, and depending on your context, can help deliver and explain your material. The example we have above is using the Spin animation to show how an atom is not a stationary object.
How to Add the Spin Animation to an Atom
Step 1: Group objects that you want to appear together.
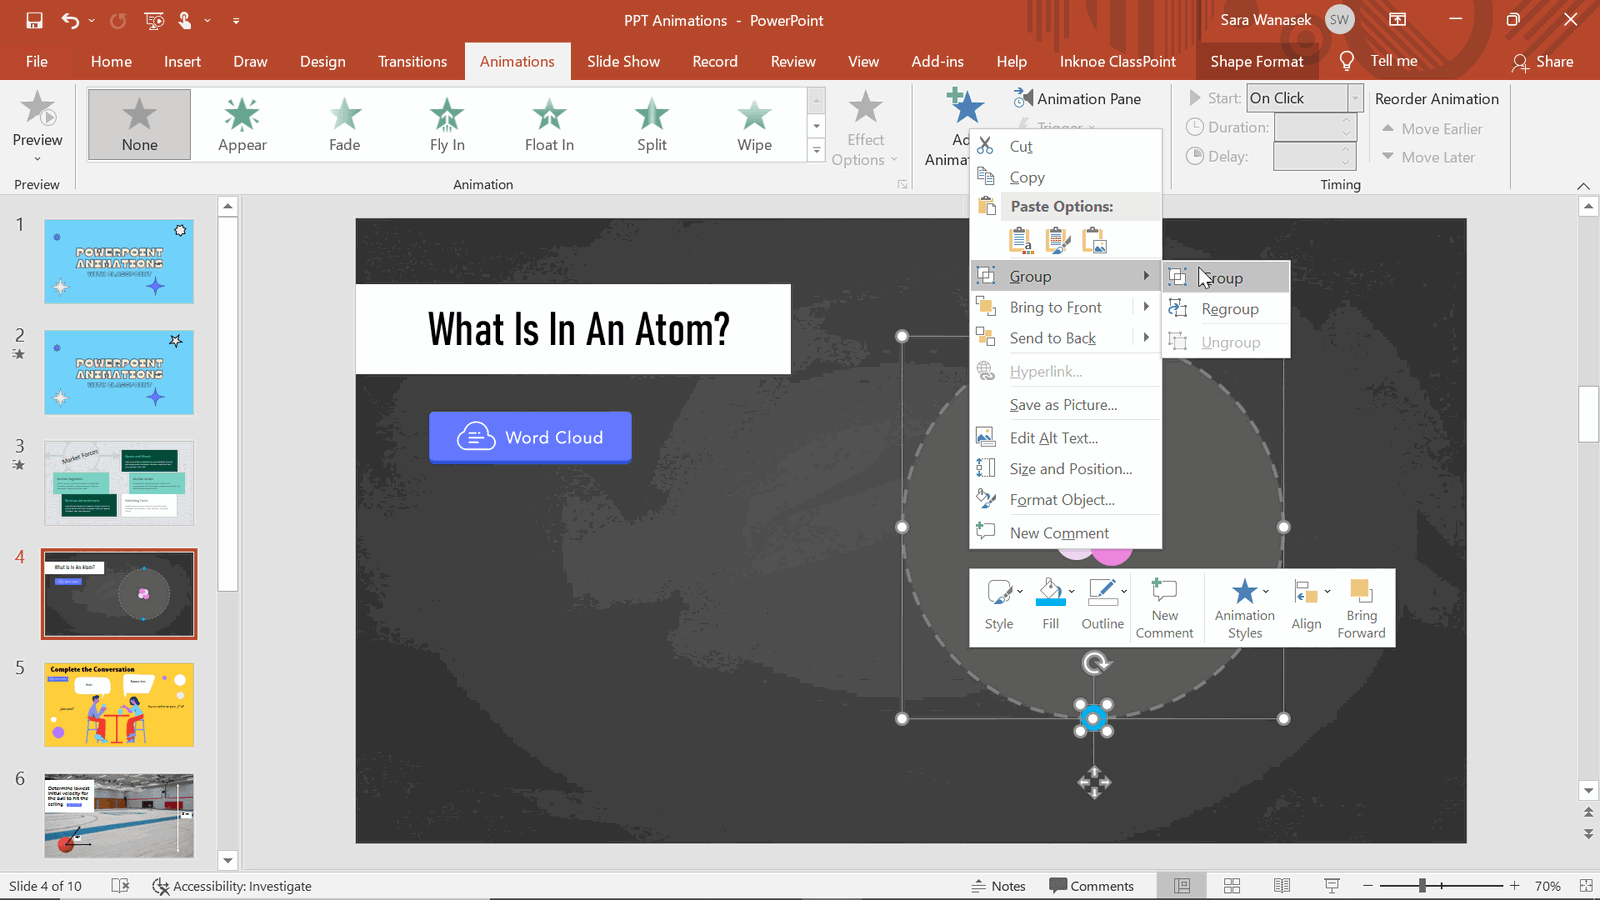
Once you have created the images or shapes you want to spin, you first have to group them together. Use the CTRL + G shortcut or right-click and select “Group”.
Above, I’ve created an Atom diagram using PowerPoint’s shapes. I am getting a little fancy here and actually want to add two spin animations to demonstrate the outside electrons moving in one direction, and the middle electrons in another, so I’ve grouped them separately.
Step 2: Add Animation
The next step is adding the Spin Animation to the two object groups. First, click on the outer electrons, then in the Animations tab, select the down arrow in the Animation box to reveal more Animations. In the Emphasis section, choose Spin.
Step 3: Edit Start Time of Animation
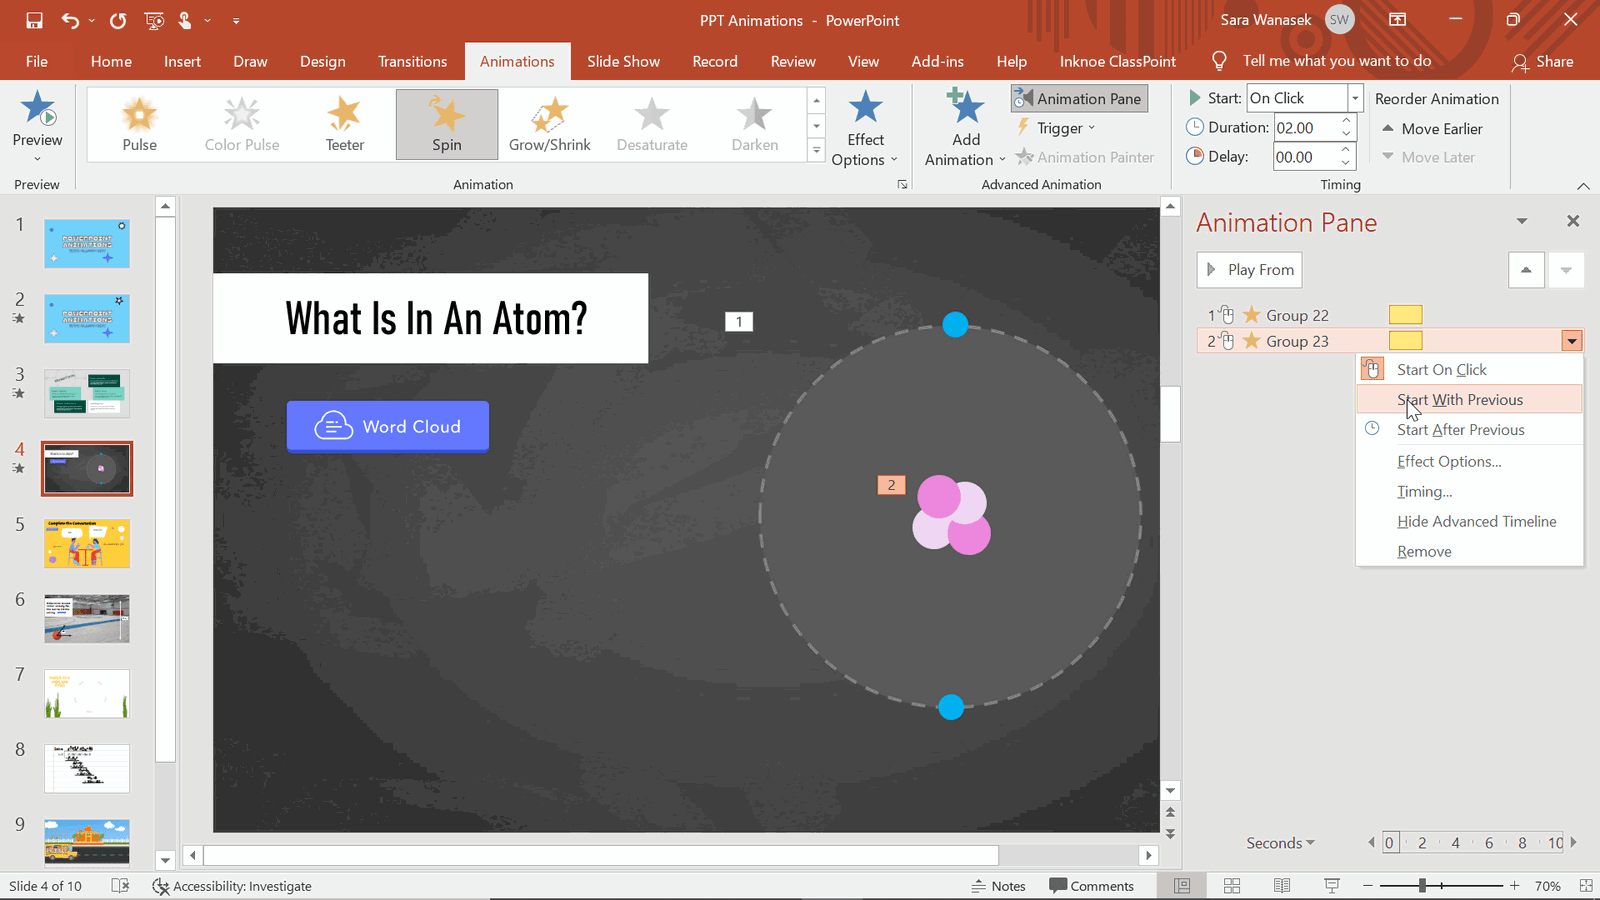
After adding an animation, you can run it and make any edits you would like. Here, the animations automatically were set to appear one after the other, which is something I wanted to change.
You can change the atom animation start time in the Animations Pane on the right by right-clicking on the animation ‘Group’. To make both animations appear at the same time, click on the second animation, the inner electrons, and choose “Start With Previous.” Here you can also change the animation to start “On Click” if you want to wait to spin your object.
Step 4: Edit Timing and Duration
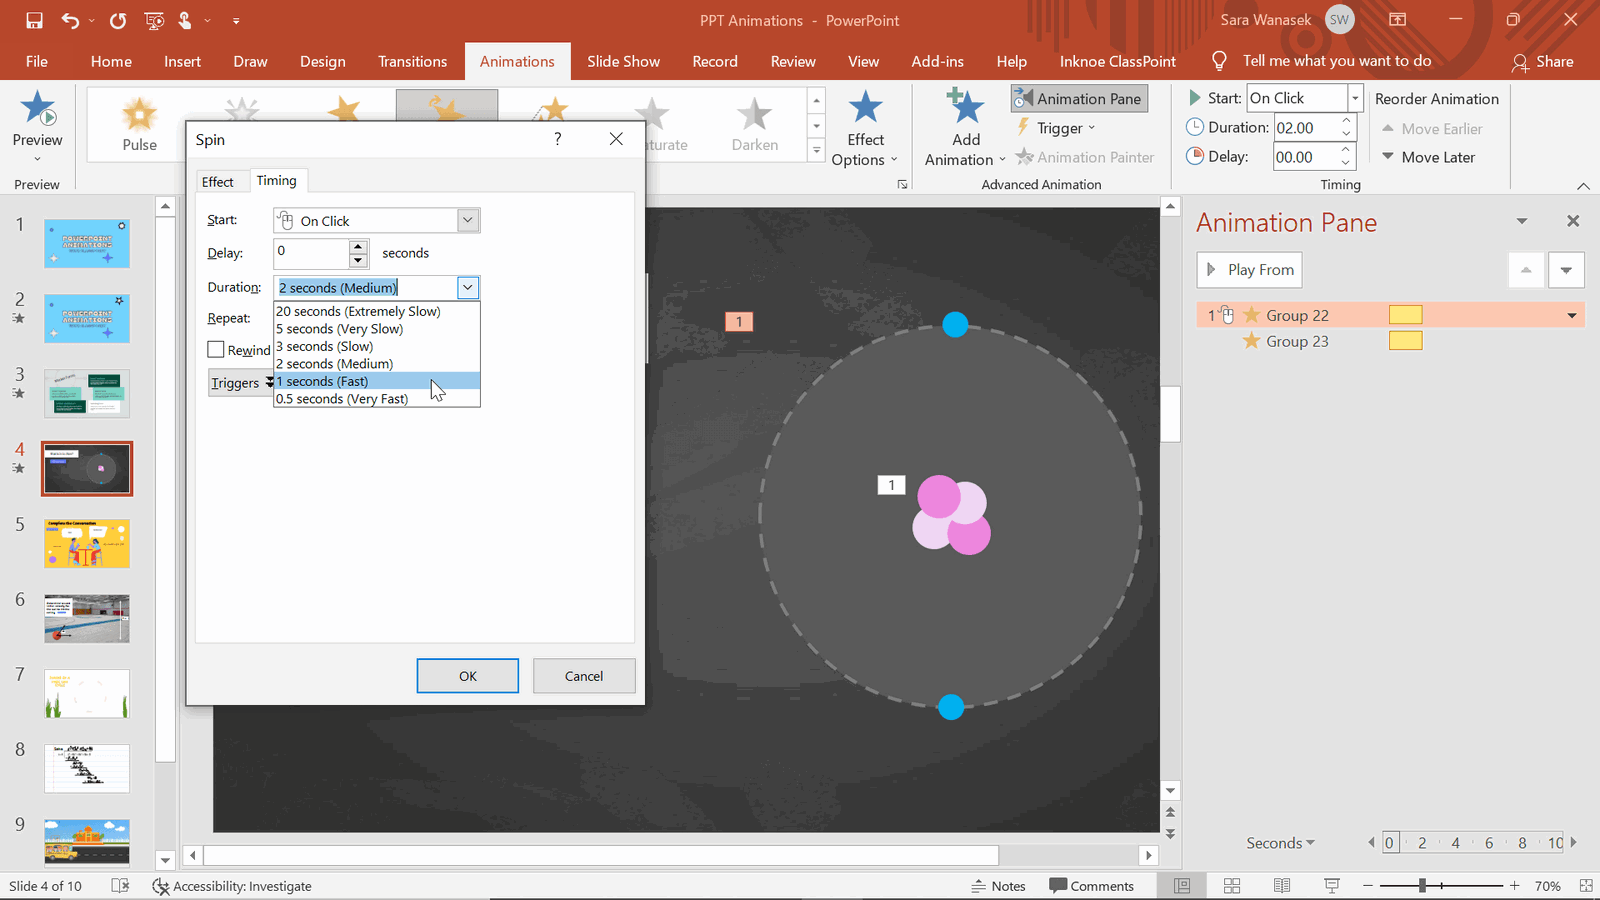
To make my diagram further represent the material, I also wanted to change the timing. Since these protons, neutrons, and electrons do not spin at the same rate, I can change the Spin Duration to show students!
To do this, right-click on the grouped object, then choose Timing. To increase the spin speed, change the Duration to 1 second (fast!).
Then to change the whole effect duration, you can edit the Repeat! I selected Repeat 3 times making the whole effect last 3 seconds.
For the inner circle, I wanted to slow the speed but still match the whole animation duration. To do this, click on the inner circle animation, and in the Timing section, change the Duration to 3 seconds (slow) and do not repeat it.
Step 5: Edit Effect Options
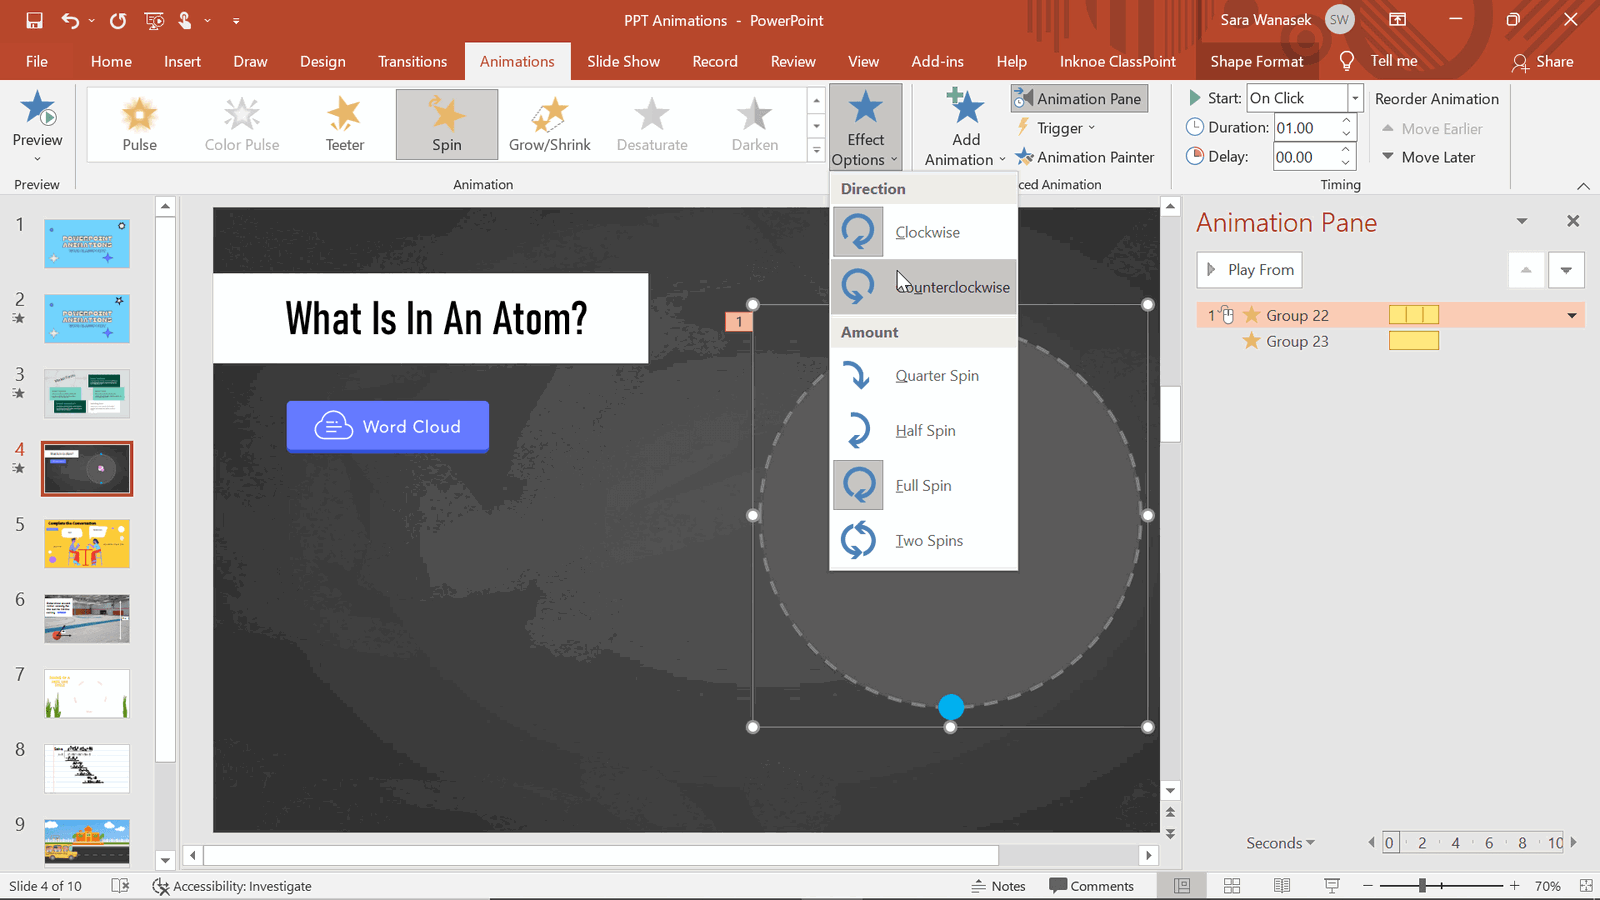
Lastly, you can change the animation effect, which for the Spin animation means the spin direction and amount. In the Animations tab, click on the Effect Options button.
Go back up to the preview, and check out how this PPT animation provided me with the tool to demonstrate the movement of an atom!
Animation 3 & 4: Disappear & Fade
Exit Animations are a great way to include more information on your slide, without crowding the space. For example, in the slide above, I demonstrated a conversation happening between friends – great for a foreign language class! Instead of creating a new slide for each text or making multiple speech bubbles, I used a mix of entrance and exit animations!
How to Use Entrance and Exit Animations Together to Show a Conversation
Step 1: Think Through Order of Animations & Add Them In
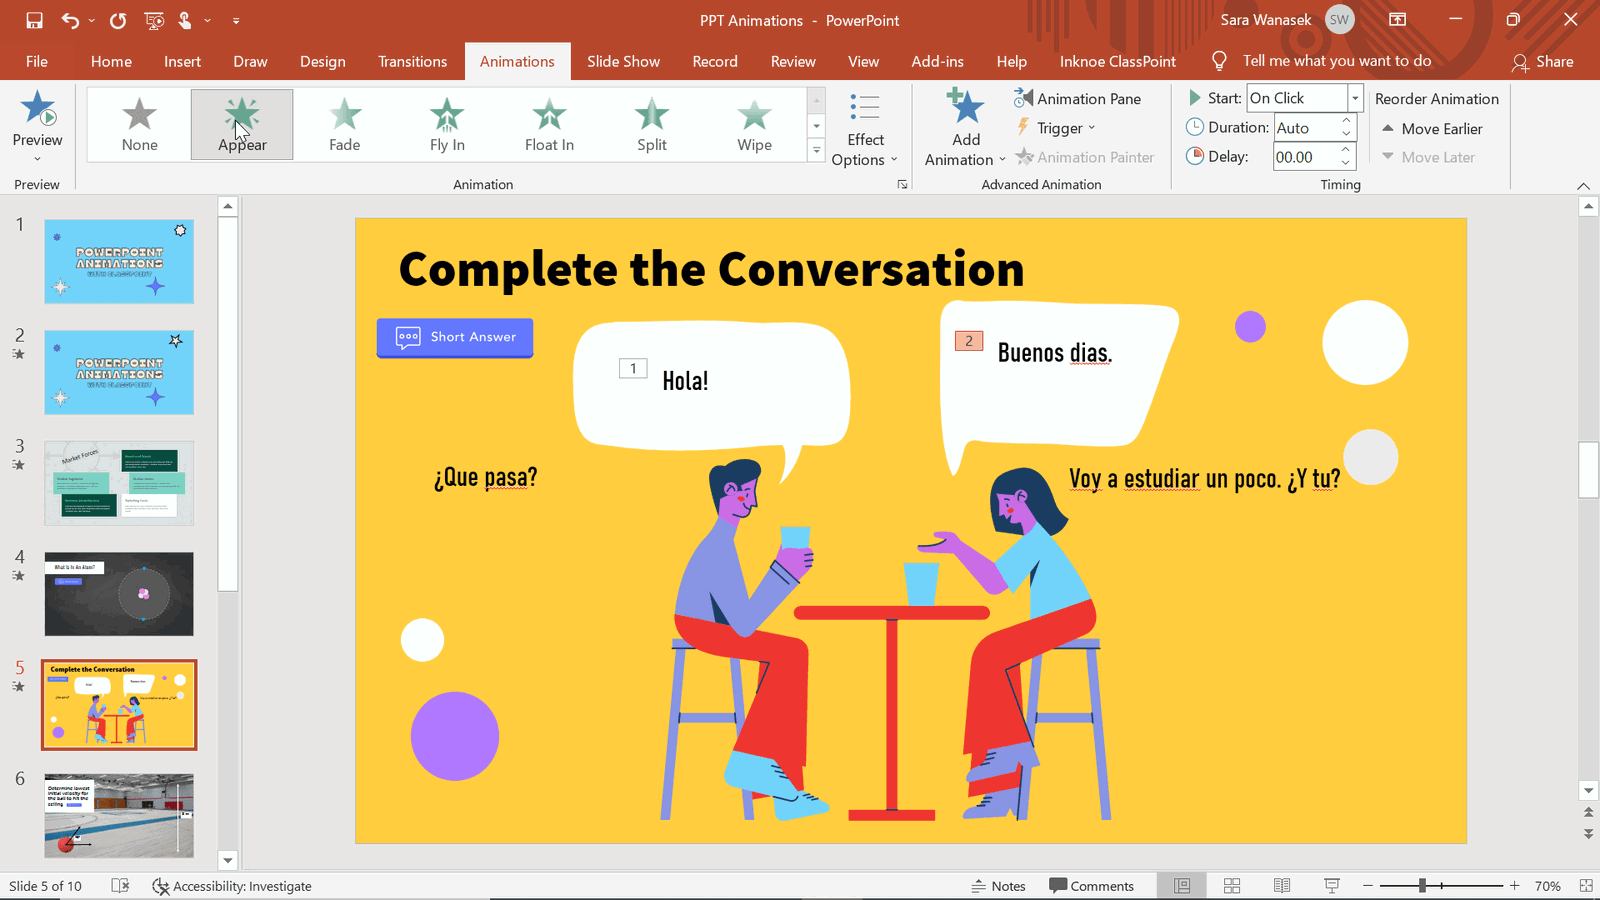
Which text will appear first? disappear first? In the example above, I have 4 textboxes that will go back and forth from their respective speech bubbles. (I find it easiest to add new dialogue text underneath the speech bubble, add the animations, and then place them layered in the correct spot!)
Once that is set, click on the first text box, then add your entrance effect. I suggest fade or appear as they are the least distracting.
Repeat for the second appearing text. Adding for the third text box is when it gets tricky.
Step 2: Add an Additional Animation to an Object
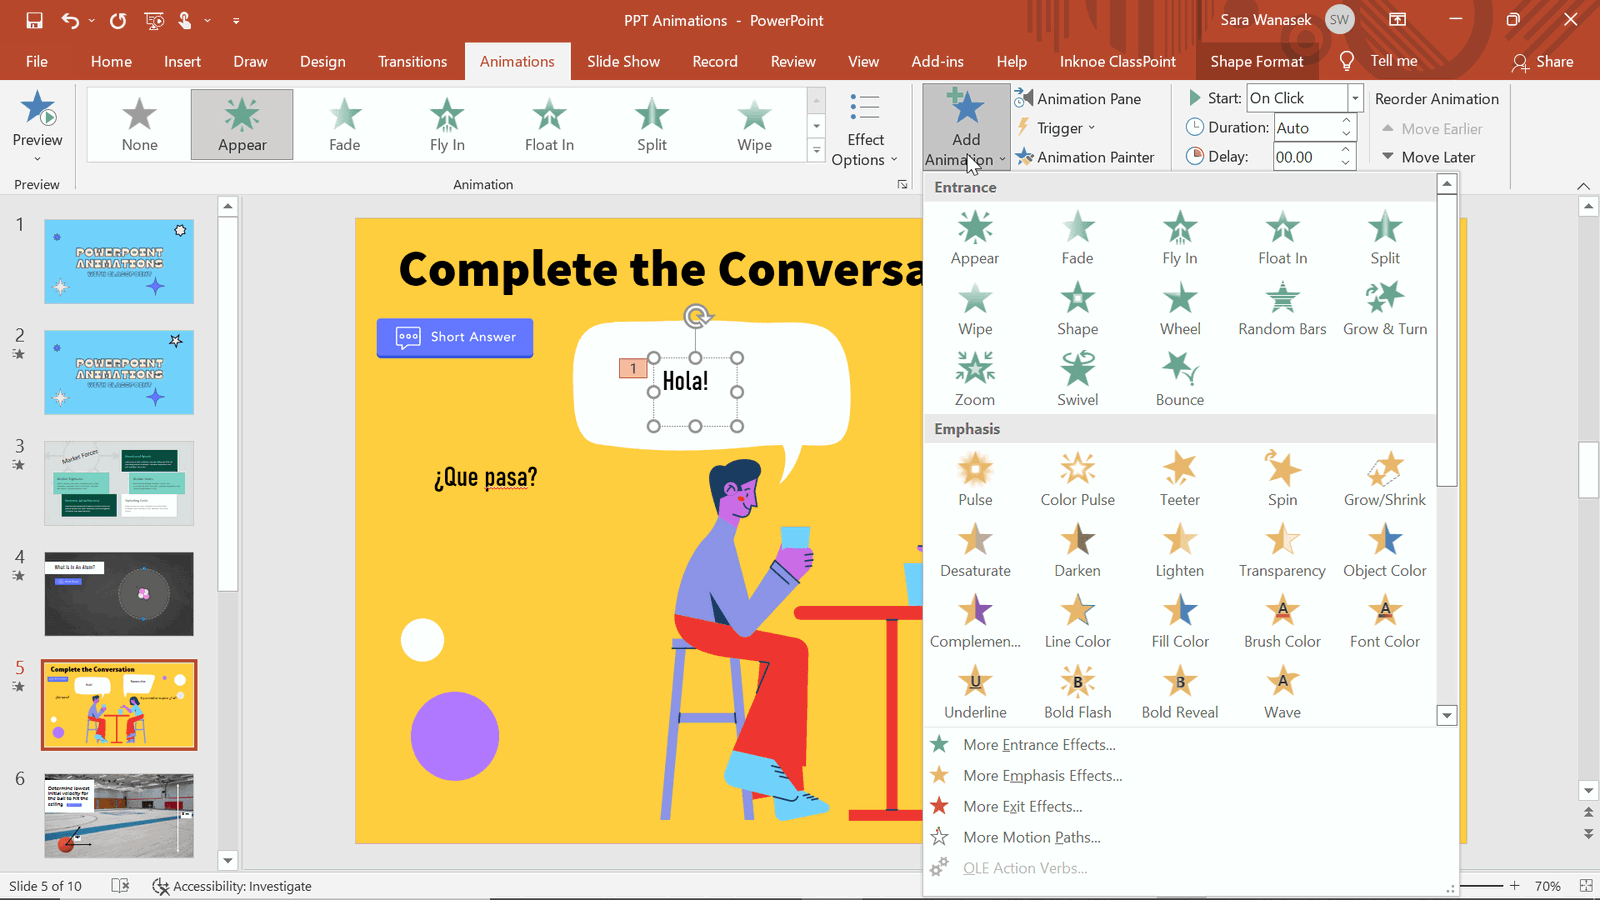
Before the third text can appear, the first one has to disappear. Click on the first text box that has an animation. Then, click the “Add Animation” button on the top ribbon. From there, add the disappear animation effect. Now, you will see a number 1 & 3 next to your text box indicating the places of these animations.
Repeat this for the next animations in your sequence.
Step 3: Change Start Time of Animations
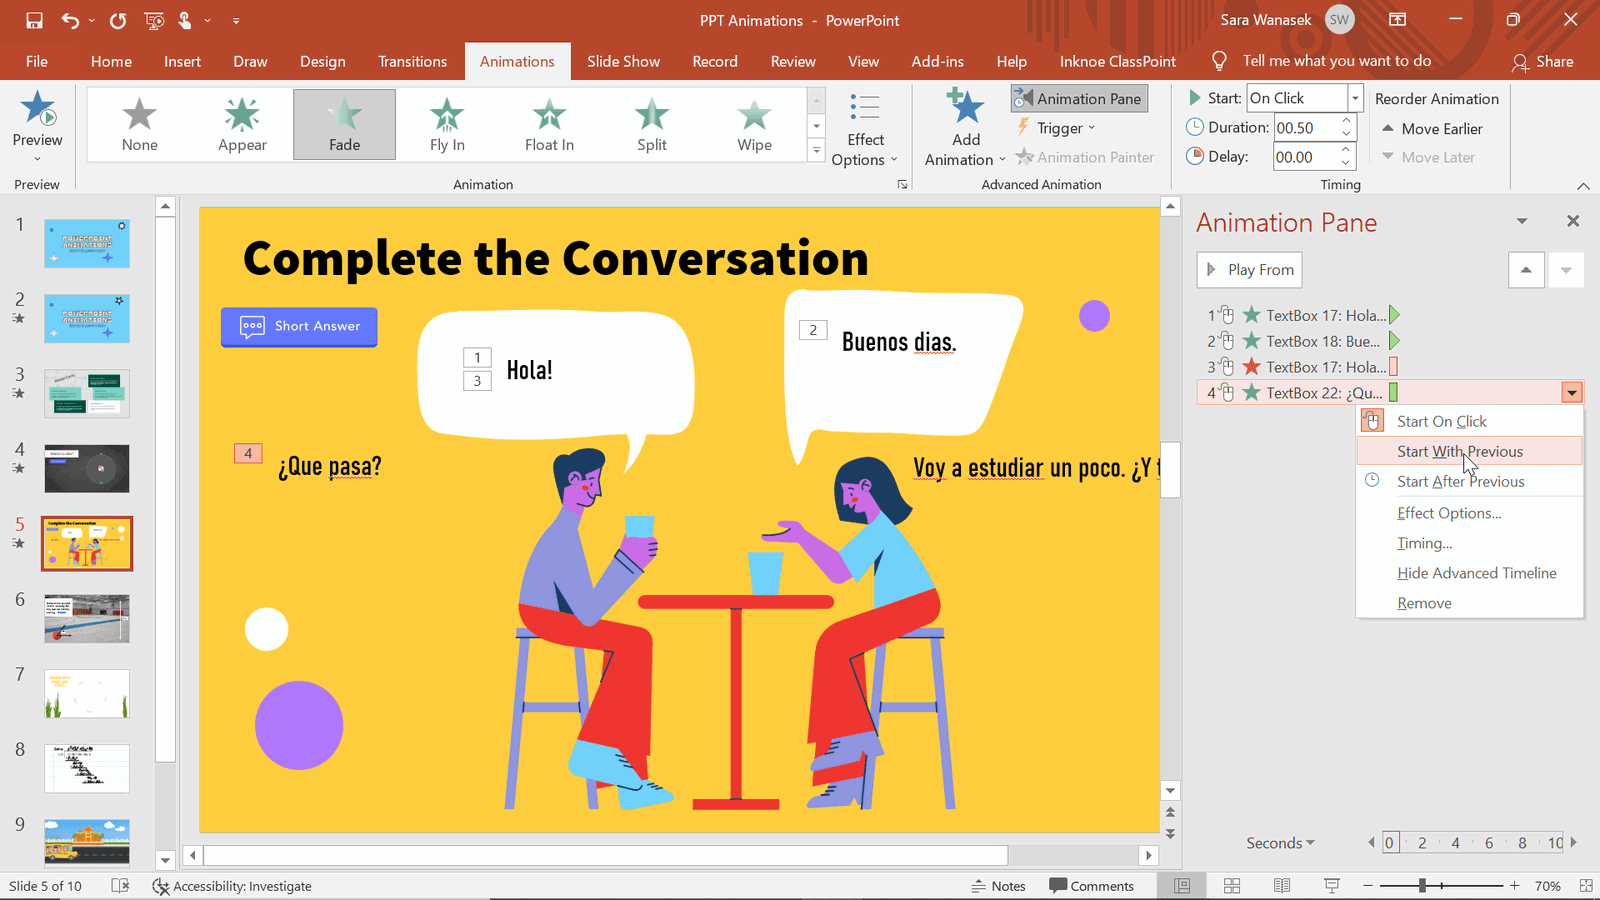
For the example of a conversation, I want the disappearing text and the entering replacement text to appear and disappear at the same time. For example, our 3rd and 4th animations above. Right-click on the 4th Animation in the Animation Pane and select “Start with Previous.” Now, “Hola” will disappear at the same time “Que Pasa?” is appearing.
Repeat this for any other animations in your sequence.
Step 4: Place Text Boxes in the Correct Location
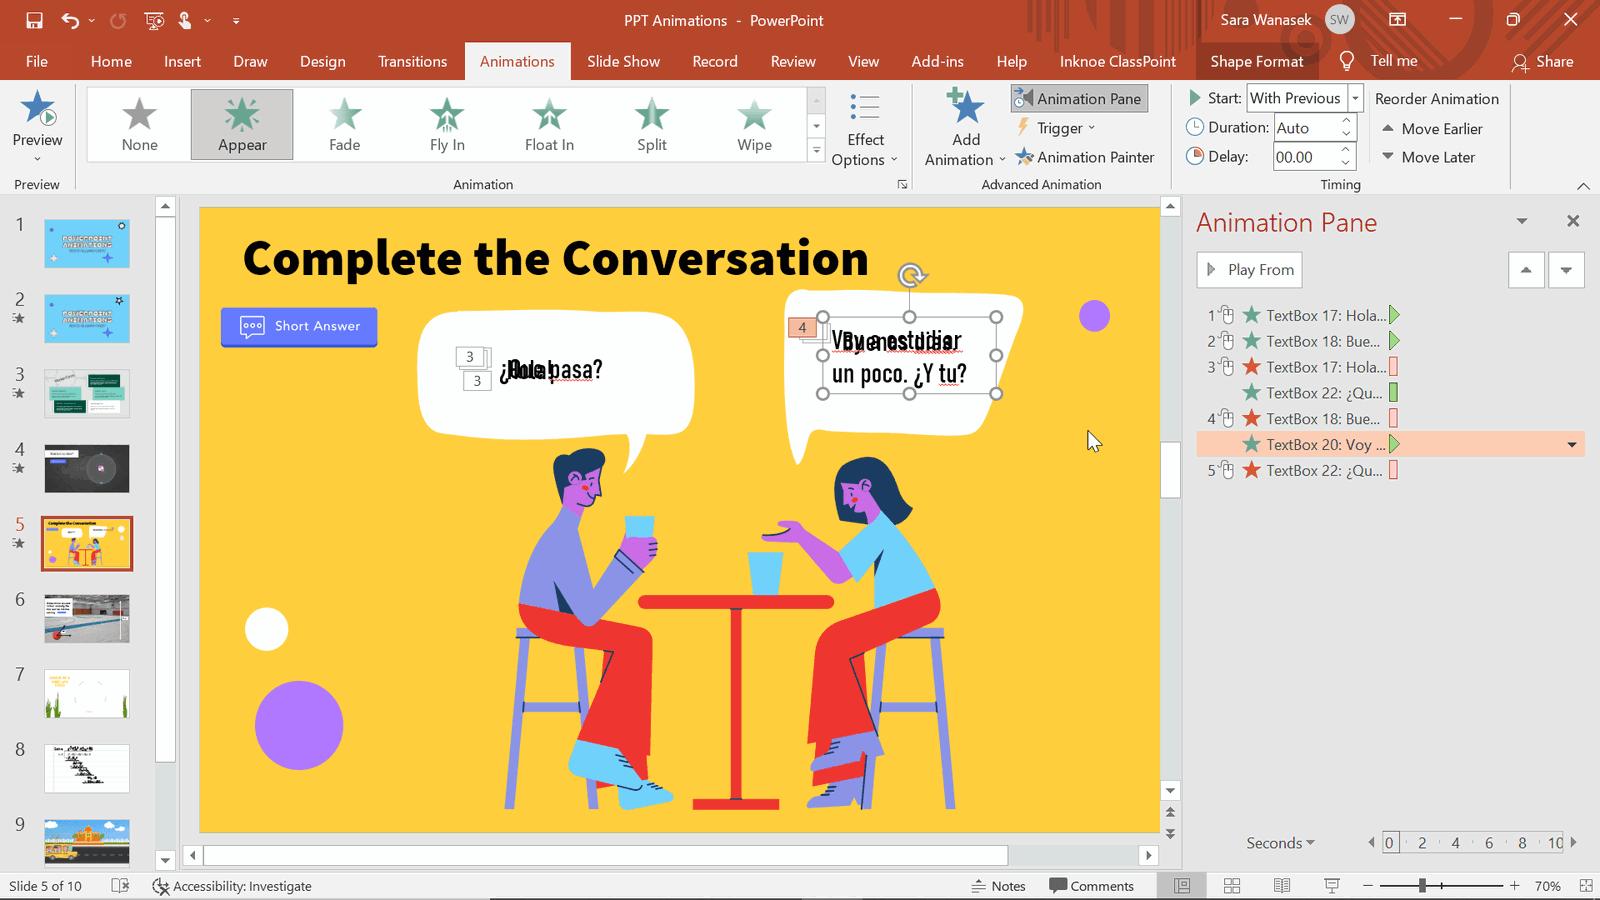
When all the animations are completed and set in the correct order, we can move the text to exactly where we want them. We moved our text right on top of one another so they would all appear in the same place in the speech bubbles.
Now, you can enter presentation mode and click through to see if the conversation flows as you would like!
Animation 5 & 6: Line & Custom Path
In addition to the Entrance, Emphasis, and Exit animations, PowerPoint also has a section of animations called Motion Path Animations. These animations allow your item to start in one location on your slide, then end in another.
This is a helpful tool to eliminate the need for students to mentally animate information themselves. Now, they can fully understand the motion, and focus more on the educational activity. This can be used for many different topics, and just for fun, but I used it above to help demonstrate a Physics problem. Here students must determine the initial velocity the ball will need to hit the ceiling.
How to Create a Motion Path Animation
Step 1: Add Motion Path Animation
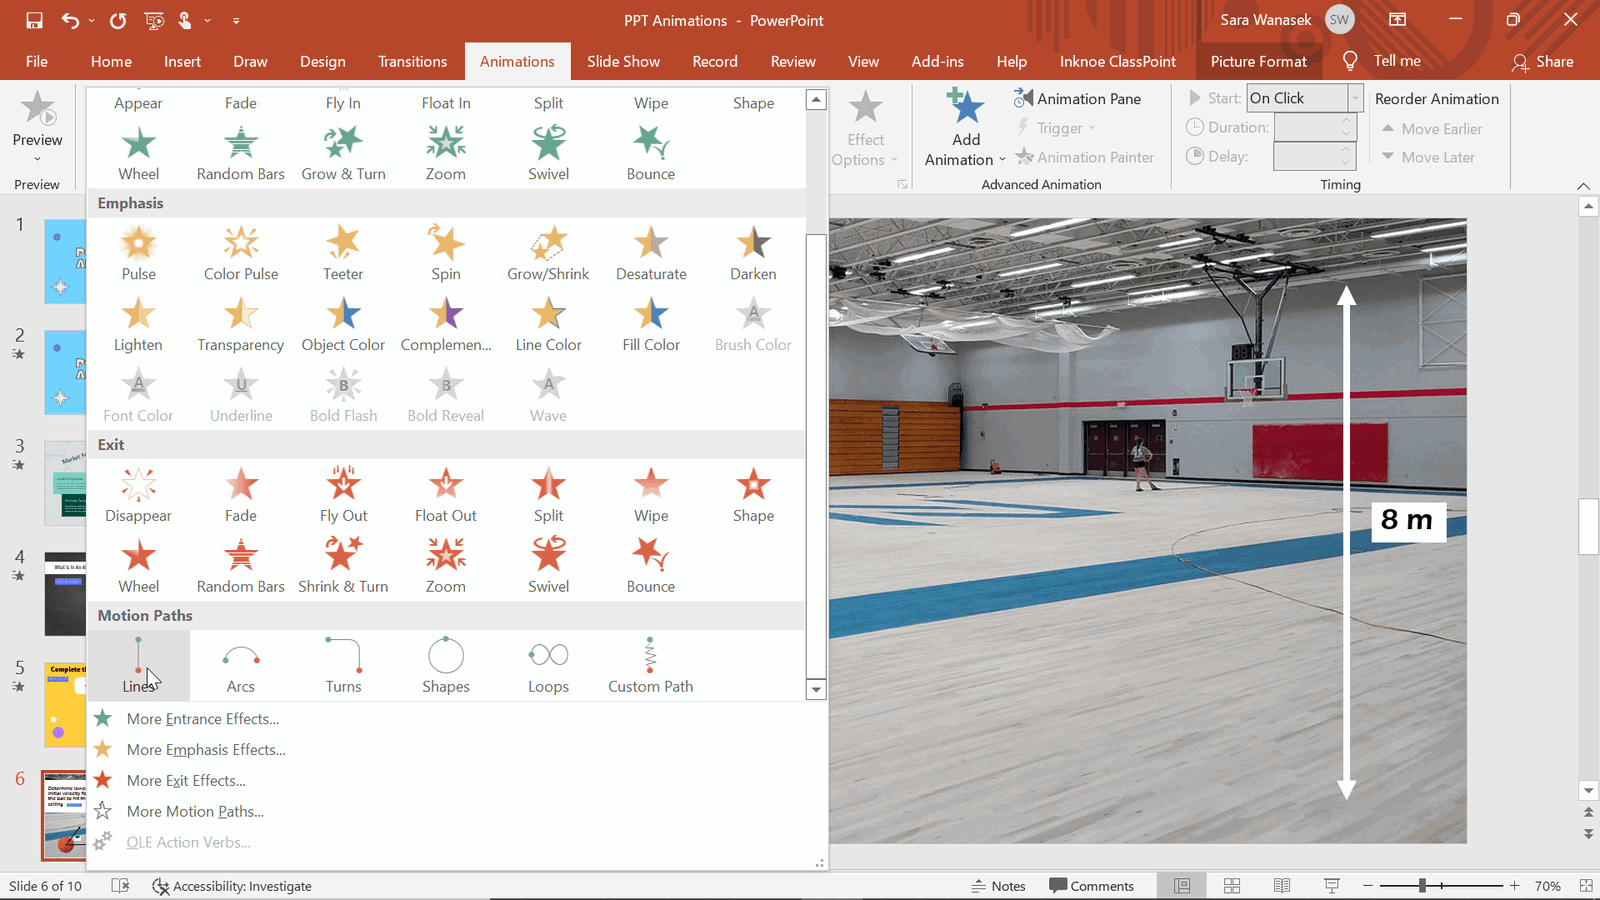
To show this movement of the ball, we will use two different motion path animations. Click on the ball and open the Animation choices. Scroll down until you see the Motion Path section. Select the Line option.
Step 2: Edit Effect Options & Placement
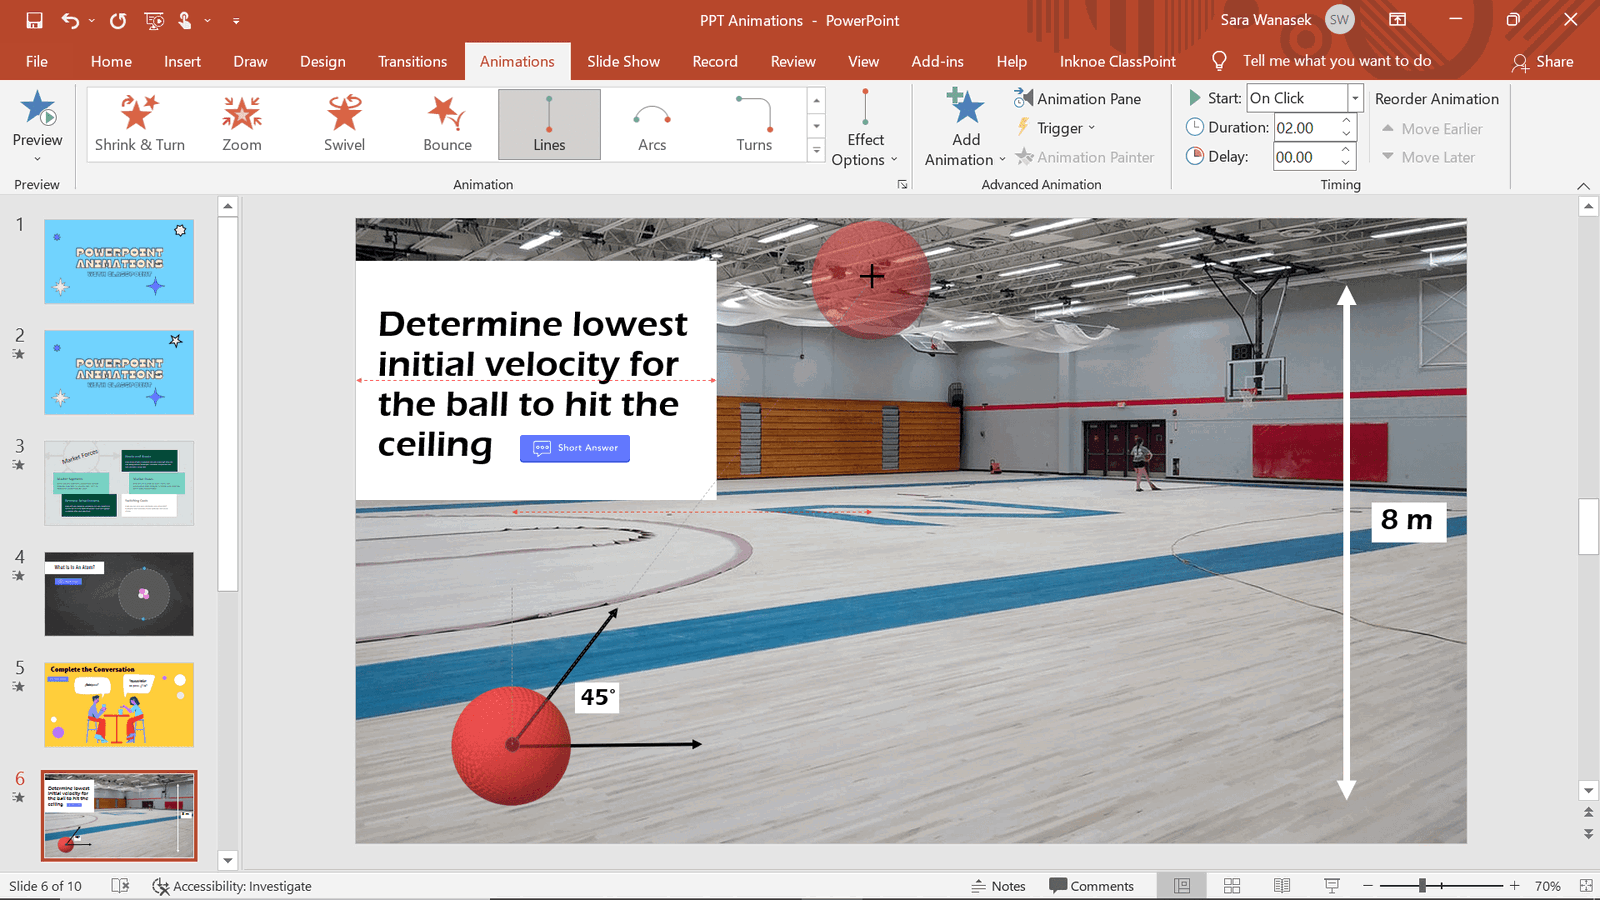
The default for the Line Motion Path is down, but since I want to animate the ball being kicked up, I changed the direction of the motion path. To do this, Click on the Effect Options button and select the Up option. Now the ball moves up, but it’s still not as high as I would like. To adjust to your desired height or location, click on the red arrow and drag it to your desired location.
To preview your animation as you are creating it, click on the animation star on the side of your current slide on the left slide preview panel. At this point, you should see the ball reach the ceiling.
Step 3: Add Custom Path Animation
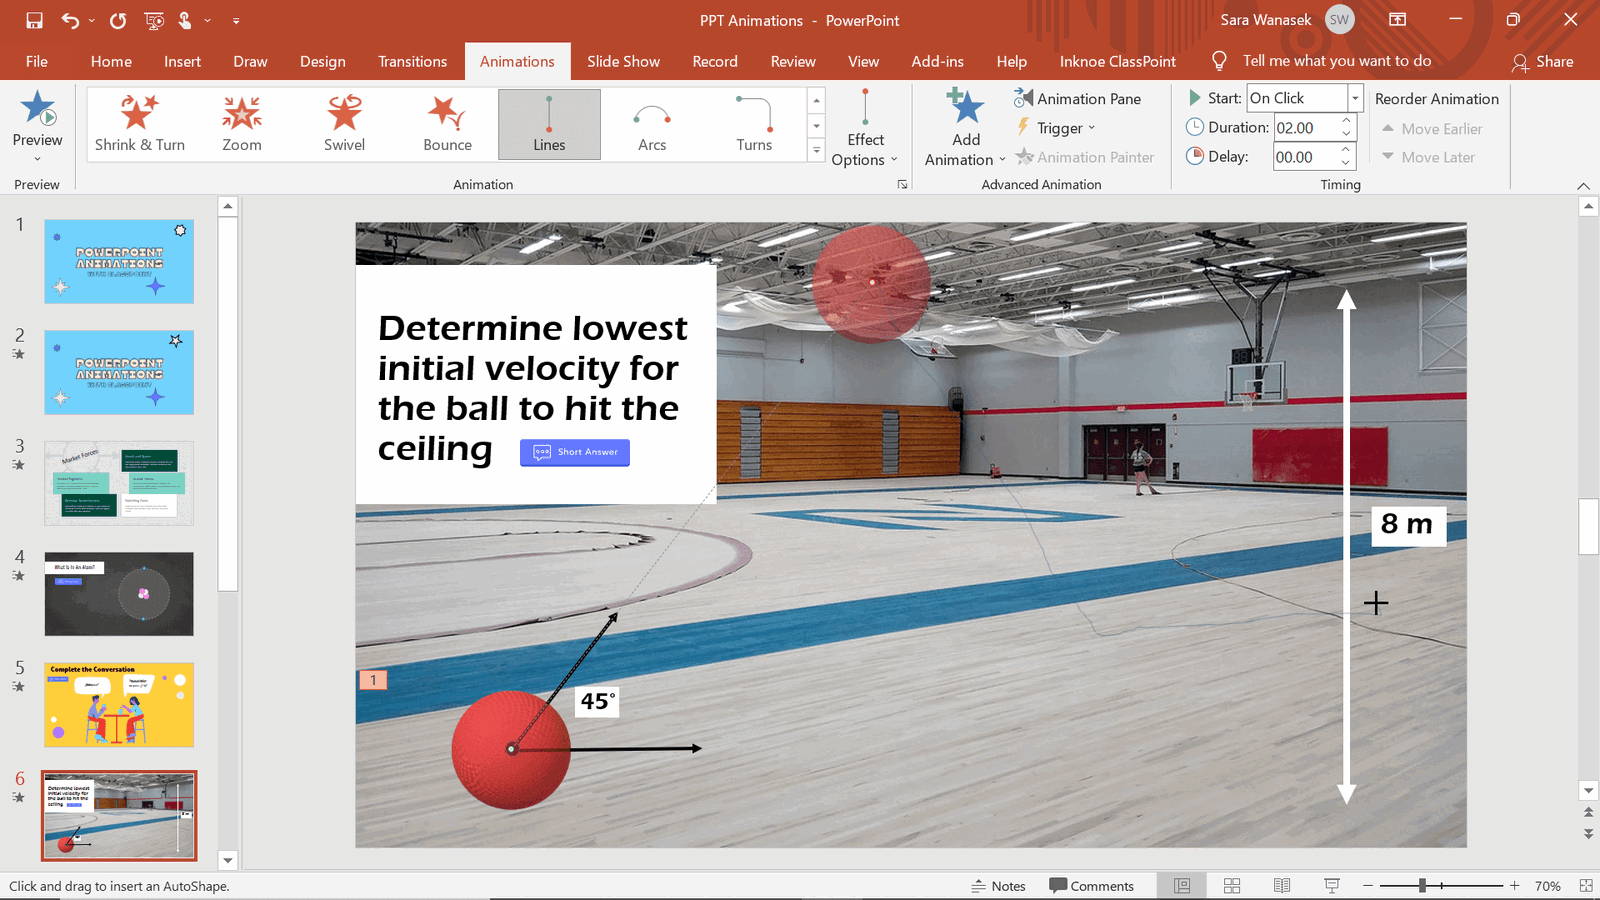
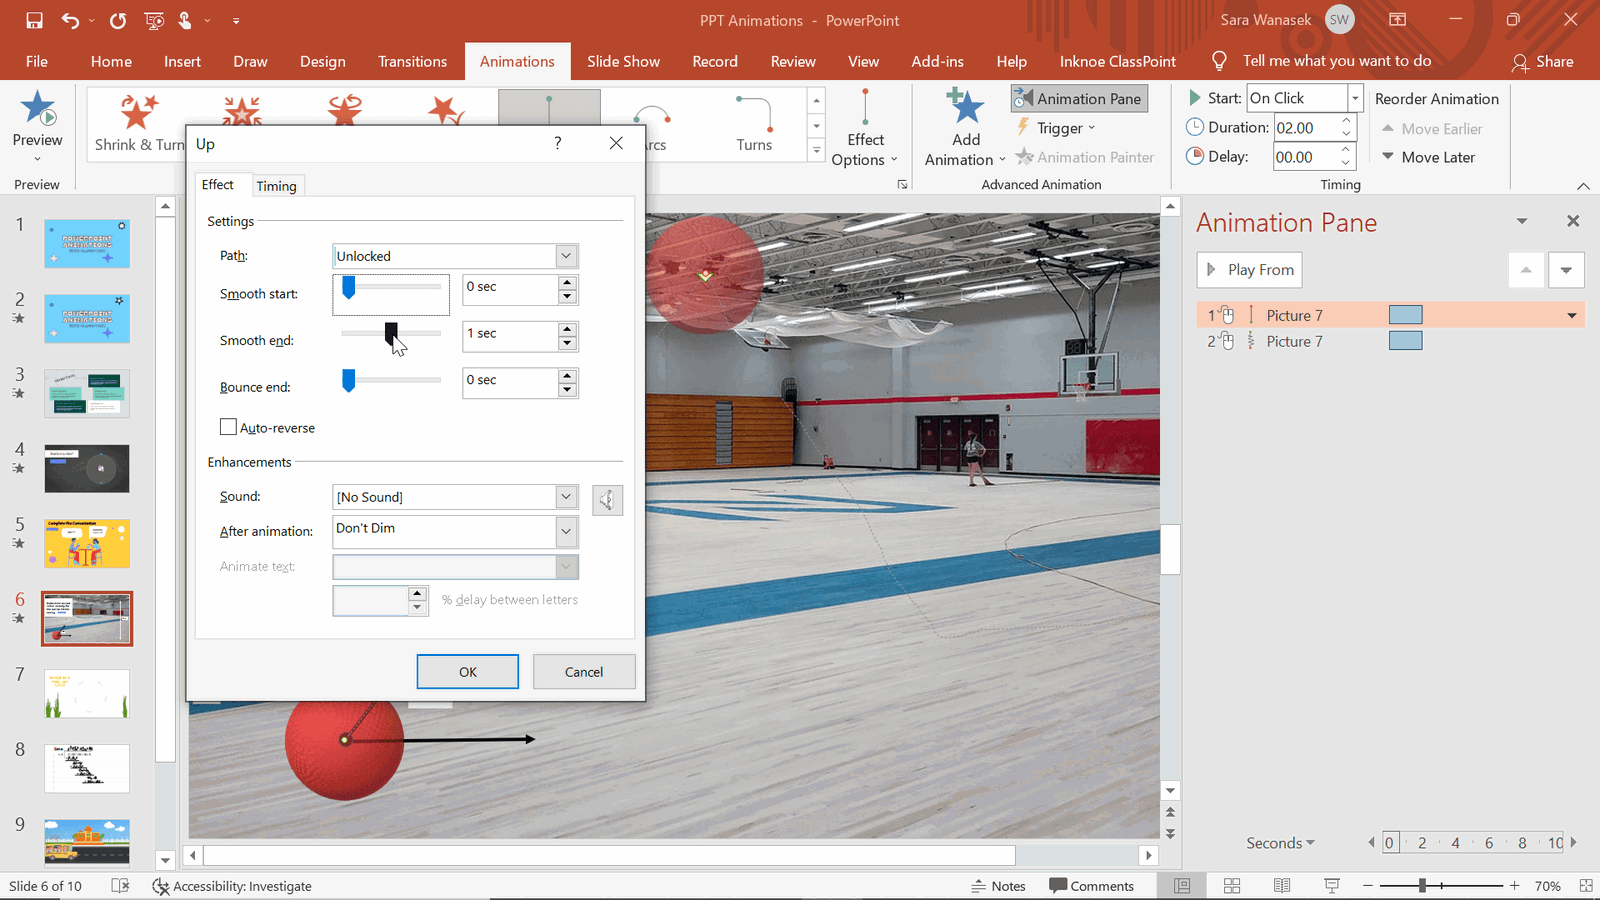
Now that the ball has reached the ceiling, I want gravity to pull it back to the floor. To make this happen, click on the ball, then the Add Animation button. Scroll down to the Motion Path animation and this time click Custom Path. This option allows you to draw a Motion Path anywhere on your slide.
To start, click the spot where the ball left off at the top of the slide, draw a line down to the floor and click to add in a stop. I added a ‘stop’ to make it more realistic by having the ball hit the side of the slide (or the wall!) To do this continue drawing a line over to the edge of the slide and click to stop one last time. To finish, click the ESC button to stop creating your path.
Step 4: Edit Animation Effects
After previewing your animation, there might be a couple of changes you want to make. For example:
- Have the Custom Path Animation to Start After Previous.
- Remove the delay between transitions by right-clicking on the animations and opening the Effect Options. Bring the smooth start and Smooth end to 0.
After those changes, you can preview your animation again, and make any changes to the timing like we did in Animation 2.
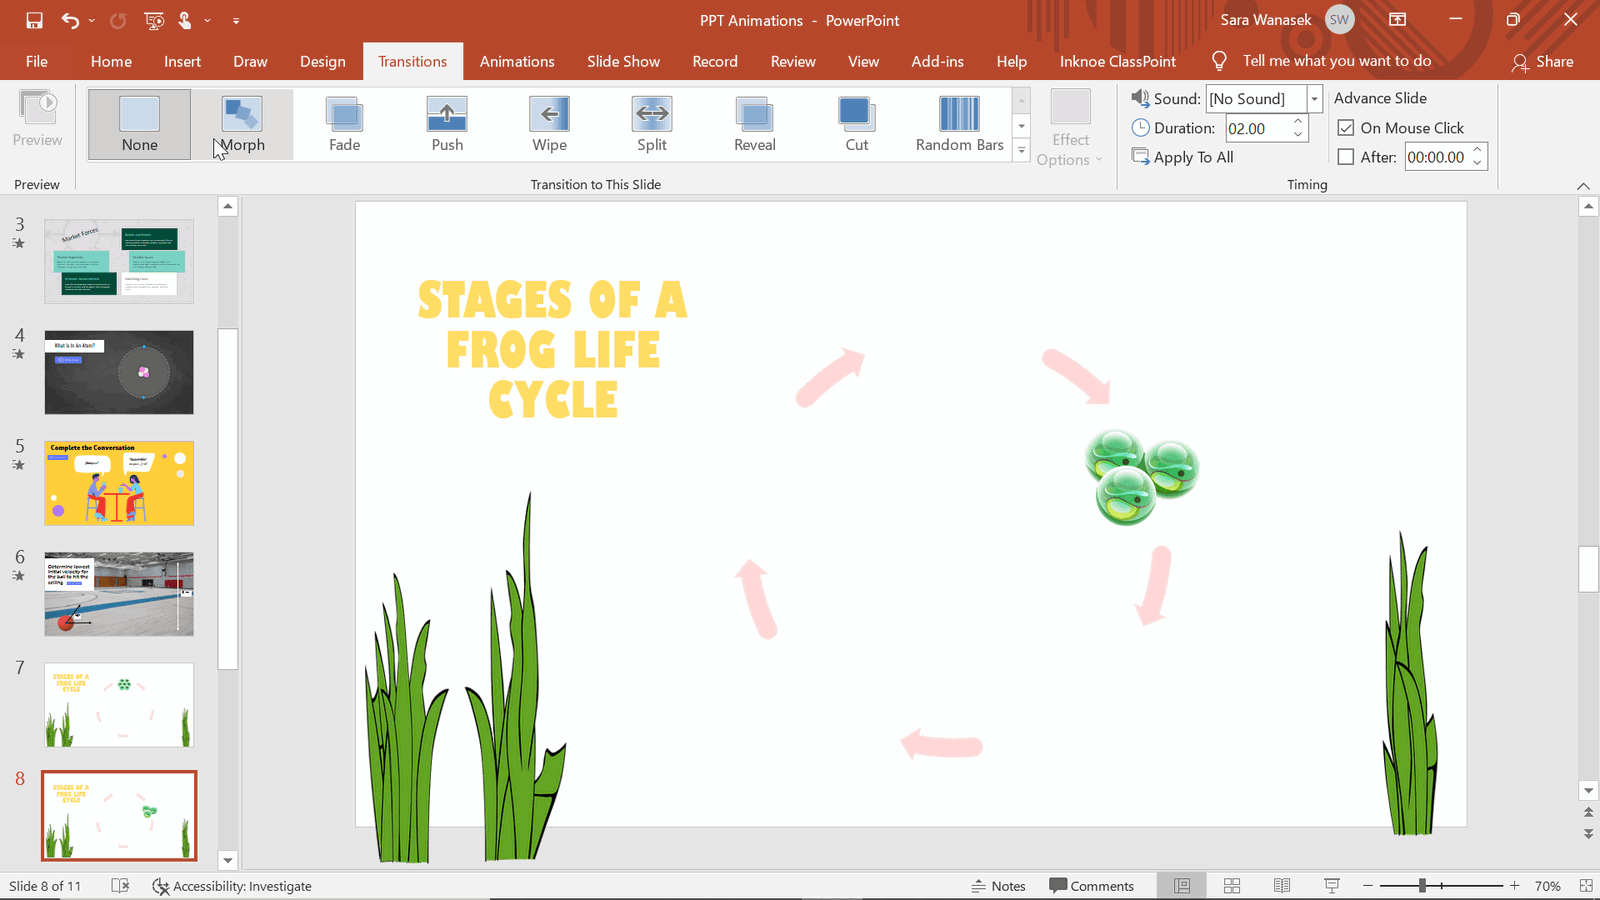
Animation 7: Morph Transition
Morphing images is a great way to show changes or effects visually during a presentation. Morph Transition is not technically a PowerPoint animation – it’s a transition! But, the Morph Transition works similarly. This transition is a great way to add a bit of animation to an object as you switch slides. With the Morph transition and a bit of name changing, different images or text can be morphed into each other. This feature, Enhanced Morph, is a great way to add emphasis on changes that are happening, or show steps that affect each other.
In the example above, I have different images of each step in a frog’s life cycle. Instead of showing all at once, we can separate slide by slide to help students visualize this transition.
How to Use the Morph Transition
Step 1: Create Your First Slide & Duplicate
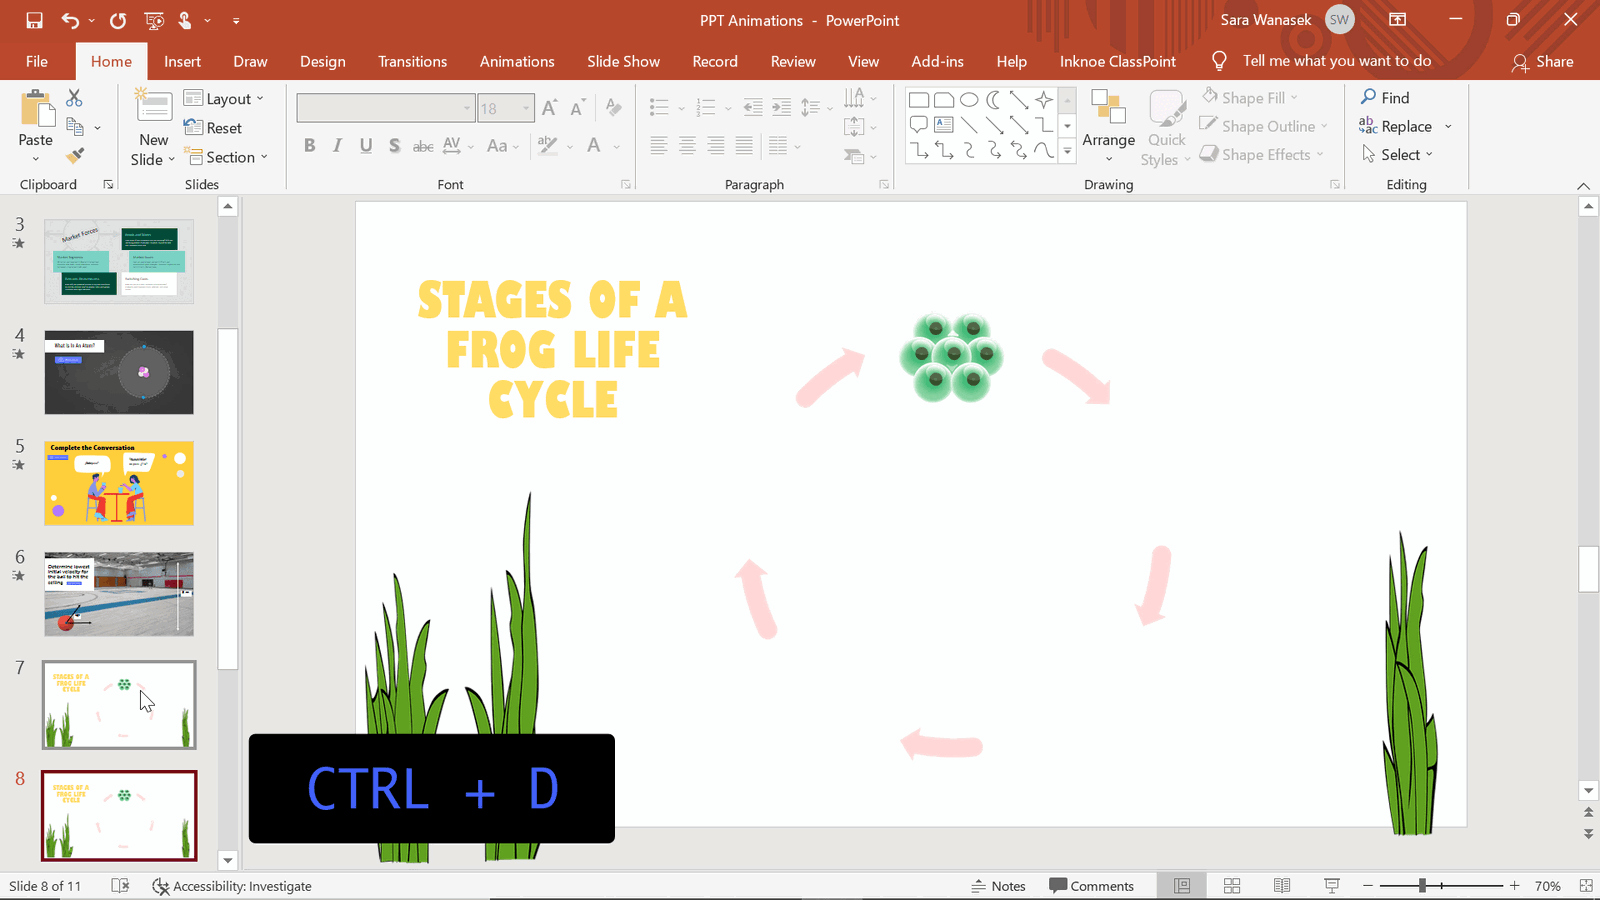
As this is a transition, not an animation, this process will take multiple slides to complete. Start with your first slide with the first image. Then duplicate the slide by right-clicking and hitting Duplicate, or CTRL + D, to continue with your phases.
Next, you can add in the next image of the cycle, and remove the first image in the second slide.
Step 2: Rename Your Images

For PowerPoint to recognize these two different images and morph from one to the other, the two images must have the same name. Open the Selection Pane from the Arrange drop-down menu.
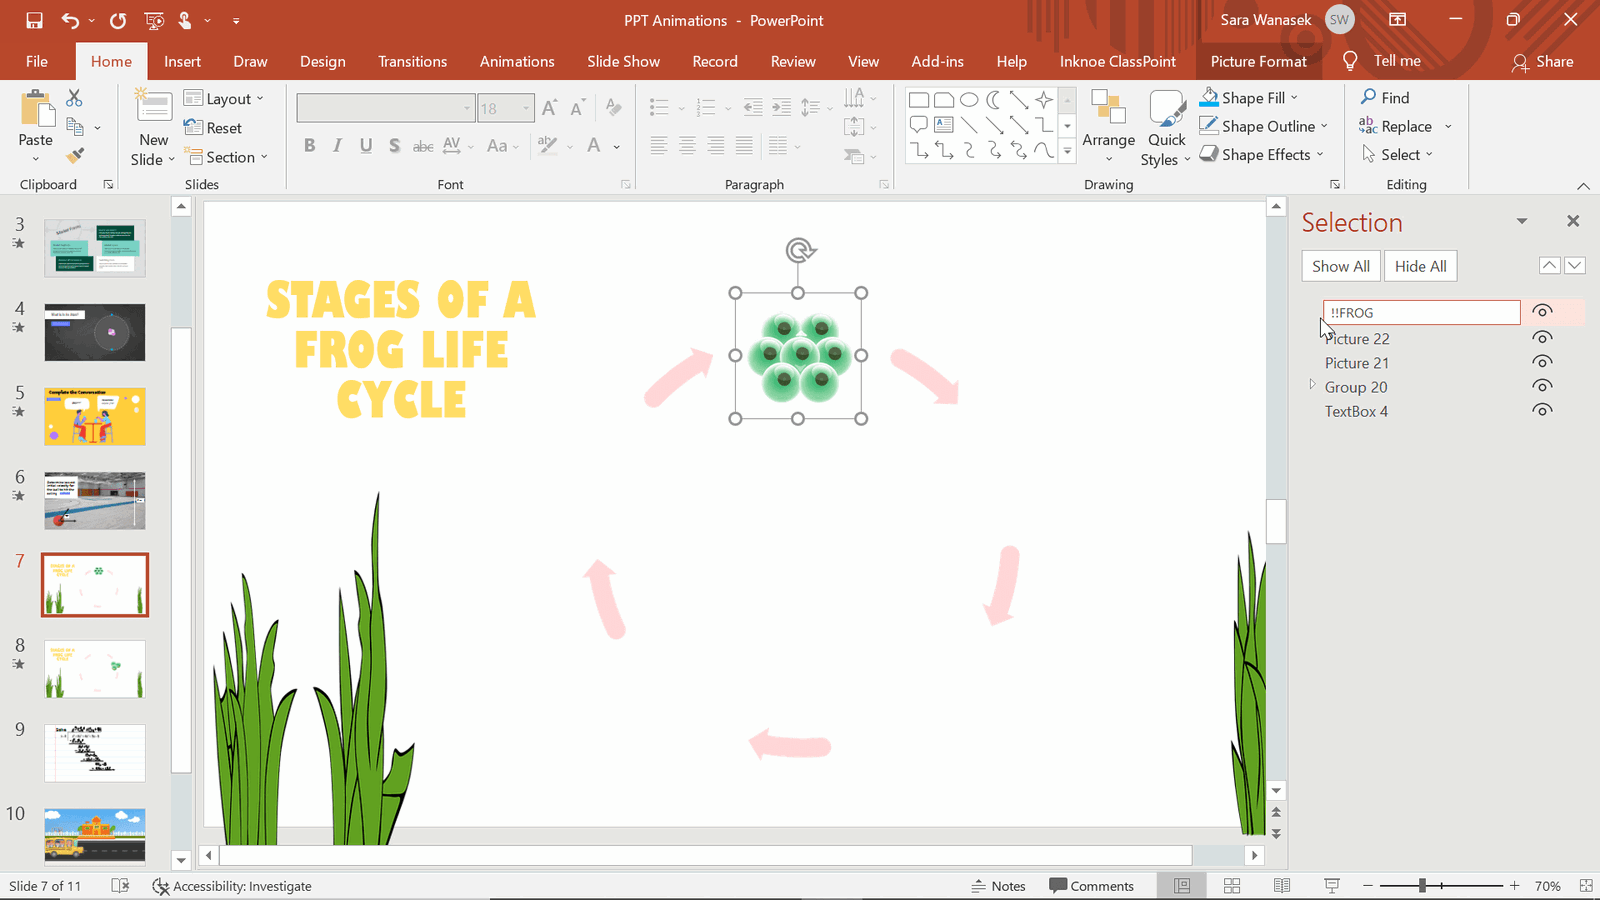
The Selection Pane shows the names of the objects on your slide. Select the image that you will want to morph to have the name highlighted in the Selection Pane. You need to rename this image and the image on the second slide so they match.
In the renaming process, you can name it anything you would like, BUT it must begin with two exclamation marks (!!). I have named ours “!!FROG” Now, copy this name, and go back to your next slide. Click on the added image and paste this same name in the Selection Pane.
Step 3: Add the Morph Transition
Now, that both images are named the same, you can add in your Morph transition.
Click on the second slide of your process, & in the Transitions tab in the PowerPoint ribbon, click on the Morph transition. You will see a preview of your transition and movement between the first two stages of your life cycle.
Step 4: Repeat for All Steps in the Cycle
Repeat the duplication and image renaming as needed.
Animation 8: Wipe
Our last PowerPoint animation suggestion is the Wipe animation. This one pairs wonderfully with the Drawing features of PowerPoint.
You may not have a touchscreen device to add annotations during your presentations with your students; however, with this simple step animation, you can create that expressive writing, drawing, or problem solving work flow similar to how you would if you were drawing and annotating live. Annotations can help bring focus, perspective, or understanding to certain areas of your presentation material.
In the above example, I used this Wipe animation + drawing for a Math problem. Maybe you have given your students time to work our the example for themselves and now it is time to go over it. Instead of just discussing, before you present, draw out the answer then add some animations. This way you can reveal step by step the problem to add suspense and answer any questions students have while the problem is being gone through.
How to Use Drawing with Animations
Step 1: Add Annotations to the Slide
Complete your annotations by going into the Draw tab, and writing out what you would like to appear on the screen. Read more information on the Draw tab and how to do this without a touch screen device.
Step 2: Add Animations
Think about the order you want your drawings to appear, then start by clicking on the first drawing and adding in the Wipe Animation.
Step 3: Use Animation Painter for Repeating Animations
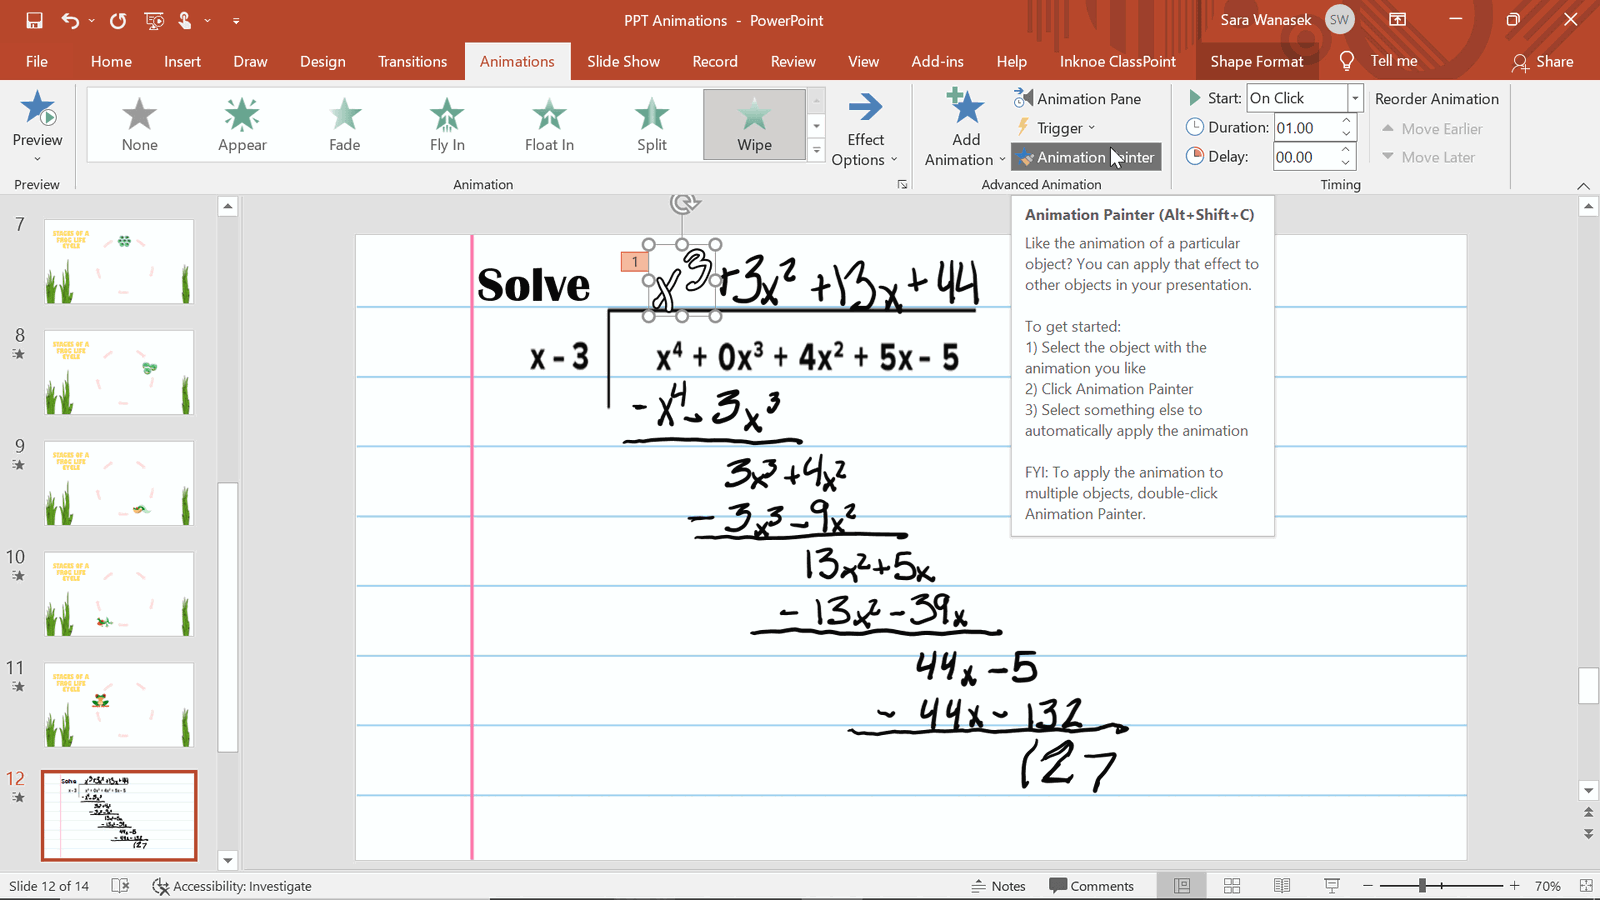
If all the steps are getting the same animation, use the Animation Painter. Similar to PowerPoints other Formatting Painter, this Animation Painter will copy the animations of one object and paste them onto another. This can save you lots of time!
Once all the animations are added, change any of the timing and give it a preview!
Summary
These simple eight PowerPoint animations can be quickly and easily (once you get the hang of it) added to any of your PowerPoint Presentations! And if you use animations, you are on your way to delivering more exciting, memorable, and engaging PowerPoint presentations.
For more tips on creating more interactive and engaging PowerPoint presentations, check out the articles below:
