
Bitmoji Classrooms grew in popularity during the COVID-19 pandemic as teachers were adjusting to teaching virtually. Now that teachers are back in physical classrooms, many of them are still sharing their Bitmoji classrooms with students whether that is in their learning management system, like Google Classroom or Teams, or during class on their interactive whiteboards.
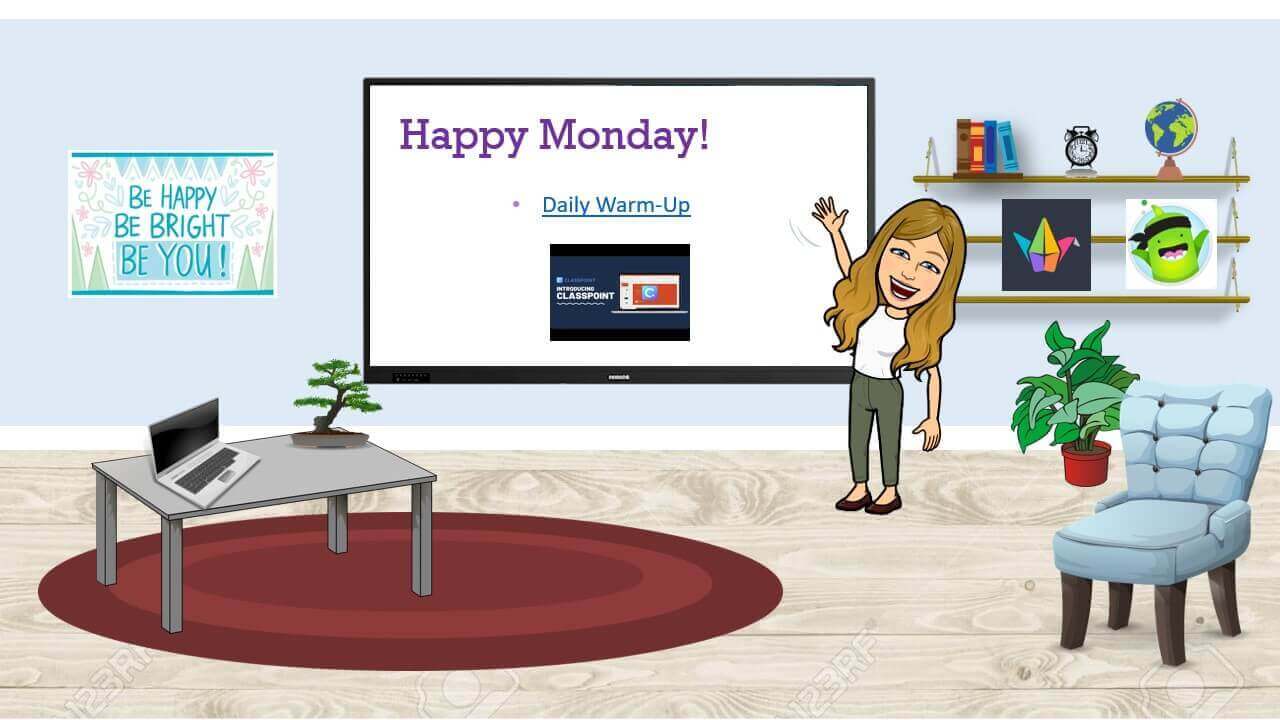
These animated virtual “classrooms” are a great way to build a welcoming connection with your students. They can be used as a homepage for you to share announcements, lead students through a presentation or a mini-lesson, or just for fun!
To begin creating your own Bitmoji Classroom in PowerPoint, and how to share it through Microsoft Teams, keep on reading!
How to Create your Bitmoji Classroom in PowerPoint
To begin creating your virtual classroom, you really need just need 4 things: a blank PowerPoint slide, a few classroom images, your Bitmoji, and any links you want to add to your classroom.
In replace of using a blank slide, there are plenty of shops online that can provide you with templates or already set up classroom backgrounds for you to personalize; however, many of these will cost money. I don’t recommend taking this route, because creating your own Bitmoji Classroom is really quite easy and won’t take too much time.
-
Upload Images
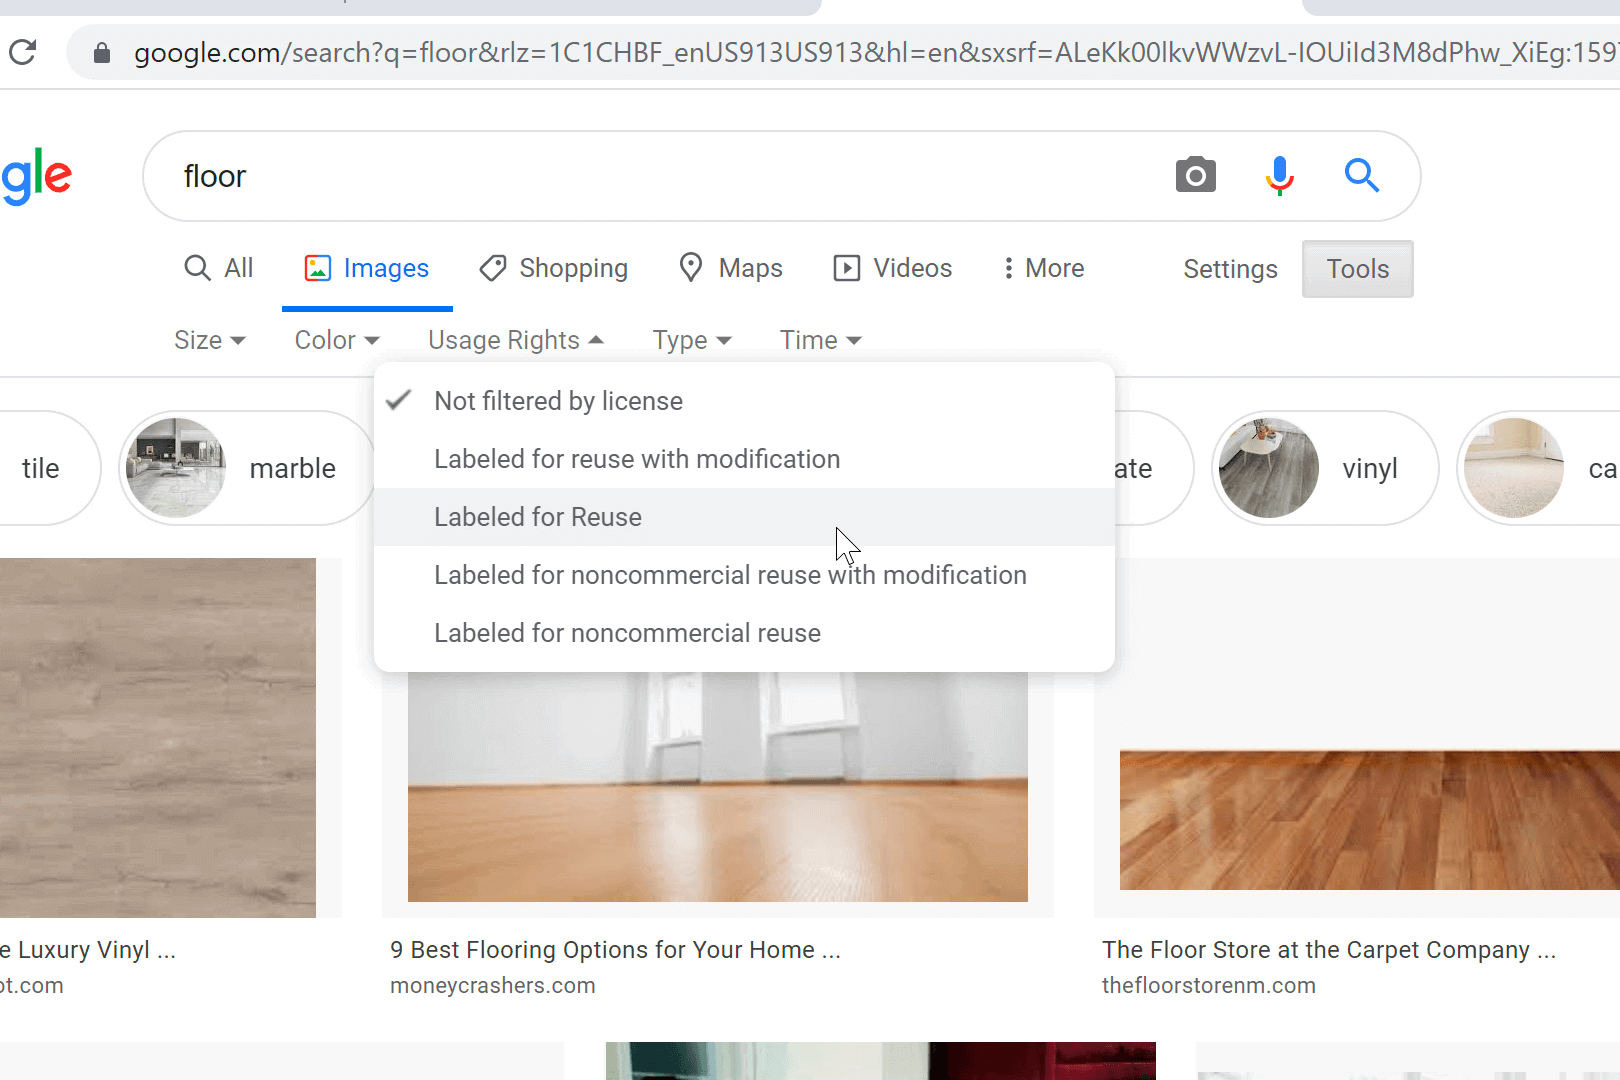
Start on your blank PowerPoint slide – an open canvas! We will insert images on this slide to build up our classroom. Be as creative as you wish! I like to start by adding a floor and a wall. Search Google for some images, and save them to your desktop or do an online search through PowerPoint.
When you search for an image online, be sure to change the search settings to account for copyright issues. Under Tools, change the Usage Rights to Labeled for Reuse. One more setting you can change is for when you are looking for transparent images. This way when you add a photo to your slide, it will not have a background. To do this, under Color, change it to Transparent.
💡 If you find an image that you must have that isn’t a transparent background, you can remove the background right in PowerPoint!
-
Format & Place the Images

Once the ‘floor’ image is uploaded onto your slide, we can crop, resize, and move it to the bottom half of our slide. Follow the same steps to move your ‘wall’ image on the top half of your slide. Then, continue to build up your classroom by adding other images, like a chair, a desk, shelves, a coffee cup, plants, or a computer. Basically, anything that you want to have that creates a homey classroom environment.
To make your classroom realistic, add depth by layering images. To do this, right-click on the image that you would like to have in front, and on the menu, click Send to Front.
-
Save Slide Background
Before you get carried away in adding images, we suggest saving the most basic features of your classroom as a slide background. This way, if you are changing your Bitmoji classroom often, you do not have to start from scratch every time. You can use this preset background and add in other images depending on what you will need and want for that day. This tip will save you so much time in the future, so don’t forget to do this!
To do this, save your slide as an image in File -> Save As. Then the next time you create a PowerPoint, start by uploading this image don’t your slide. Then you can continue adding in all the other small image features to your classroom.
-
Add Your Bitmoji to Your Classroom
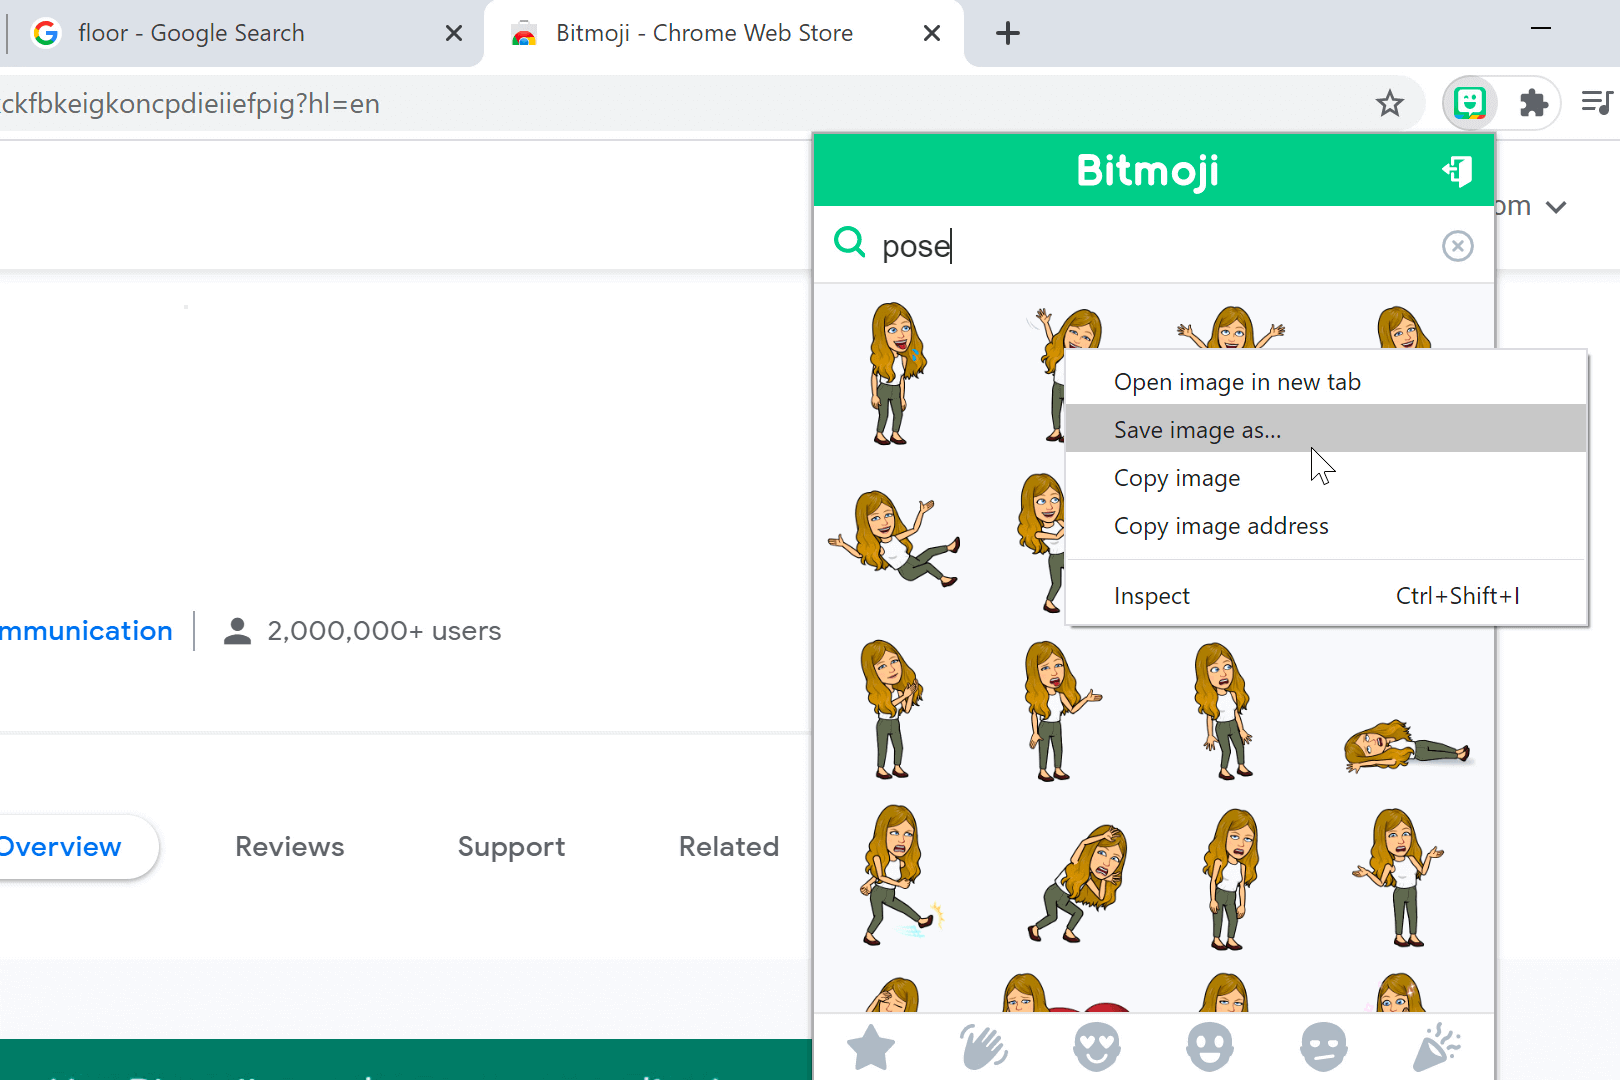
Now, it’s time for the most important part – adding yourself to the classroom! Open Chrome and download the Bitmoji Chrome extension if you do not already have it. Then, log in to your account. If you don’t have one, easily create one at bitmoji.com.
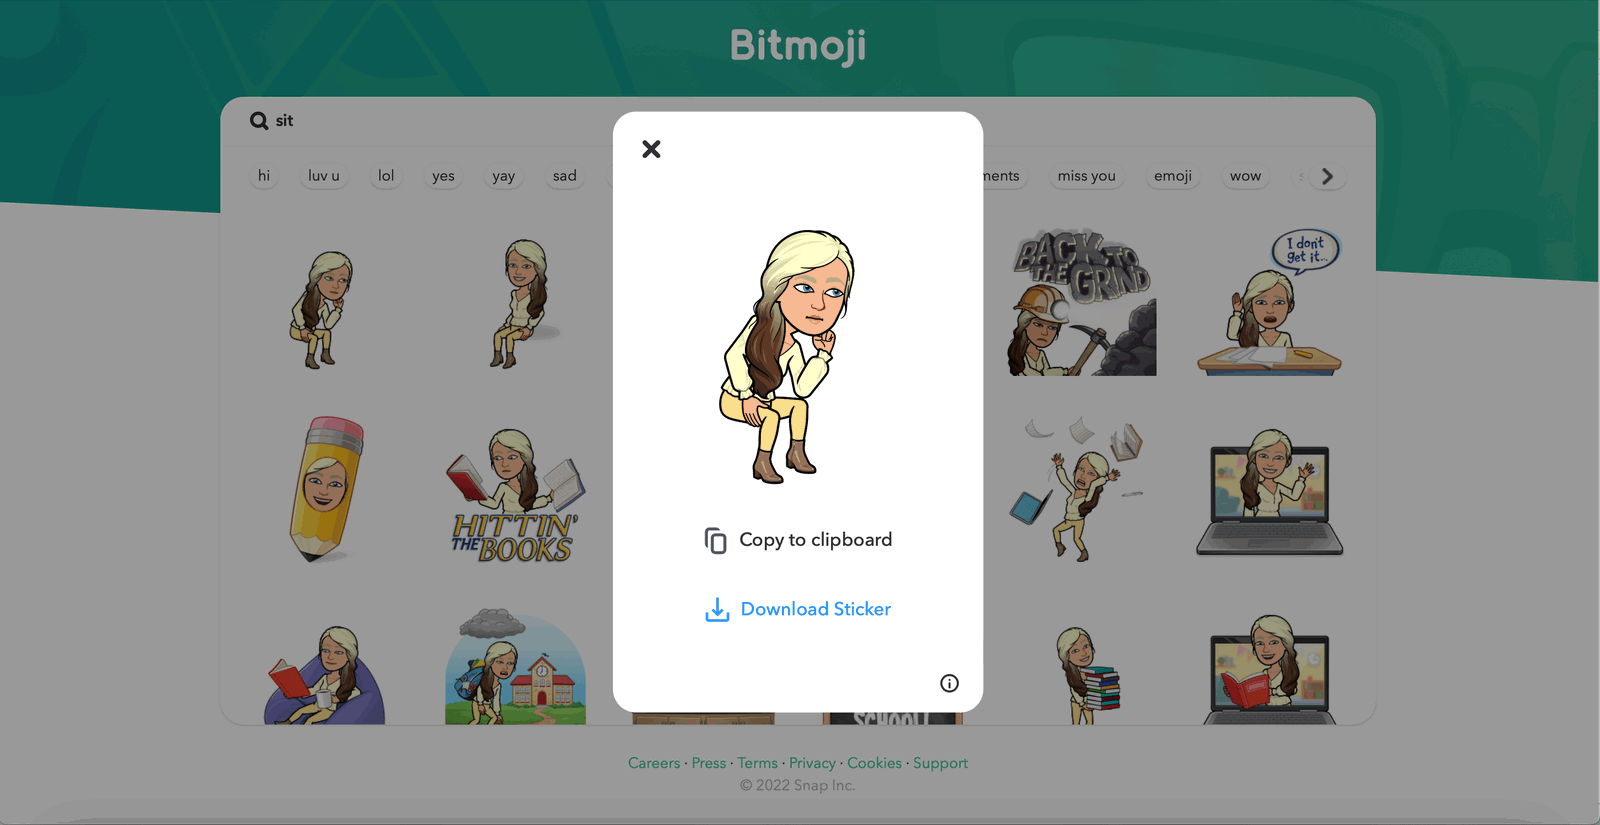
Bitmojis come with a lot of different poses, many of them with text attached. When adding a Bitmoji to your classroom, you usually want one without extra text and artwork included. To find one that is just yourself, search “pose” or “full-body” in the Bitmoji extension. When you see one you like, right-click to save it as an image on your desktop.
Then, head back into PowerPoint and insert that image into your slide. Resize and place it anywhere you would like it.
3 Ways to Make Your Bitmoji Classroom Interactive
Method #1: Through Hyperlinks and Multimedia
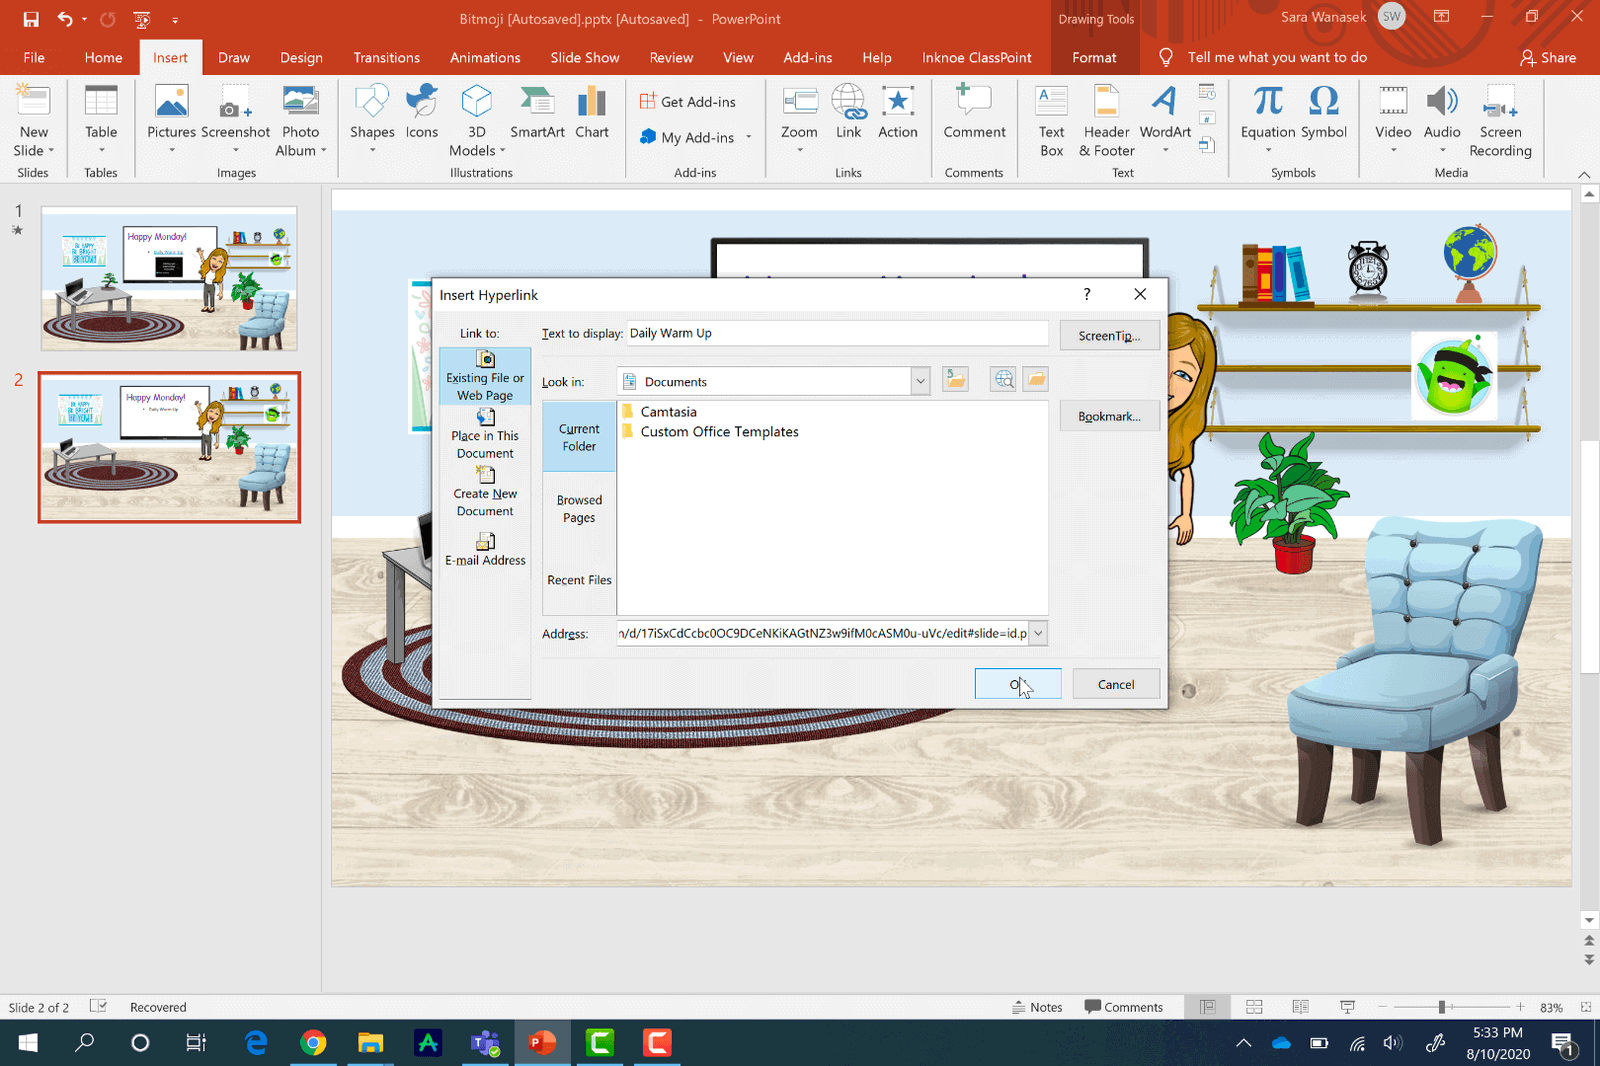
Bitmoji Classrooms aren’t just for looks! Add links or videos to your classroom for students to explore and to help them feel like they are learning back in their own classroom.
You can add links through text or images that are on your slide. Highlight the text, or click on the image that you want to link. Then, on the top ribbon in PowerPoint, hit the Link button to paste in a website that you want your students to check out. You can also link these to another slide in your presentation instead if you want them to check out the information there.
To embed a video right on your slide, you only need to go to the Insert tab, and then click Video and Online Video. Students can watch these videos from your slide without ever having to leave PowerPoint!
Now, your students can click on objects and text, and watch videos through your Bitmoji Classroom!
Method #2: Animate Your Bitmoji Through PowerPoint Morph
To make your Bitmoji stand out and bring it to life, we can use PowerPoint Morph to simulate the impression of an animated Bitmoji.
Follow these 3 simple steps to create an animated Bitmoji in no time:
- Download Different Bitmoji Poses: Download various Bitmoji poses of the similar style (i.e., the Bitmoji should be wearing the same clothes, be in the same setting or similar orientation) from www.bitmoji.com. This is crucial because using a similar set of Bitmoji would allow us to create a smoother transition using PowerPoint Morph later.
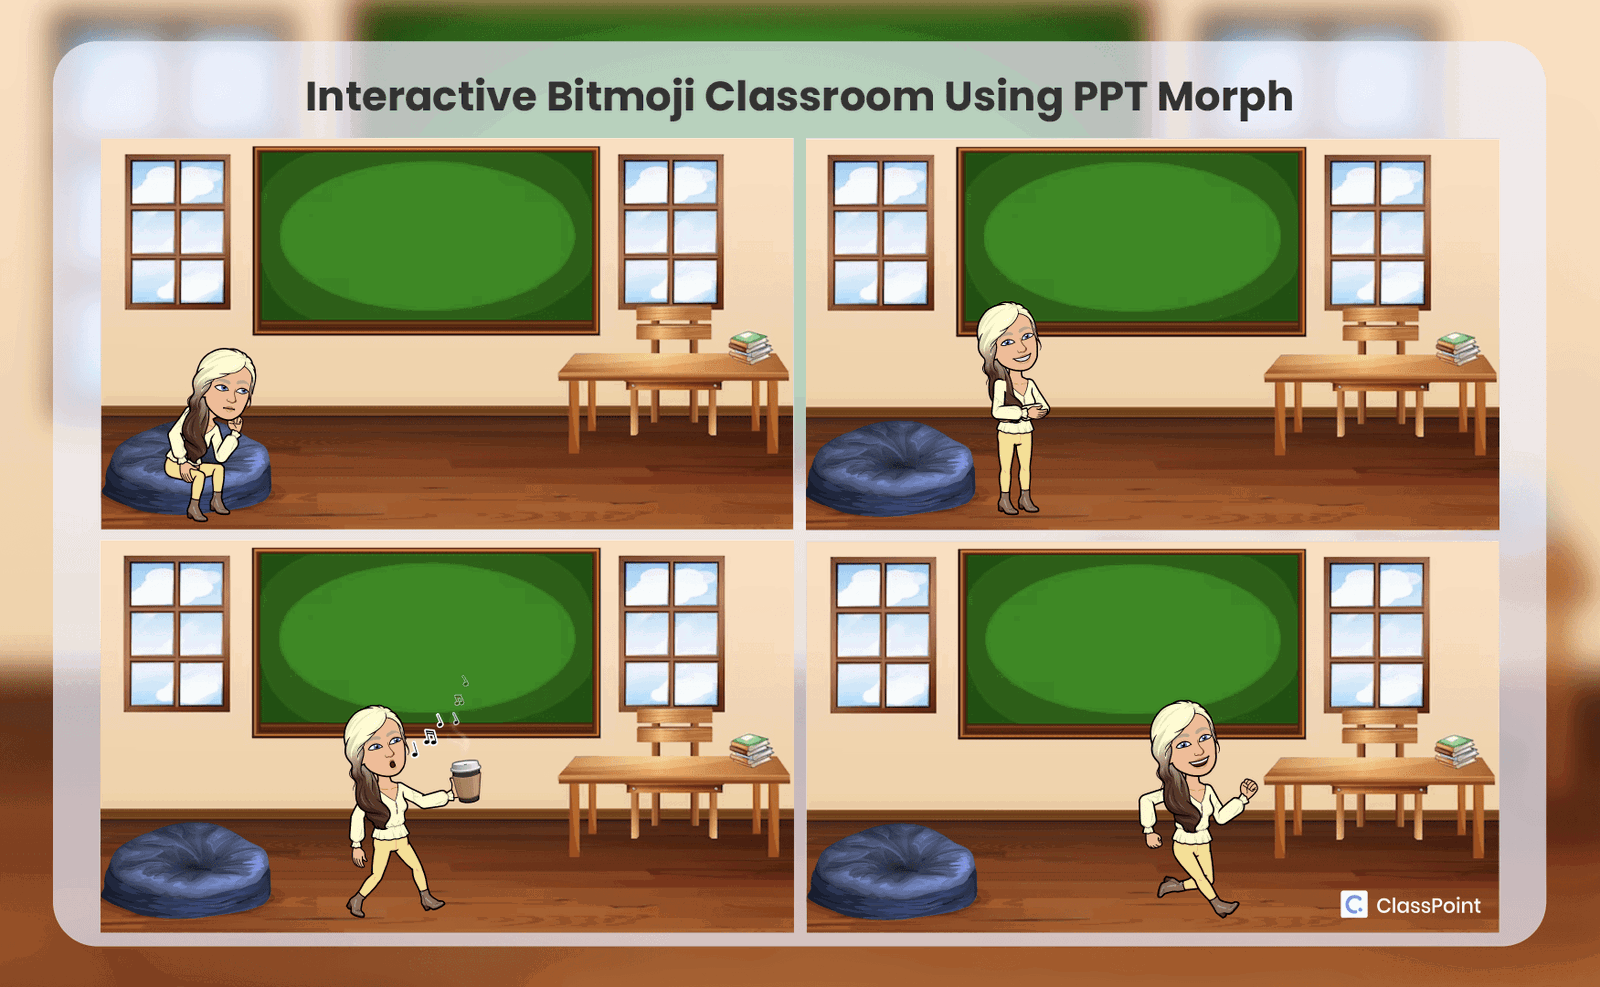
- Import the Bitmoji Poses into PowerPoint: Next, import your chosen Bitmoji poses into PowerPoint and position each of them on separate slides based on the sequence of movements you want your Bitmoji to depict. For instance, you want your the first stage of the sequence to be a sitting position, gradually transitioning to a running position.
- Apply PowerPoint Morph: Apply PowerPoint Morph to all slides except the first by heading to Transitions > Morph.
There you have it! Now when you enter slideshow mode, it will seem as if your Bitmoji is transitioning from one pose to the next as you navigate through the slides!
Method #3: Animate Your Bitmoji And Make it 3D in Snapchat
To make your Bitmoji presentation even more realistic, you can even import 3D animated Bitmoji into your PowerPoint presentation.
Follow these 3 simple steps to create your 3D animated bitmoji classroom now:
- Create Your Bitmoji in Snapchat: First, you will need to create your own Bitmoji in Snapchat by tapping the Profile icon at the top right corner and select ‘Create My Avatar’.
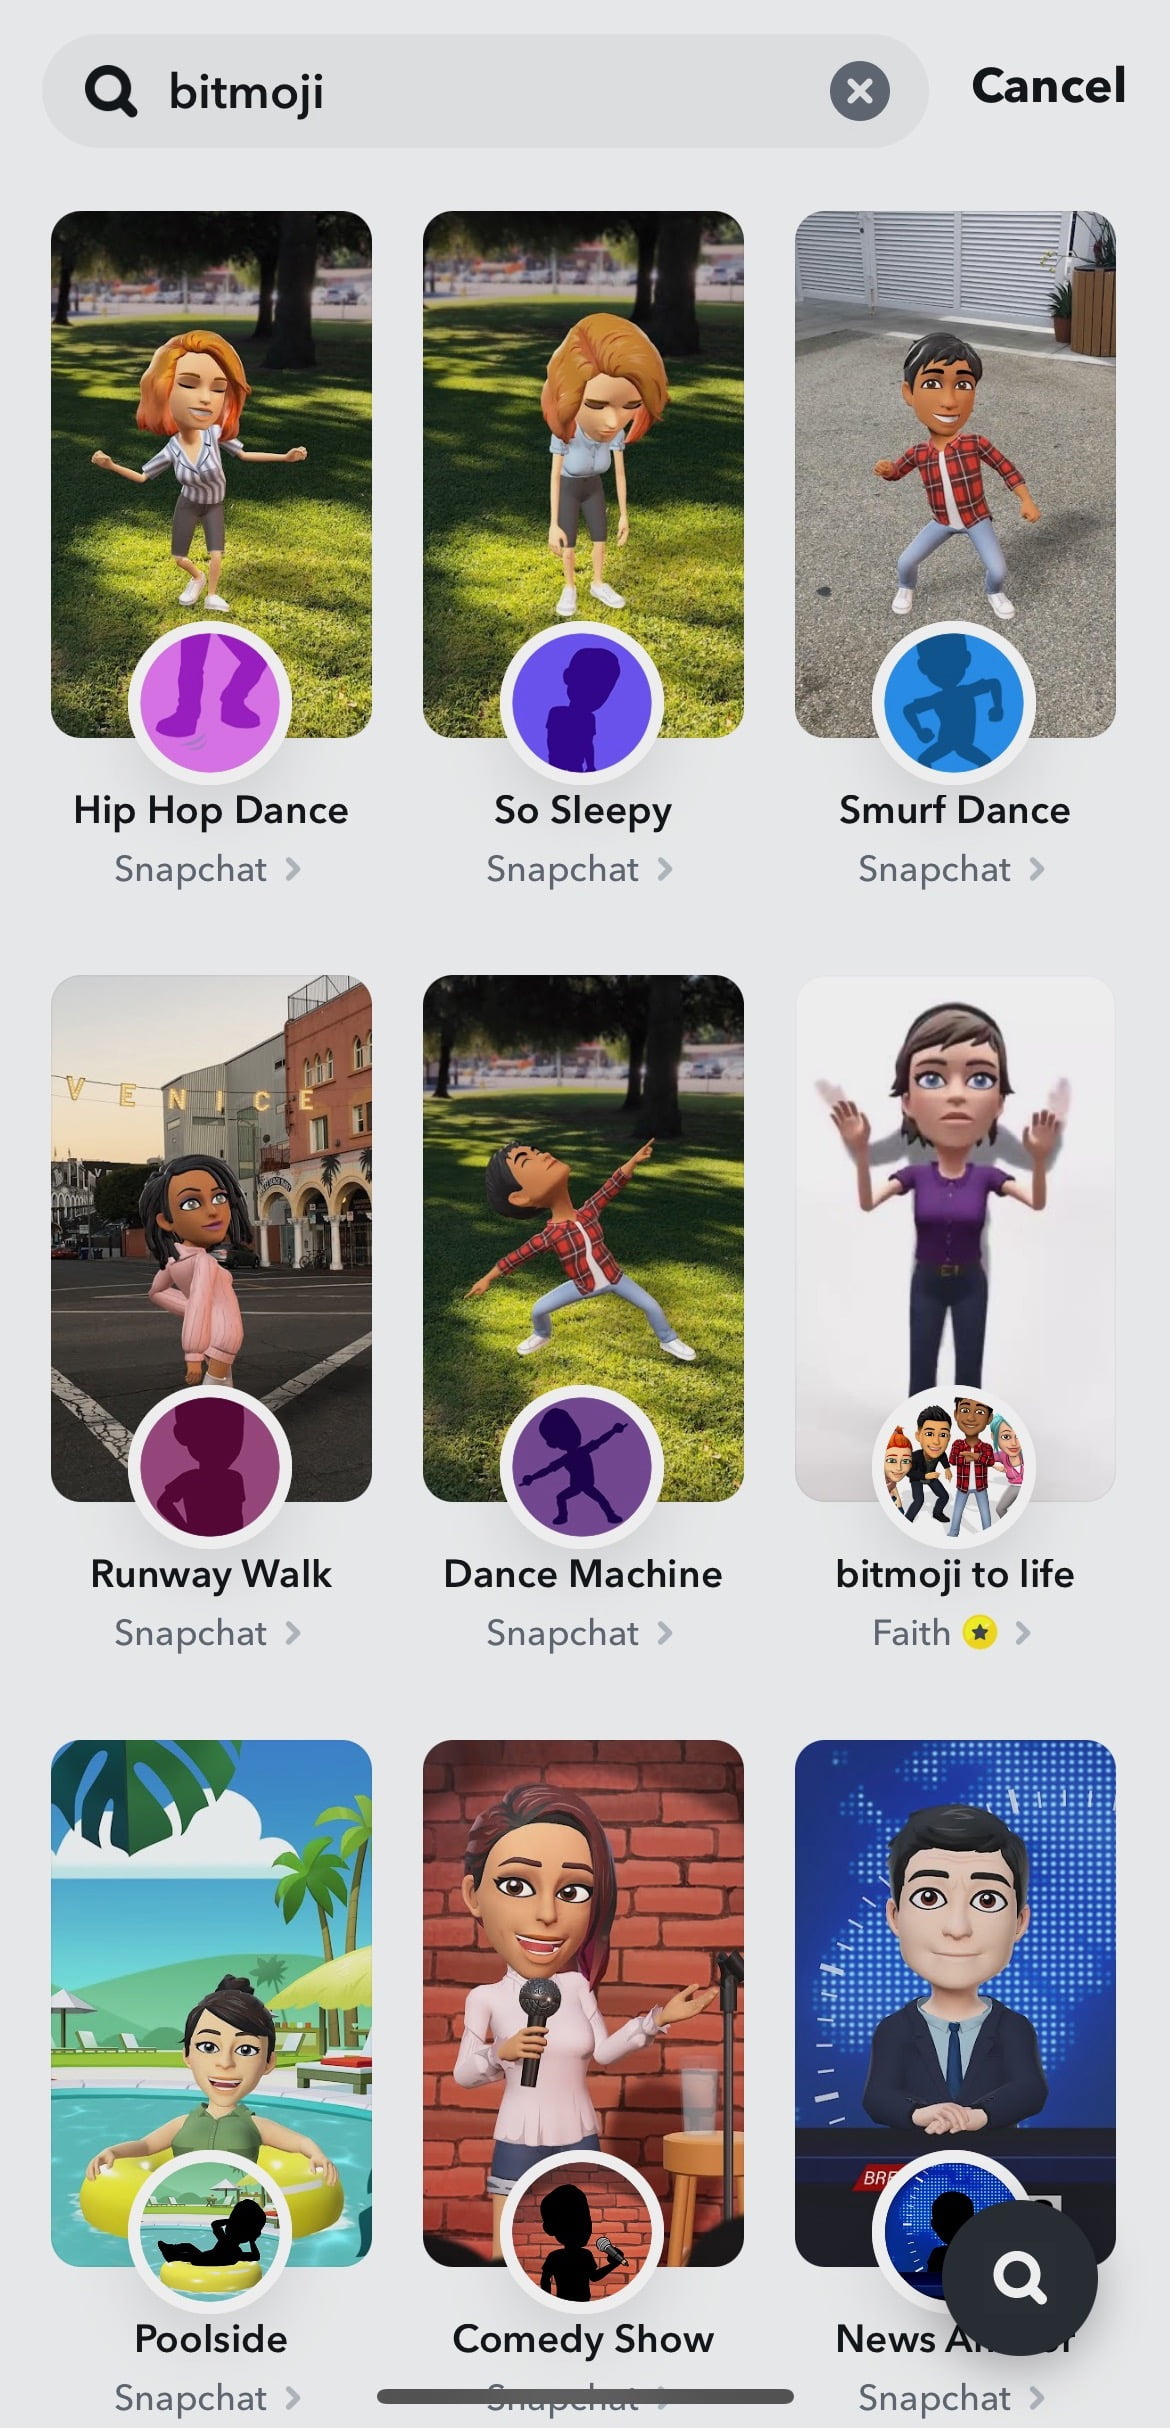
- Apply Snapchat Bitmoji Filter: Head over to Snapchat filter and search “Bitmoji”. Pick any of these Bitmoji filters. These filters will then automatically applied to your Bitmoji, turning it into an animated augmented 3D model in your Snapchat screen.
- Download the Video: Record the video of your 3D animated Bitmoji against a plain background and download it to your device.
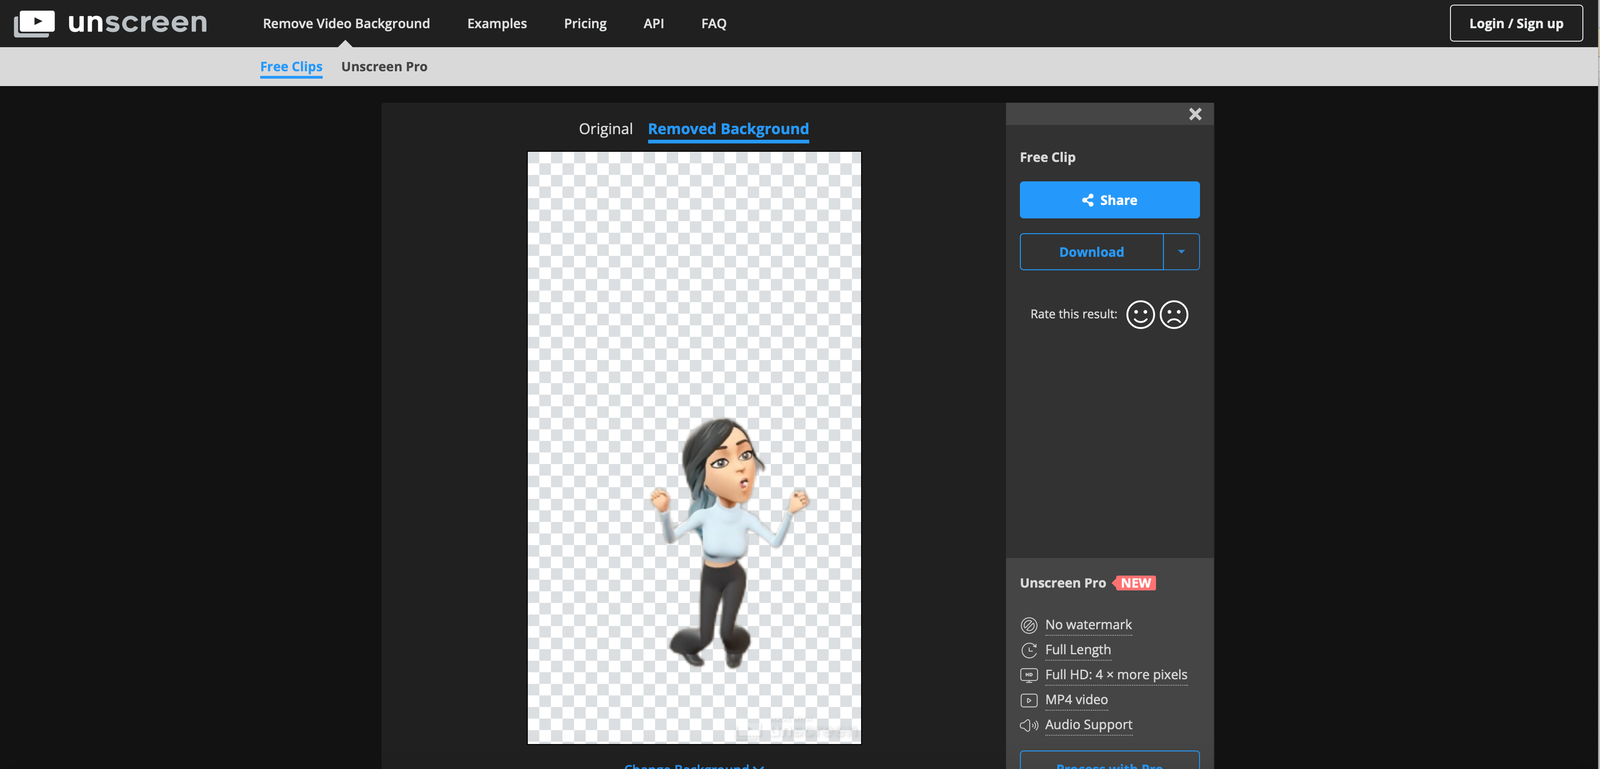
- Remove the Video Background: Remove the video background and turn it into a gif using any video background removers like unscreen which will automatically remove the background of your video and turn it into a gif.
- Upload the gif to PowerPoint: Finally, upload the transparent background gif into your PowerPoint.
That’s it. You have successfully added a 3D animated Bitmoji right inside your PowerPoint slides!
There are times when you may want to recreate or unlink your Bitmoji from Snapchat, here's how you can delete your Bitmoji from Snapchat if necessary.
Share Your Bitmoji Classroom Through Teams
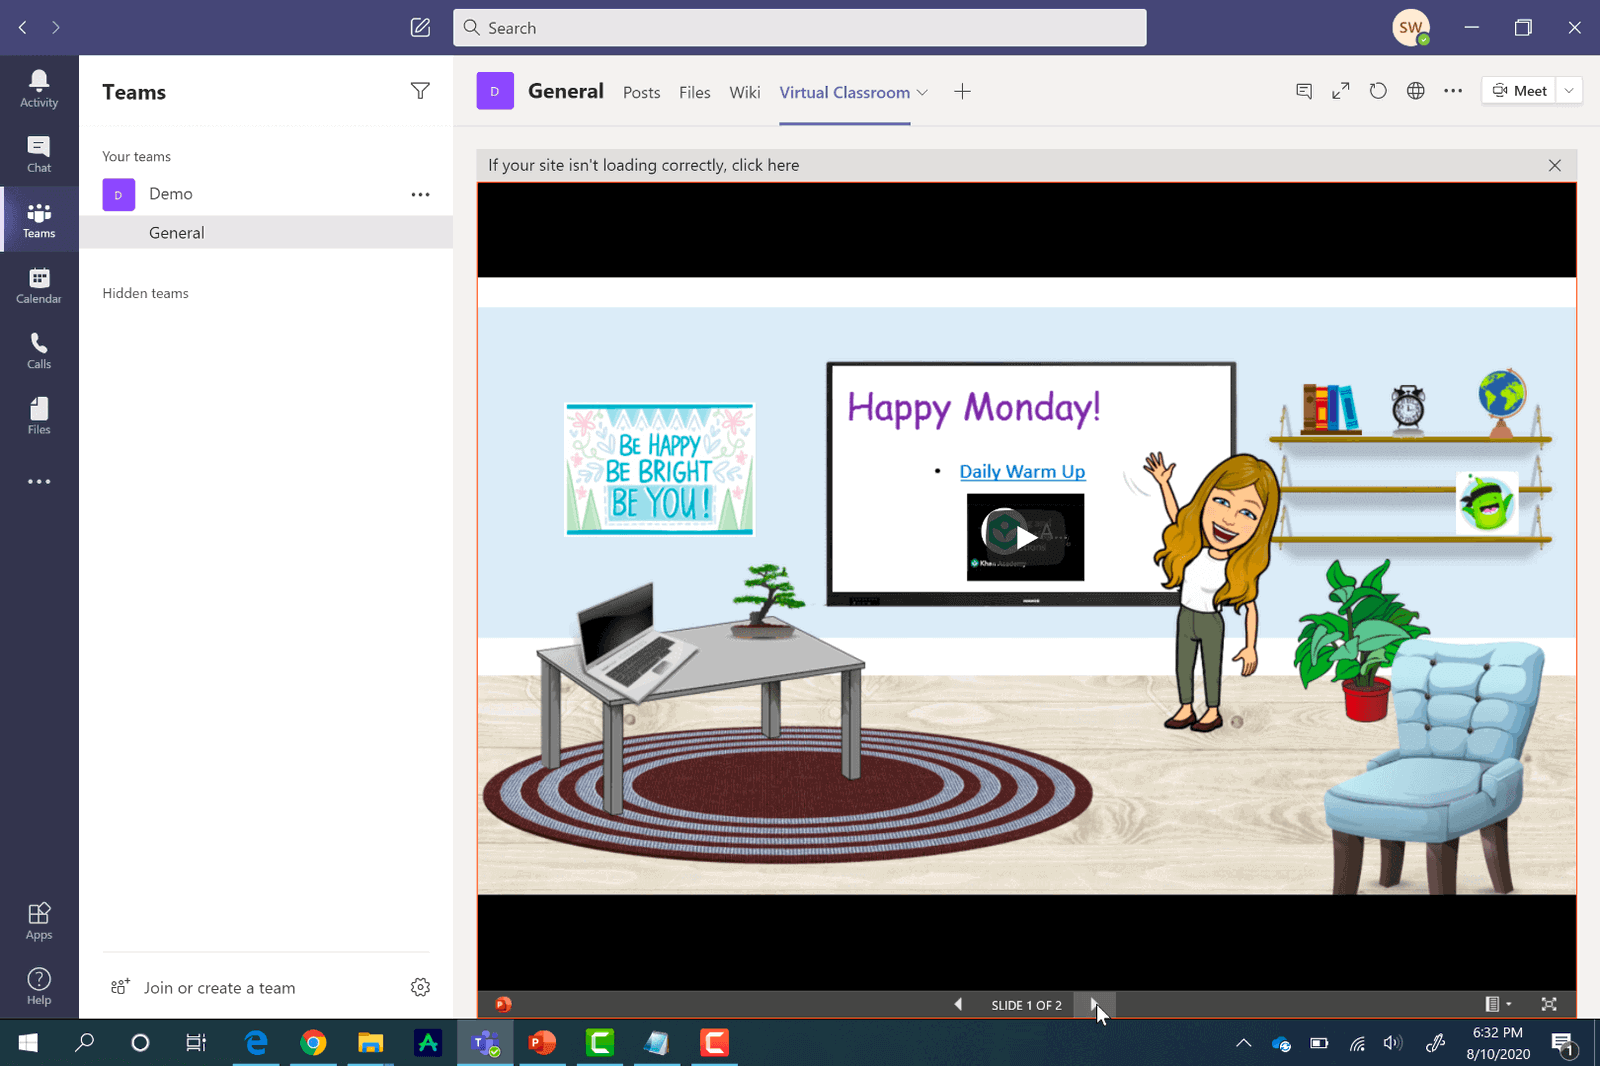
If you and your students are using Teams, you can easily share your Bitmoji classroom with them for easy access. You will need to create a shareable link to your PowerPoint slide so that your students can view it. From the top right-hand corner, click share, and get a website link. Create a view-only link and copy.

Before we do anything with this link, we will need to add some text to the end of the link. This text allows us to publish the link online. Open any text editor on your desktop, paste your link, then add this text to the end of your link:
&=&action=embedviewNow, copy that whole link and open up Teams. In your Class, under the General Channel, we are going to add a new pivot on the top ribbon. This will give students easy access to your classroom at any time. Click the plus button, and add a Website. Name the pivot “Virtual Classroom” or “Bitmoji Classroom,” and paste the link. Students now have access to explore your slide deck by clicking through all the interactive links.
If you are not a Teams user, share youtr Bitmoji Classroon with your students by pasting the link into an email and sending it to them.
Want more Microsoft Teams tips? Check out our other articles on using Teams for online teaching, Teams breakout rooms, assignments in Teams, Class Notebook, or a roundup of the best Teams tips and tricks.
For more expert tips, tutorials and free templates for interactive PowerPoint presentations, read this Expert Guide to Interactive PowerPoint, with free 60+ pages playbook for download.
Bitmoji Classroom in PowerPoint Review
Congrats! You have now created your very own Bitmoji Classroom. Hopefully, that was fun for you to make! To review, here is what you need to do to create your Bitmoji classroom:
- Start with a blank PowerPoint slide
- Add images to the slide to look like a classroom
- Place your Bitmoji on the slide by saving it from the Chrome extension
- Insert links and videos to your slide to make it interactive
- Share through Teams with the Website pivot on the General Channel
If you are looking for more PowerPoint Tips, check out our # Topic: PowerPoint below, and check out ClassPoint, an all-in-one teaching add-in for PowerPoint designed to increase student engagement & involvement during lessons and improve teaching with PowerPoint. Some of ClassPoint’s teaching tools include a random name picker, drag & drop slide objects, interactive student questions, and a gamified point system with stars & a leaderboard to motivate active participation during lessons!
