
PowerPoint animations are a great way to enhance your presentations and make them more engaging. With so many different animation options available in PowerPoint, it can be overwhelming to decide which ones to use and take hours to create the ~perfect~ slides. However, in this blog, we’ll explore four unique animations that are more advanced than the basic entrance and exit animations, but no less powerful, and just as easy to implement.
PowerPoint tools that will be covered in this template:
- 3D Models: We will start with using 3D Models to add depth and visual appeal to your slides.
- Morph: Next, we will add a Morph transition which allows you to create seamless transitions between slides. With Morph, you can animate the movement of objects, text, and even entire slides, creating a smooth and visually appealing presentation.
- Section Zoom: Then, we will add a Section Zoom to our slides to zoom in and out of specific slides within the presentation, creating a more interactive and engaging experience for your audience.
- Draggable Objects: Lastly, we will cover Draggable Objects which allows you to freely move slide objects around your PowerPoint during live presentation mode. You can convert any shape, text, image, or object on your slides into a draggable object, so that during your presentation, you can click and drag them around your slide.
Whether you’re a beginner or an experienced PowerPoint user, this guide will provide you with valuable insights on how to use animations to take your presentations to the next level. So follow along in the video below or keep reading to get started creating your dynamic and engaging presentations to captivate your audience.
3D Models
What are 3D Models?
3D models in PowerPoint are realistic, three-dimensional objects that you can insert into your presentations to enhance their visual appeal and effectiveness. These models can range from simple shapes and objects, like letters and icons, to more complex and detailed designs, like the inside of a cell and geology dioramas.
Use 3D Models to:
- Capture your audience’s attention and hold their interest longer.
- Illustrate complex concepts and ideas in a more visual and intuitive way.
- Create interactive and immersive experiences for your audience.
How to Implement 3D Models to Your Presentation
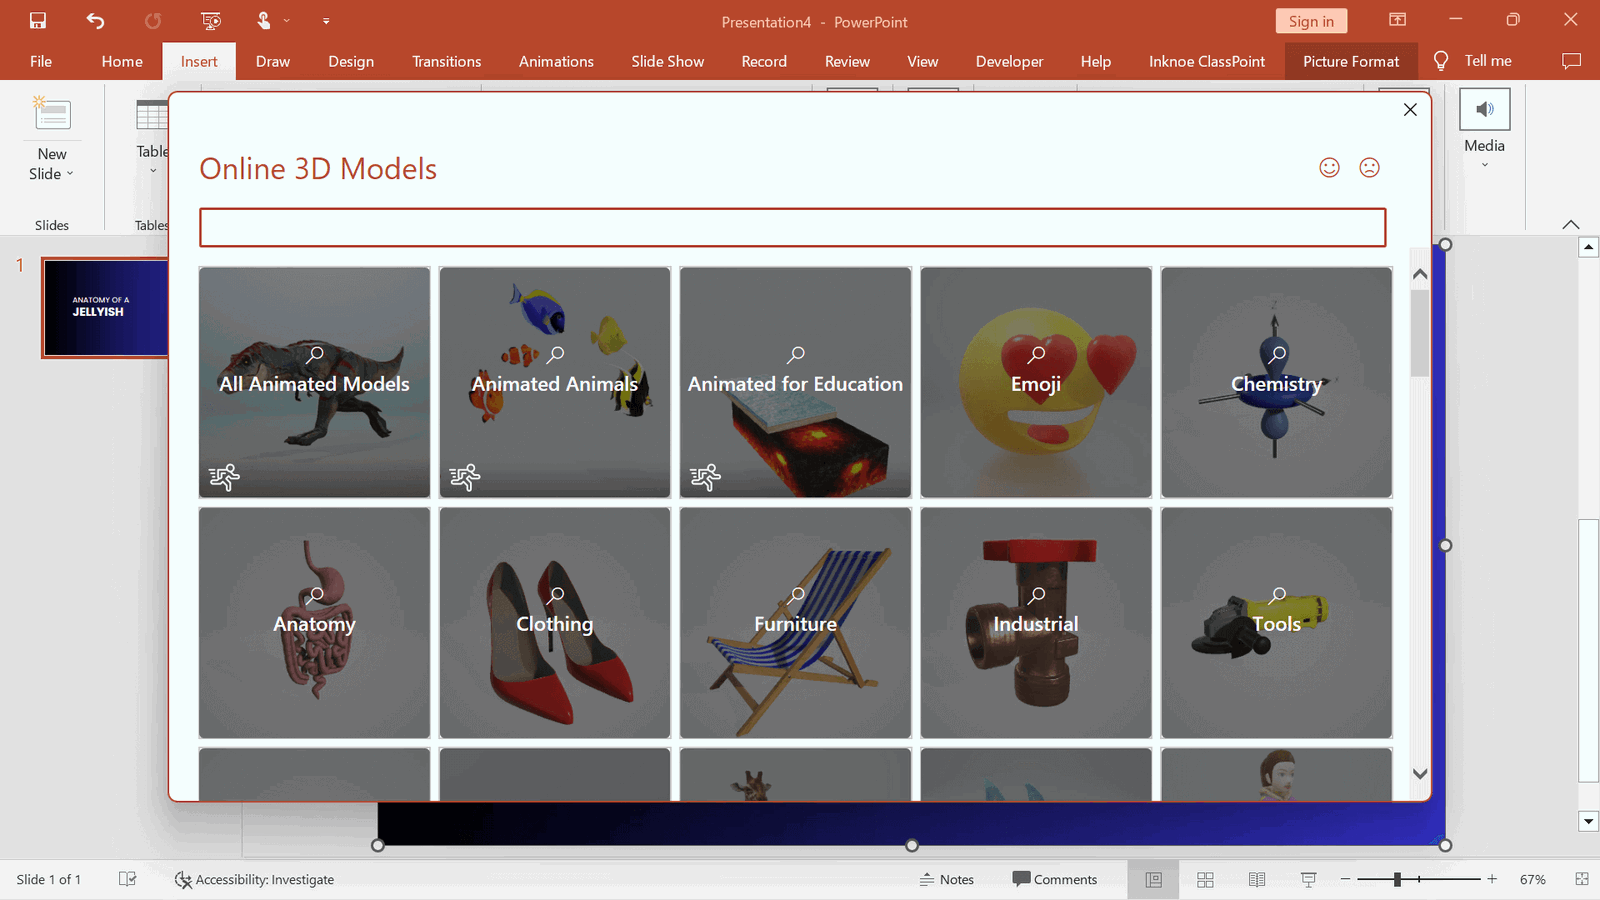
PowerPoint has a 3D Model library available for users to browse – no need to worry about creating your own! To add a 3D Model to your presentation:
1. Click on the Insert tab and 3D Models.
2. Browse the library of Models or Insert one from your own files.
3. Customize the 3D model by rotating, changing the scene, zooming in and out, or adding its own animations from the 3D Models Tools tab in the PowerPoint ribbon.
You can add more life to your 3D Model by copying the model onto the next slides in your presentation and adjusting its position. If you are interested in more information on 3D Morph animations, check out the next step or, follow this guide & video on creating 3D morph animations in PowerPoint.
Morph Transition
What is the Morph Transition?
The Morph Transition is a slide transition that analyzes the position, size, and shape of objects on one slide and then smoothly transitions them to a new position, size, or shape on the next slide. This dynamic and fluid effect is particularly useful for presentations that require a lot of movement or change, such as product demos, process flows, or timelines, but is also the simplest way to create a visually appealing presentation that will capture your audience’s attention.
Use Morph to eliminate complex animation sequences or manual adjustments, which can be time-consuming and prone to errors. With Morph, you can achieve complex animation effects with just a few clicks, making it a powerful tool for both novice and experienced PowerPoint users.
How to Implement Morph Transition in Your Presentation
Adding Morph Transition could not be easier! You only need to 1. click on the Transitions tab, then 2. click Morph! You will see a quick preview of the movement from one slide to the next with the morphing of your shapes or objects on one slide, morphing into the shapes or objects on the next!
For more information on how to use PowerPoint Morph animations check out this blog! It also includes different ways to use Morph animations such morphing a shape to move from slide to slide!
Slide Zoom
What is PowerPoint Slide Zoom?
Have you ever wanted to make your PowerPoint look more like a Prezi presentation? Instead of a normal linear movement of one slide moving to the next, create a look that your slides appear to be zooming in and out on each other to lead to more information.
PowerPoint slide and section zoom is a feature that allows you to do just that but without the confusing layout! Zoom in and out of individual slides or entire sections of your presentation, making it easier to navigate and present your content in a more dynamic and engaging way.
Use Slide Zoom in your presentations to:
- Help organize your content and make it more accessible for your audience.
- Highlight important information or emphasize key points, making it easier for your audience to understand and remember your content.
- Deliver your message with clarity and impact.

How to Implement Slide Zoom in Your Presentation
For how amazing this looks in your presentations, the setup is actually quite simple! Start your slide zoom process with these steps:
1. Create a “Main Slide” where your zooms will begin from. Think of this as the overview of your slides.
2. Create all your secondary slides. These are the slides that you will zoom to.
3. Back on your “Main Slide”, click on the Insert tab and Zoom, Slide Zoom.
4. Select all the slides you want to zoom to. This will add the selected slides to your Main Slide as a thumbnail.
5. Adjust your Main Slide design so that all slide thumbnails can be visible and fit your template.
6. Use the arrow keys to move through your slides in order, or click on any of the slide images to jump around to that exact spot in your presentation!
With Slide Zoom you can even add a transparent background or change the thumbnail image! Jump to 9:46 in the video at the top of the page to check it out!
Draggable Objects
What are Draggable Objects in PowerPoint?
Draggable objects are images, text, or shapes that you can freely move around your slide during presentation mode!
Draggable objects are similar to PowerPoint animations, except instead of a set path or movement, the presenter can unlock the object in its place and move it around the slide during presentations. This is done with the free PowerPoint add-in, ClassPoint, an audience engagement tool.
Use Draggable objects during presentations to:
- Create interactive slide material that commands attention, and intrigue, and increases your audience engagement.
- Liberally Demonstrate concepts and ideas in a more visual and intuitive way.
- Turn your slide into a drag & drop interactive class activity that encourages your audience to take an active role.
How to Implement Draggable Objects in Your Presentation
If you don’t already have ClassPoint, you will need to download the add-in, it’s free! Then you can amaze your audience by drag-enabling your slide material. Here’s how to drag PowerPoint slide objects:
1. Download ClassPoint at classpoint.io and sign up for an account.
2. Select the objects on your slide that you want to enable to be draggable.
3. Click on the Draggable Objects button in the ClassPoint tab of your PowerPoint ribbon.
4. Switch the toggle to drag enable the object in the Side Panel.
5. During the presentation, click on the Draggable Objects icon on the ClassPoint toolbar, which will appear at the bottom of your slides in presentation mode. Then click and drag your objects around the slide.
Draggable Objects make for a great teaching resource, try using them to help convey your ideas, interact more freely with your content, and better engage your audience.
Conclusion
PowerPoint is a powerful tool for creating dynamic and engaging presentations that can captivate your audience and help you communicate your ideas more effectively. By using features such as 3D models, PowerPoint Morph transition, Slide Zoom, and Draggable Objects with ClassPoint, you can create presentations that are visually appealing & interactive, and content that truly resonates with your audience.
If these four PowerPoint PowerPoint animations aren’t enough and you want more, there are so many more PowerPoint animations, you can check out to spice up your presentations.
And, if you are just learning about ClassPoint for the first time, be sure to check it out! ClassPoint adds an array of presentation tools designed to improve the experience of presenting in PowerPoint AND improve your audience engagement! Some noteworthy tools are the random name selector, the added whiteboard tools, and the audience response questions that will instantly involve your audience.
Drag Slideshow Objects in PowerPoint!
Try this non-animation presentation hack and interact with your slide objects! It’s free with the PowerPoint add-in ClassPoint.
