Open Broadcast Software (OBS Studio) is the most capable, easy-to-use video and screen recording software for teachers. Use OBS to record your screen for quick clips to help students, to make supplemental learning material, or use it to record your screen and yourself to share online lessons and reviews with students.
When trying to screen record on Windows, there are many different solutions out there, but OBS is free, with no ads or watermarks, making it the best option for both quick screengrabs and longer recorded classes. Plus, it works on both Mac and Windows devices. Below we have the steps to show you how to record your screen and how to add video and audio to your recording.
Getting Started with OBS
To use OBS, head to obsproject.com to download and install first. Choose the downloader that is compatible with your device.
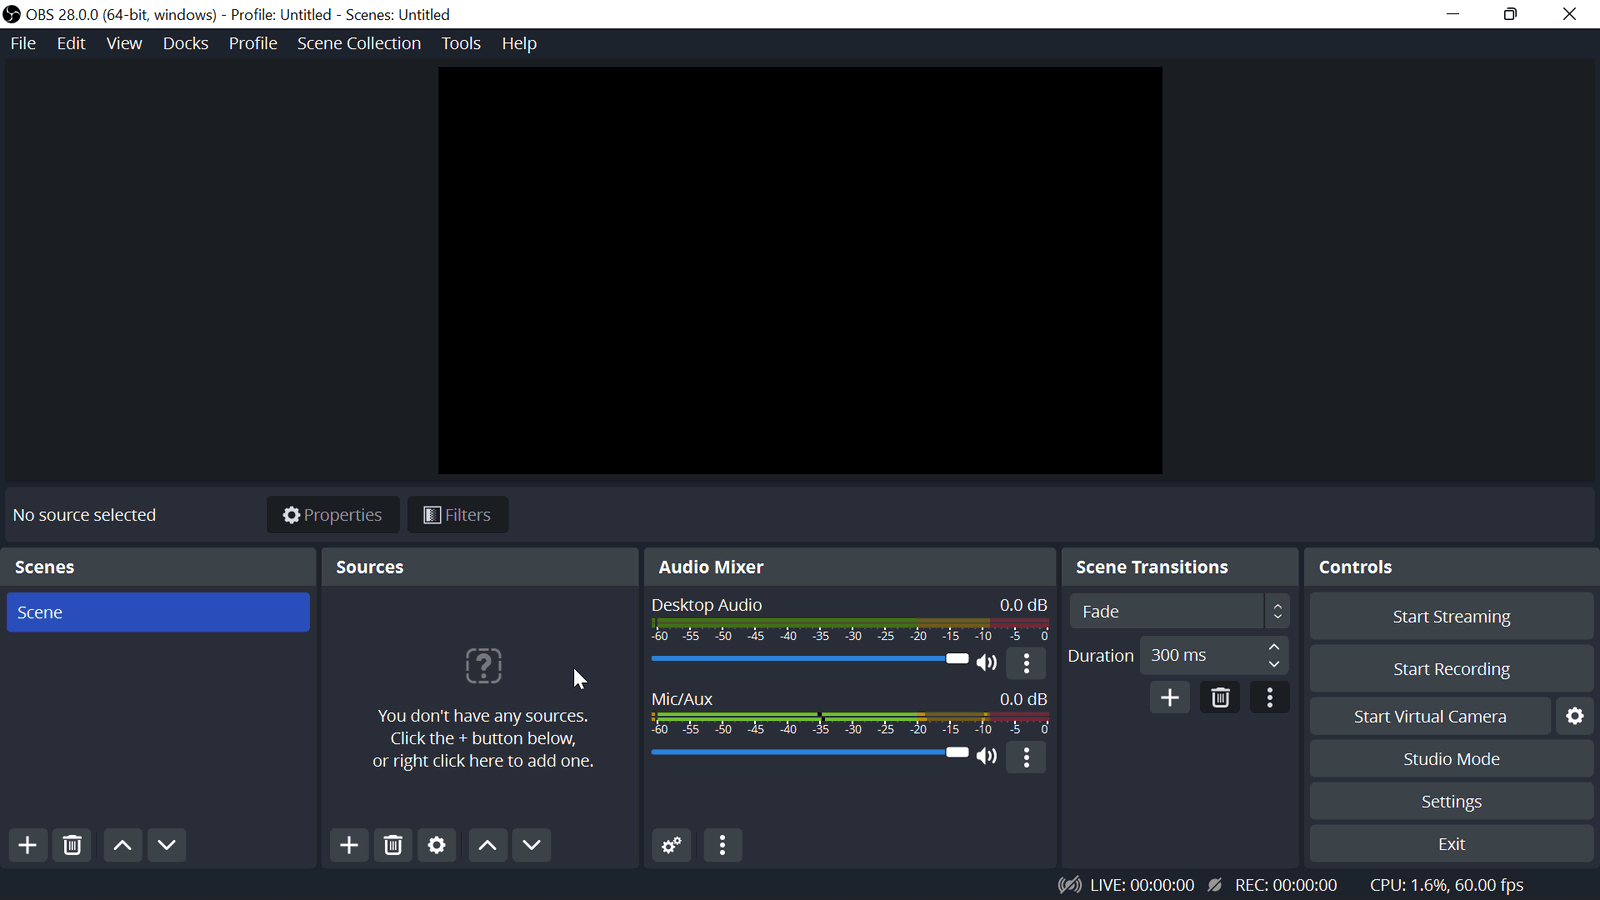
When you open OBS for the first time, you will see the black project canvas in the middle. This is where you will be able to view your recording. To make your recording, OBS has both scenes and sources, found in the tools below the project canvas.
What are OBS scenes and sources? Scenes are screens you can switch between when you are recording. Each scene is comprised of multiple sources, like audio, video, and screen recording. For example, I can have a scene, named Lecture, that is made up of three sources: a screen recording, a microphone, and a webcam.
How to Screen Record on Windows with OBS
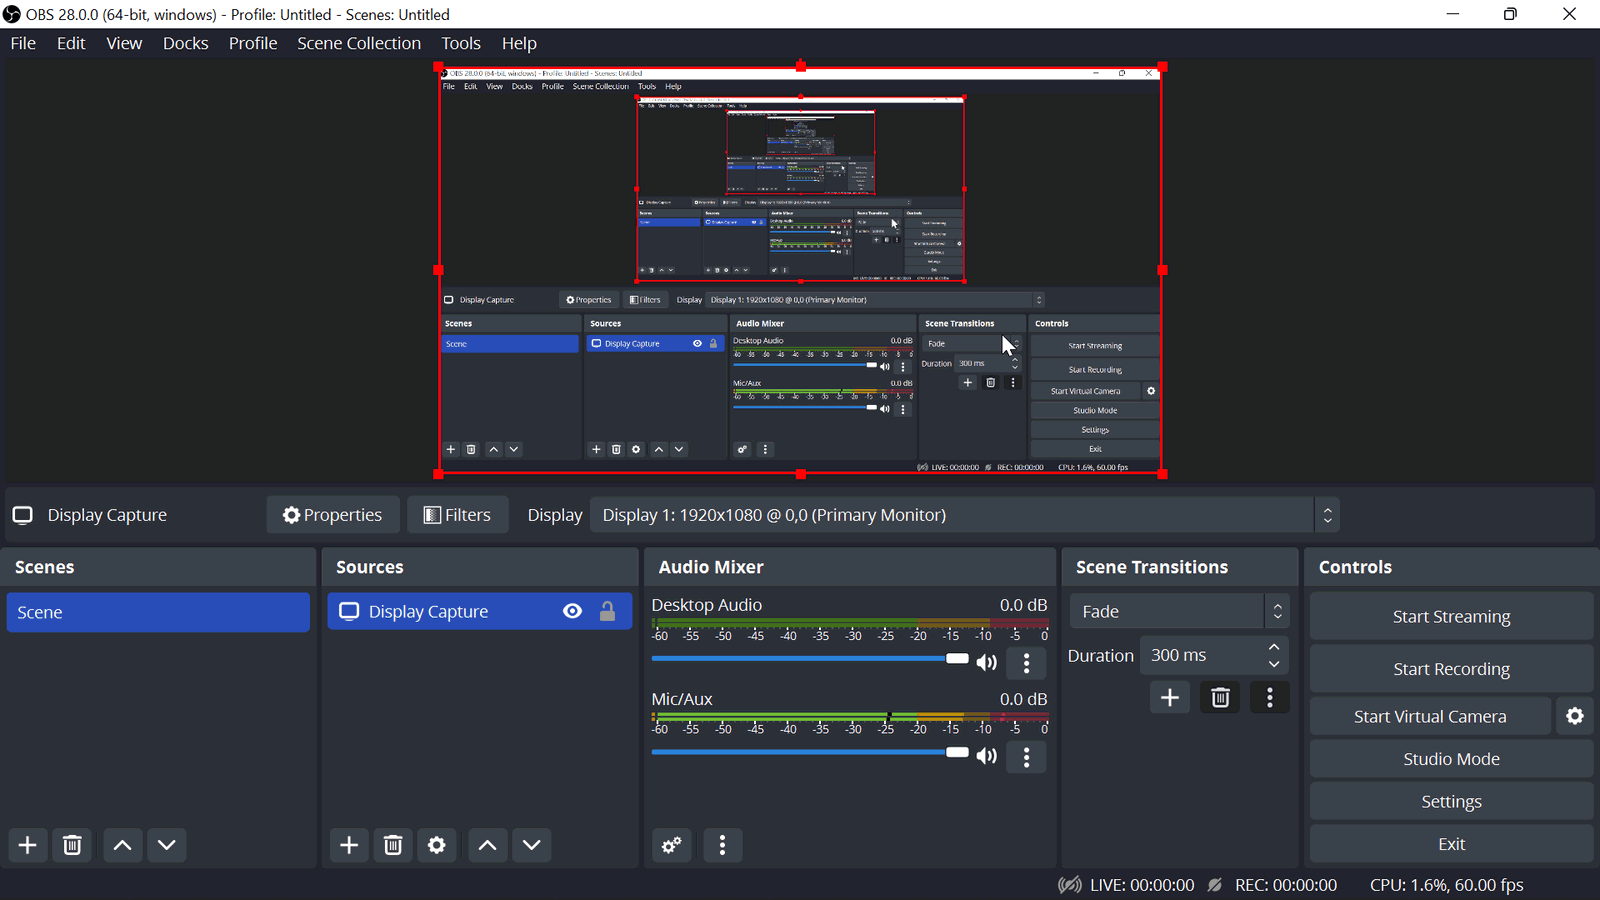
To record only your screen, we only need one scene and one source: the display capture. Click the + button under the Source menu. Find the option that reads “Display Capture.” You can provide a name and select the full-screen window. On your project canvas, you will see a preview of what will be recorded. Move the screen recording to fit the whole project canvas so that your audience will be able to watch on full screen.
Now, your recording is set up and ready for you to record. If you do not want to record any other audio or video, you’re all set and can begin recording by clicking Start recording. When your recording is done, just click Stop back in the OBS window.
However, many of you might want to add video, and at least audio, to your recording so that viewers can have more information on what they are seeing.
How to Record your Screen with Audio and Video
Record your screen, record your voice, and yourself all at once with OBS. To do this we will add each of those as a Source.
Add Microphone
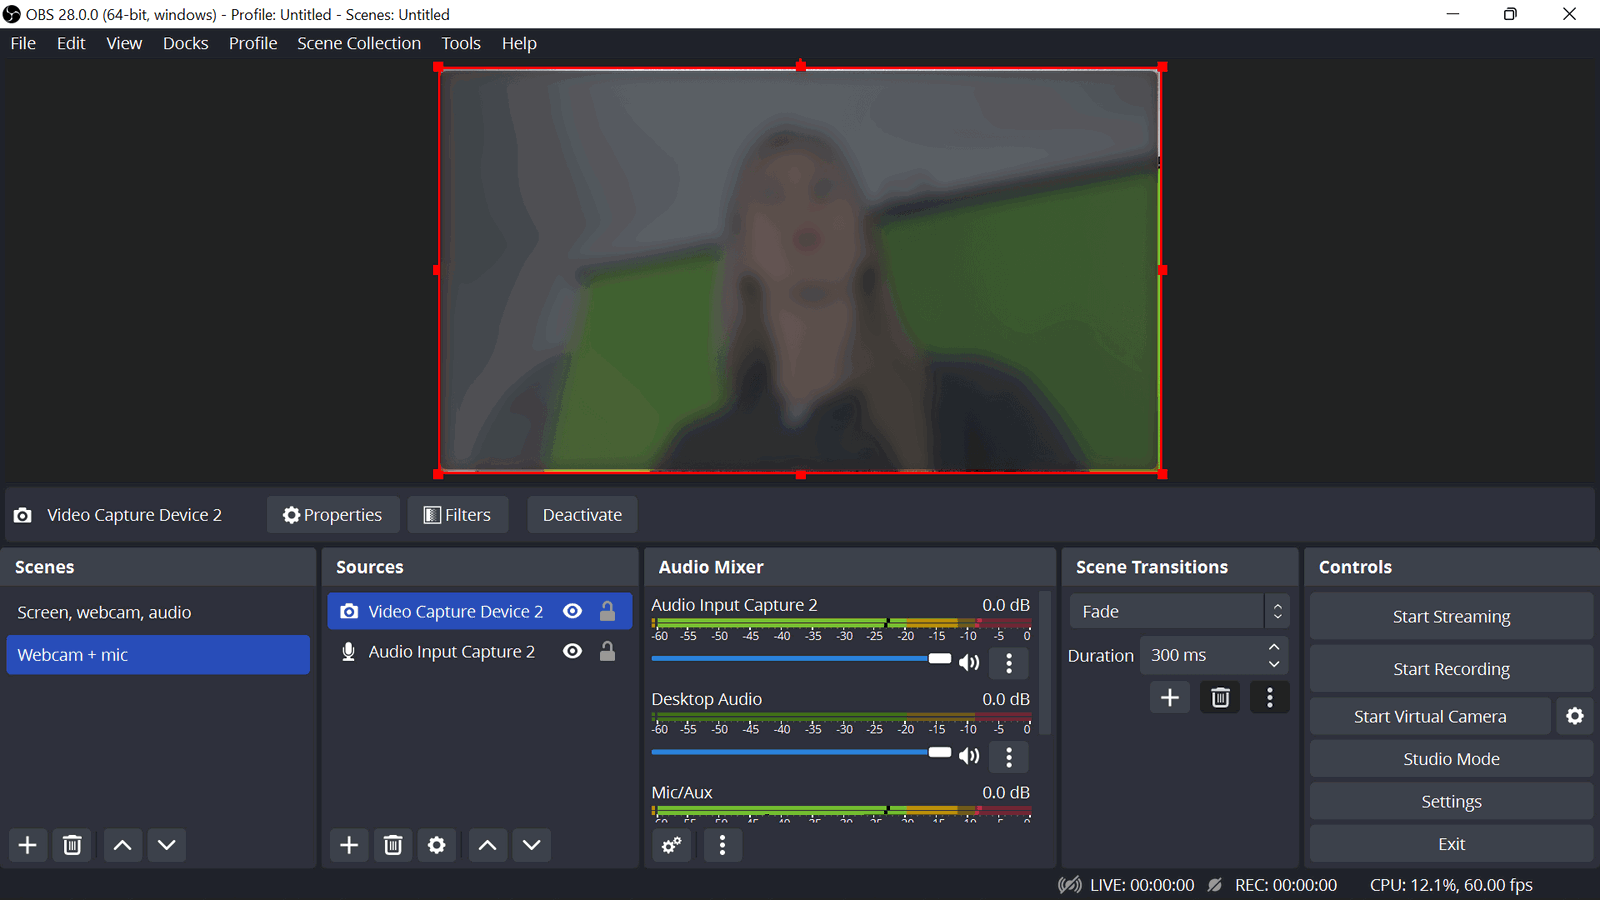
Click the + button under the Source menu and add your Display Capture, Audio Input Capture, and Video Capture Device. When adding the audio, ensure you select the correct device listed that you want your audio to come from. In most cases, you will likely use the default mic, unless you have an external mic to use.
Test your mic before recording by speaking and seeing if the audio bars, next to the Source box on the OBS main page, move to your voice. If the bars are moving, this indicates your mic is working and picking up sound. If you do not see the bars moving, check your connection or go back and edit your device to one that is fully connected.
Add Webcam video
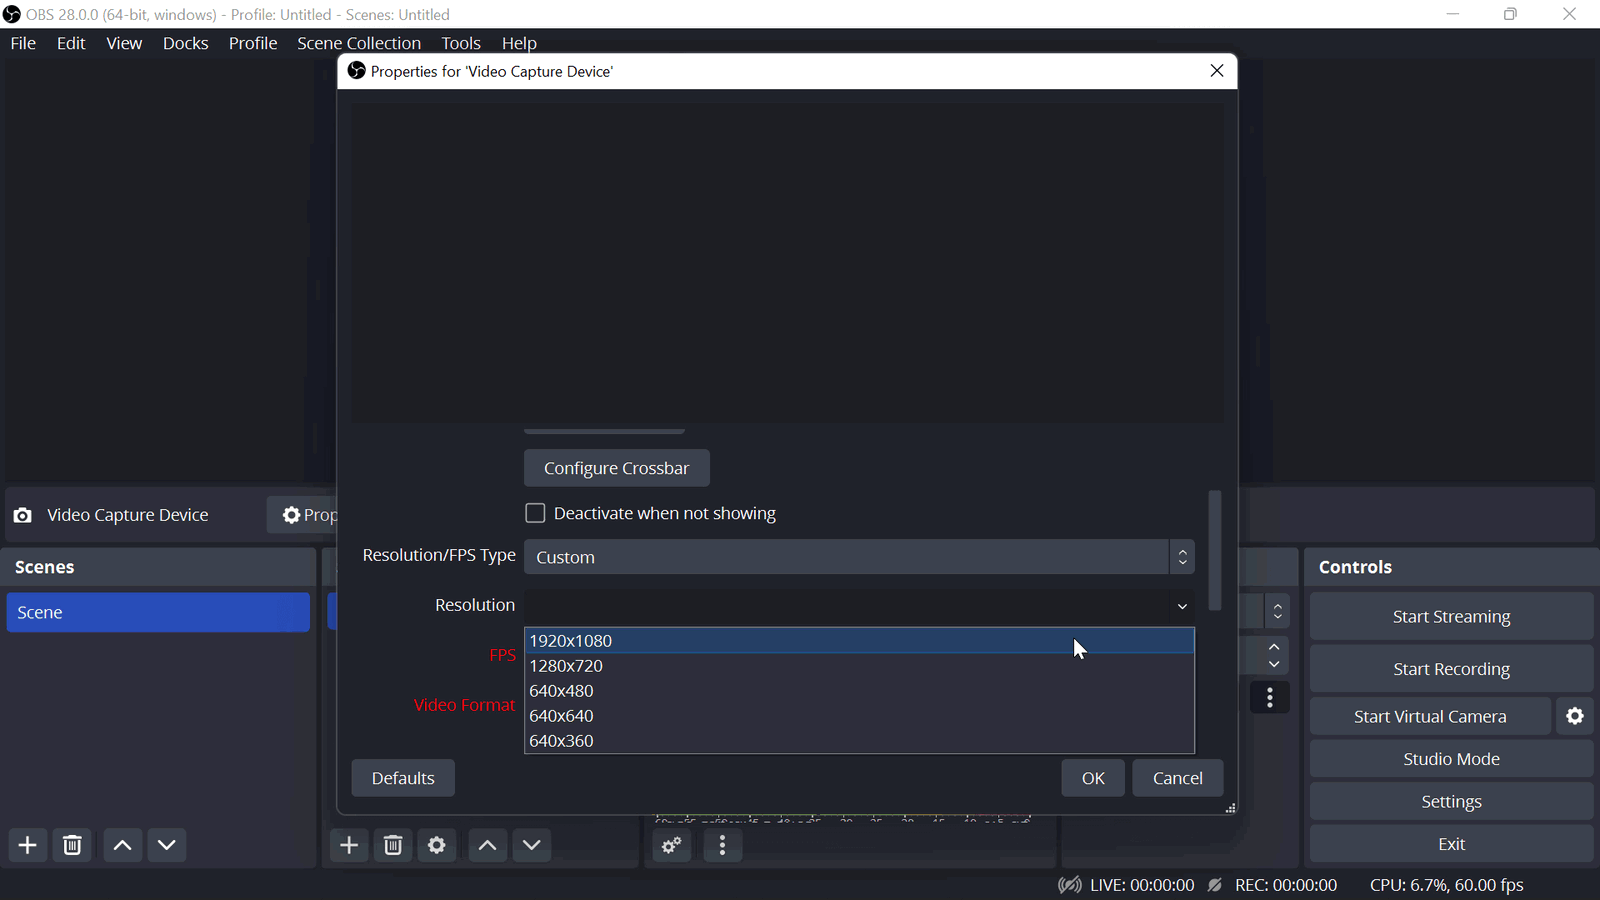
You can begin recording the audio at this stage, but maybe you want to add a visual of you speaking from a built-in camera or external webcam to the recording. To do this, select the Video Capture Device from the Source list, and set the resolution and aspect ratio that’s best for your layout. I tend to stick to Full HD and 16:9 for the best output. Adjust the webcam view on the Project Canvas so that it is not covering up too much of your screen recording for your audience.
Now, all the sources are set! Begin recording with the Start Recording button on the far right of the OBS menu.
How to Access your Recordings
After your recordings are complete, you will need to share them with your audience. In the Settings menu, click Output, then Recording Path. This lets you know where OBS has saved your recordings for you to access.
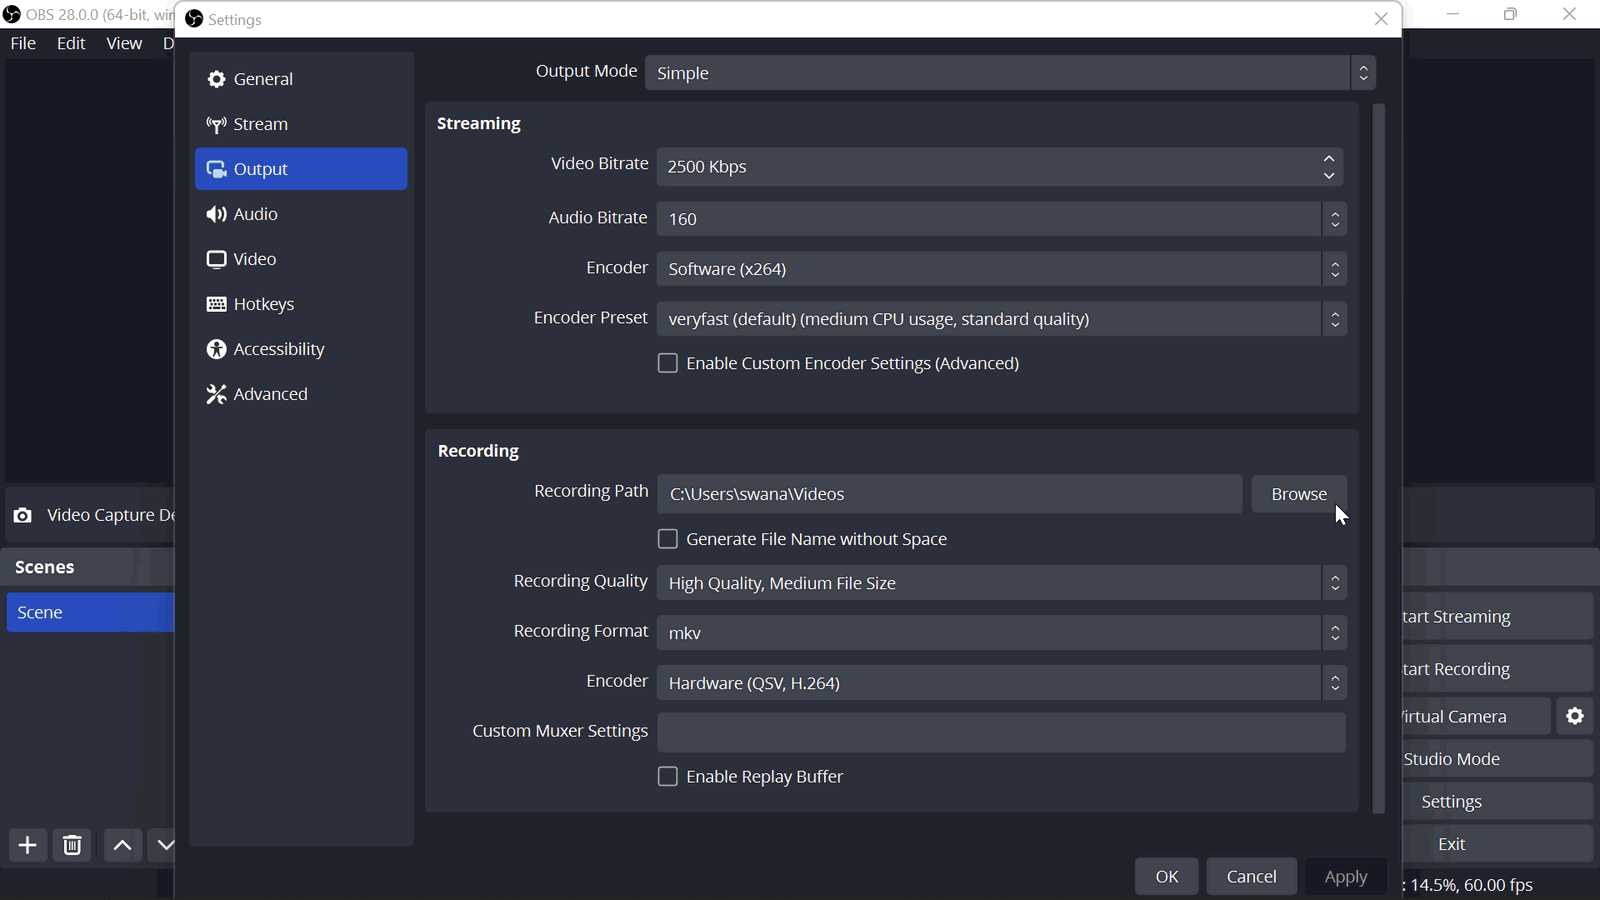
By default, OBs saves recordings as a fvp file. This is because if OBS or your computer were to shut down, everything up until that crash point will still be recorded. With a more familiar mp4 file, recordings before the crash point would be lost. To edit this file, or upload it, you can easily convert this fvp file to an mp4 right in OBS.
In the File menu, click Remux. Find the saved video you want to convert and click Remux. Now, back in that saved file location, you will see a new mp4 version of your recording.
How to Create Multiple Scenes in OBS Studio
Using multiple scenes in a recording is great for switching between a full-screen webcam view of yourself speaking, and your screen recording. This can help split your video into sections, and keep your viewers focused, especially if you are making a longer video. For teachers, this is a great tool for welcoming and introducing the topic with just your face, and then switching to a PowerPoint or Whiteboard application with your face in the corner when you begin instructing.
To do this, follow the steps above for adding in your sources to record your screen, audio, and video. Then, give that Scene a name (ie. Lecture) in the Scene menu box. To create a new scene, click the + button and give it a new name (ie. Teacher). Now, you can go through to add the sources to this new scene, like a webcam and microphone.
If you have created more than one scene, you can switch between them while you are recording! To do this with shortcut keys, read the tips in the next section.
OBS Studio Tips
- Achieve the best output for your video. Click the Auto Configuration Settings. Then check to have full resolution and 30 to 60 fps (frame speed). Then you can check to have the Optimal Settings.
- Set Hotkeys. In the Settings menu, click Hotkeys. Then, set a shortcut for your most common OBS actions. I recommend setting one for starting and stopping the recording and switching between scenes. Use keys that are not common (ie F7, CTRL 9) so you do not accidentally hit them.
- Use Audio Filters. Improve your audio quality with the noise suppression effect when setting up your audio capture.
OBS Studio FAQs
What do I do if I do not see the Display Capture populate the project canvas?
If your screen recording does not populate to the project canvas right away, check the graphic settings on your device. Type “graphic settings” into the search bar on your Windows toolbar. Then find the C drive → OBS → program files → OBS → bin → 64, bin and click the high performance or power saving (high for gaming) option.
What is OBS? Is it safe to use?
OBS is an open-source project, meaning the programming code is open for anyone to look at or improve, so you can see exactly how it works. Changes to the code are reviewed by other OBS contributors, so no one can add anything malicious. Always download OBS from their website to ensure you are receiving the safest & latest version.
Now you can record any lessons or short screen grabs as you need quickly and easily. OBS Studio is not video editing software, so to adjust any of your clips, we love using Camtasia to edit and trim videos. Let us know if you have any questions below and we would be happy to help you guys become better experts!
