Take full advatage of Microsoft Teams and its many features. Because of all features Teams offers, it is a powerful tool to be using in the classroom or for meetings. But with more features, means more time spent learning the tool. With these 15 Microsoft Teams tips and tricks, you will be put into the fast lane to making the most of your Teams experience. Below, we’ve listed the best (& easiest!) Teams tips for before, during and after a meeting to help transform your classroom without changing the way you teach.
Microsoft Teams Tips for Before Class
Tip 1: Hard-mute attendees
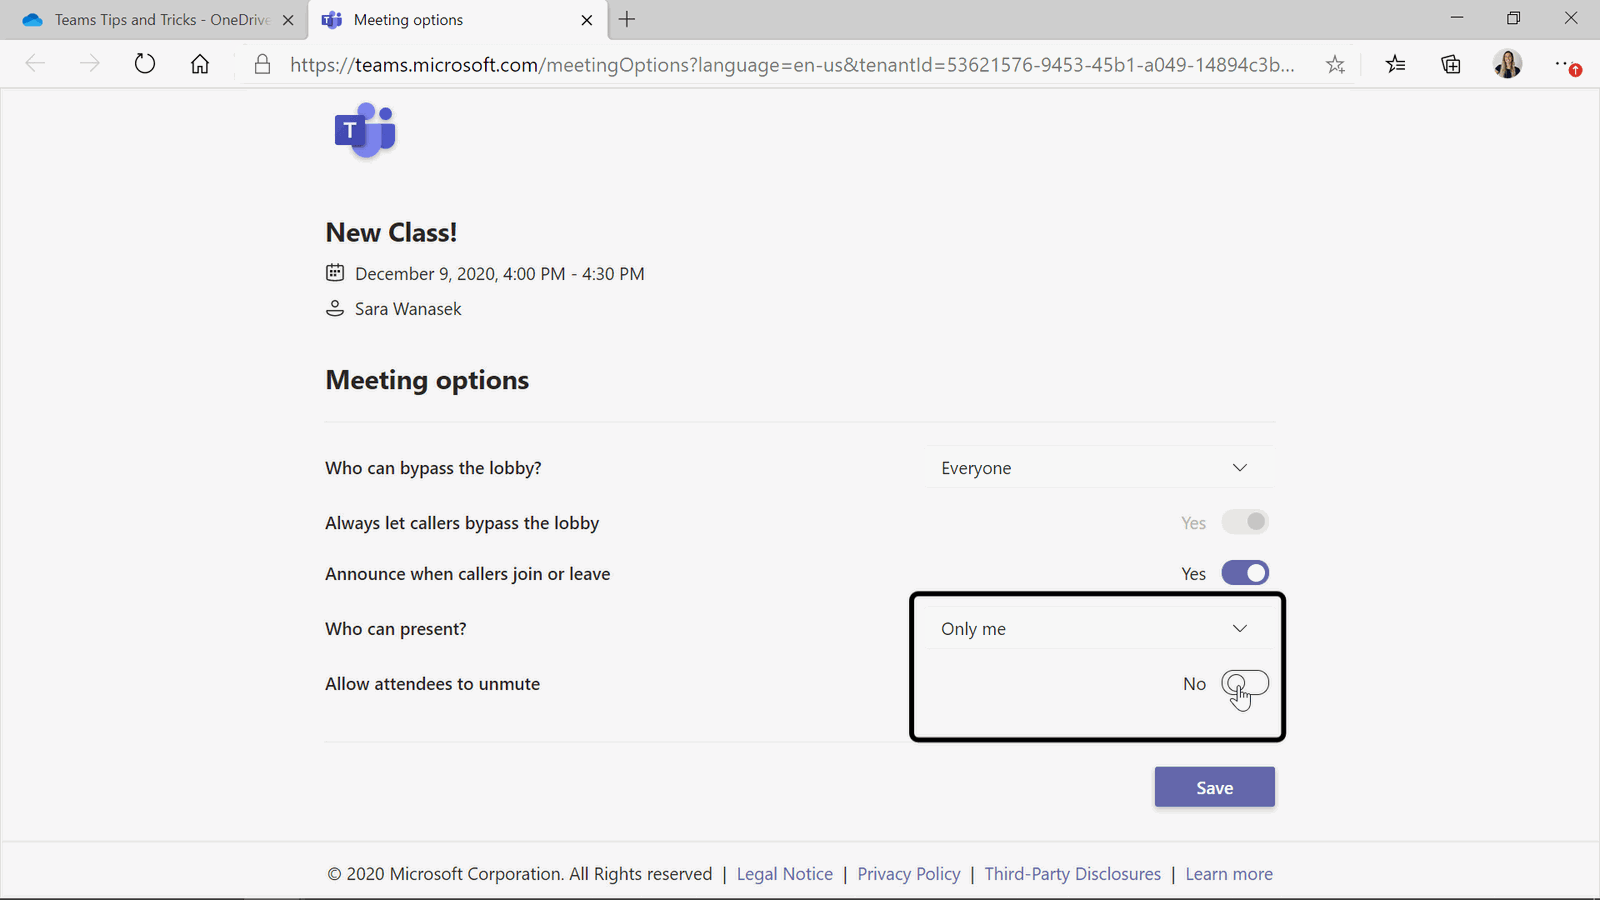
To ensure that students do not unmute themselves, change your meeting settings.
To do this you must be the meeting organizer. Edit your upcoming meeting, and click on the Meeting Options. A new window will pop up with customizable options. Switch “Allow attendees to unmute” to “No.” Then, set who can present to “Only me.”
Quick Tip! Control+Shift+M to quickly mute and unmute your mic.
Tip 2: Set specific people to Present
If you have a co-teacher or a student you know will be presenting in class, you can set up your meeting so that only that person is allowed to share their screen. In the same Meeting Options dialog as in Tip 1, you can set the exact participants that you want to share.
Tip 1 & 2 can be conducted during your meeting as well! During your class, on the top toolbar, click the "..." (More Actions button) and then Meeting Options. You can then change your mute and presenter settings.
Tip 3: Don’t allow students to start class without you
Right now in Teams, if students are invited to your class, they are able to join the class and begin it at anytime. To avoid this, change your settings so that you are the only one to begin class.
To do this, edit who can bypass the lobby. This way, students cannot be in the meeting without your permission. In the same Meeting Options as in Tips 1 & 2, change “Who can Bypass the Lobby” to only you.
Tip 4: Disable the chat feature for your meetings
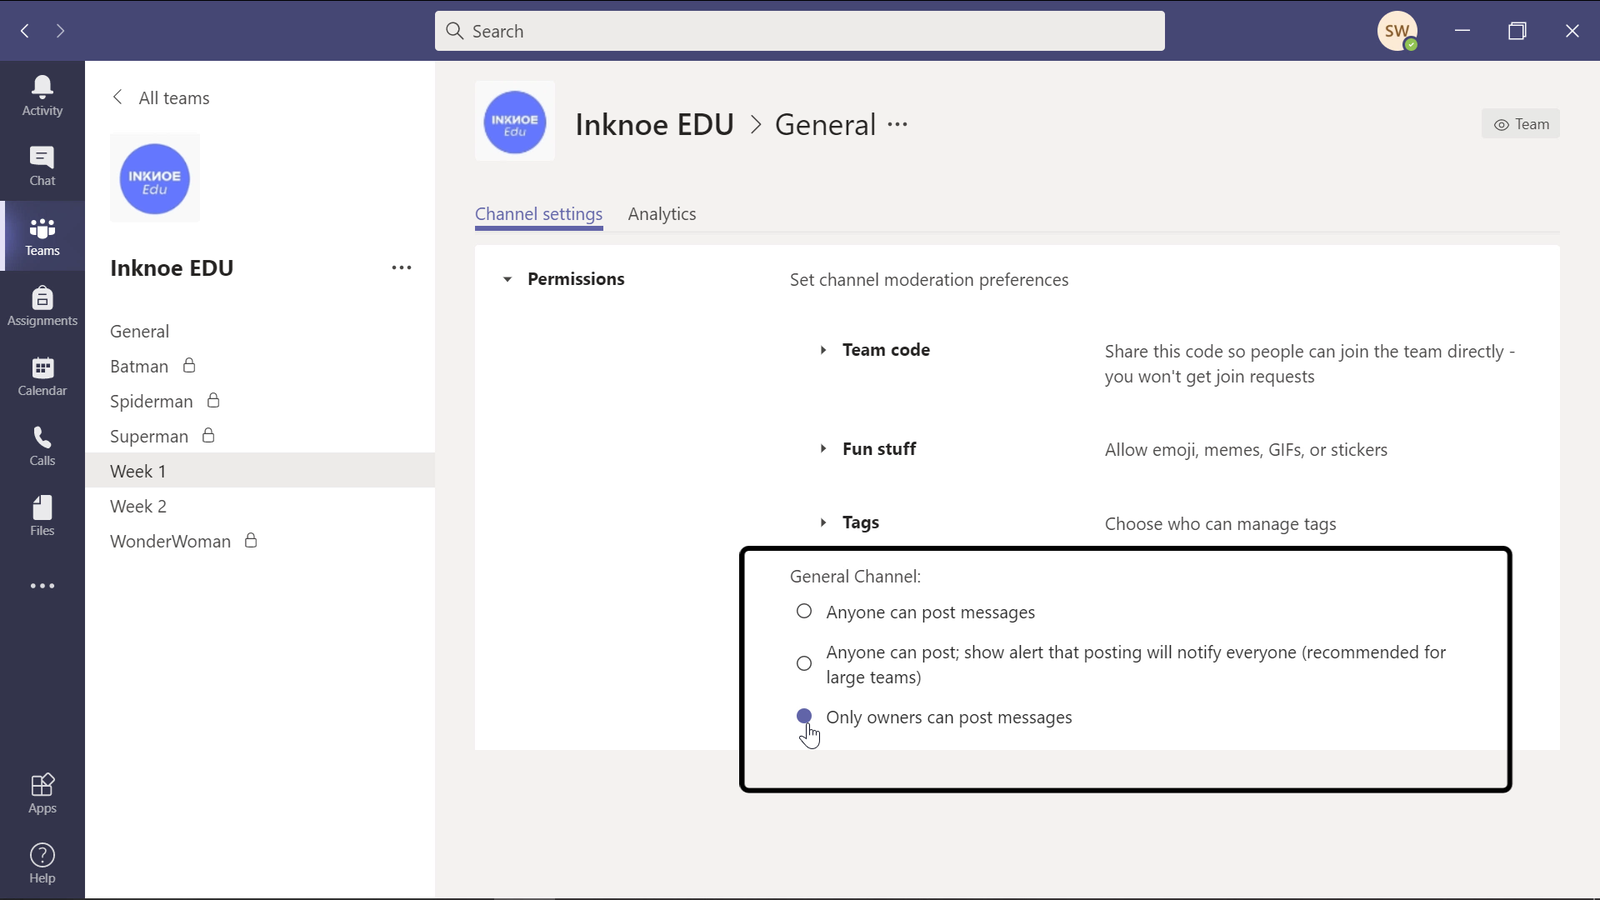
Some teachers want students to be fully concentrated on the class, even if that means not allowing the chat to be open.
To disable students the ability to type in the chat, head to your Channel Settings. Then click on Manage Permissions and check the box so that you are the only one to post messages.
Tip 5: Turn on noise suppression
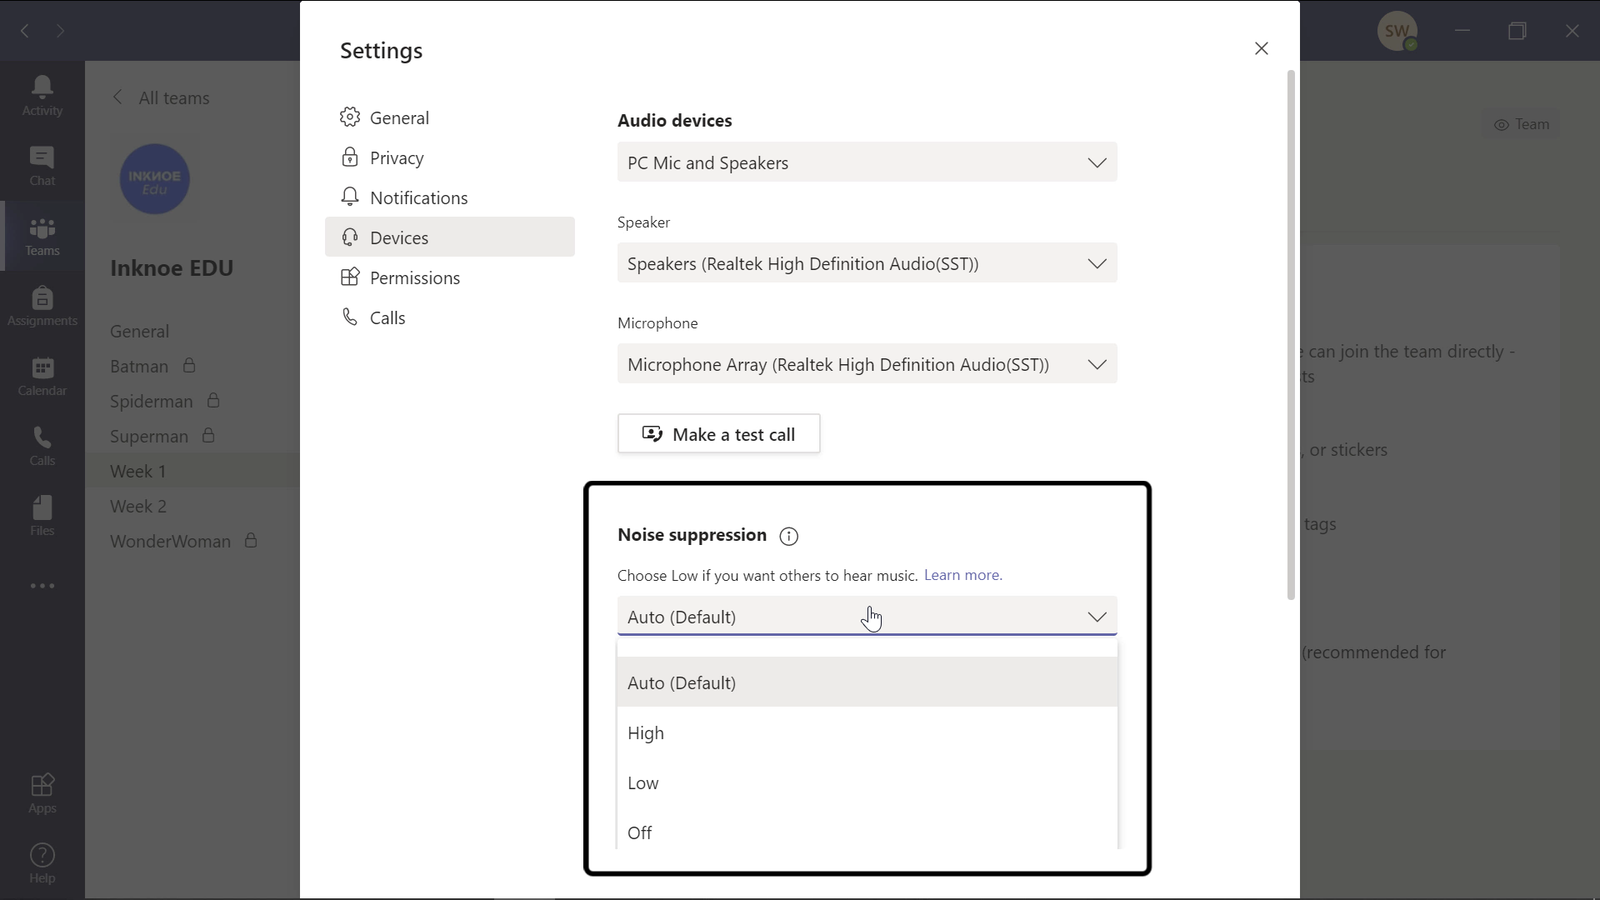
The noise suppression feature of Teams removes background noise during your meeting.
In your Profile, head to Settings, then Devices. You will see a box for the level of noise suppression you prefer. The high setting will block out all noise around you, however, it does take up quite a bit of your computer resources. The low setting will be enough to block out the dogs barking, sirens, or any fans you have in your room.
Microsoft Teams Tips for During Class
Tip 6: Use the Spotlight feature
The Spotlight feature of Teams allows you to highlight a particular participants’ video. If you want your students to focus on solely your video instead of viewing everyone in class, you can spotlight your video. This way, students see your video in full screen.
Students are not able to spotlight themselves or other people, but teachers can select a student’s video to spotlight if they are doing a presentation. To use this feature, open the Participant tab during your meeting. Then if you right-click, or click on the “…” on your name or a student’s, you can choose ” Spotlight.”
Read this next: 5 Pieces Of Advice For More Engaging Online Teaching
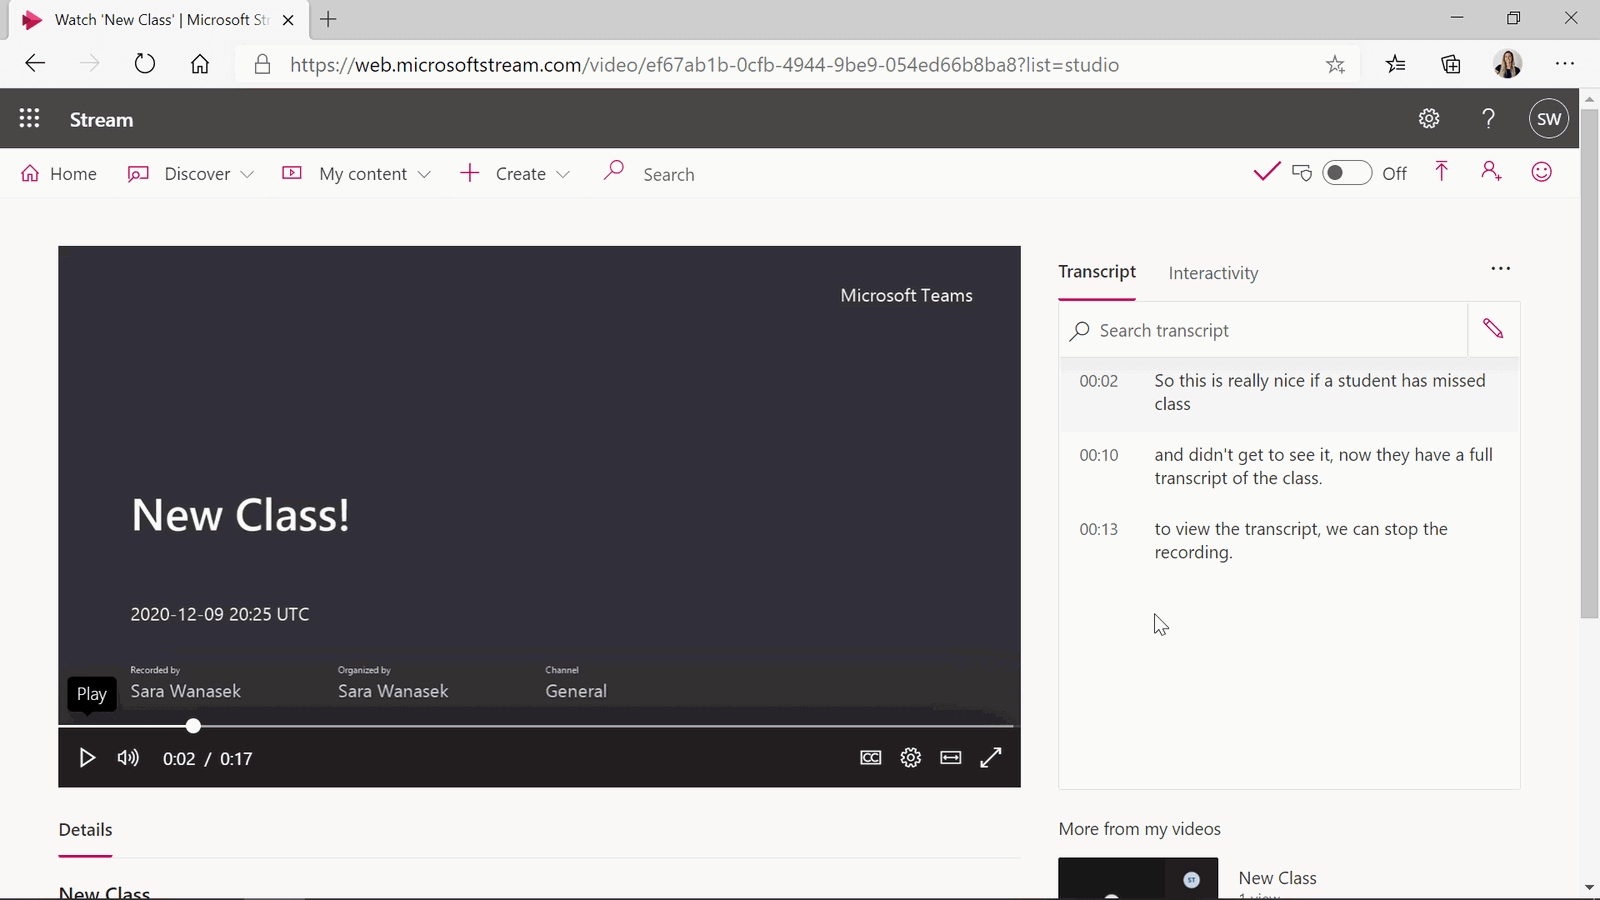
Tip 7: Get a transcript of your class
If you would like a transcript of class for yourself or for any students that have missed class you can now do so in Teams!
First, your meeting must be recorded. Then, you can download and open it in Microsoft Stream. From there, you are able to view the transcript and edit any mistakes for a more accurate transcription.
Tip 8: Turn on live captions
If you or your students do not have a strong network connection, your audio might cut in and out. To help with this, turn on live captions. This will add captions to the bottom of the meeting of whatever is being spoken.
Your students will be able to see what you are saying along with hearing. In the More Actions button (“…“) click to turn on the Live Captions. As of now, English is the only supported language.
Tip 9: Download the attendee list
To track your student’s attendance, download a report that tells you exactly when students entered and left your class. This report must be downloaded before your meeting ends!
To download, open the Participant tab, and click on the “…” Then click to download the attendance report as you an Excel document. After the meeting has ended, only your IT department will have access to the report.
Tip 10: Use Breakout Rooms
This feature of Teams has been much anticipated by so many teachers. Using Breakout Rooms allows you to easily split your class into different groups for students to discuss and collaborate with each other.
To use this, go to the Breakout Room icon on the top toolbar and choose to split your class Automatically or Manually.
Microsoft Teams Tips for After Class or Anytime
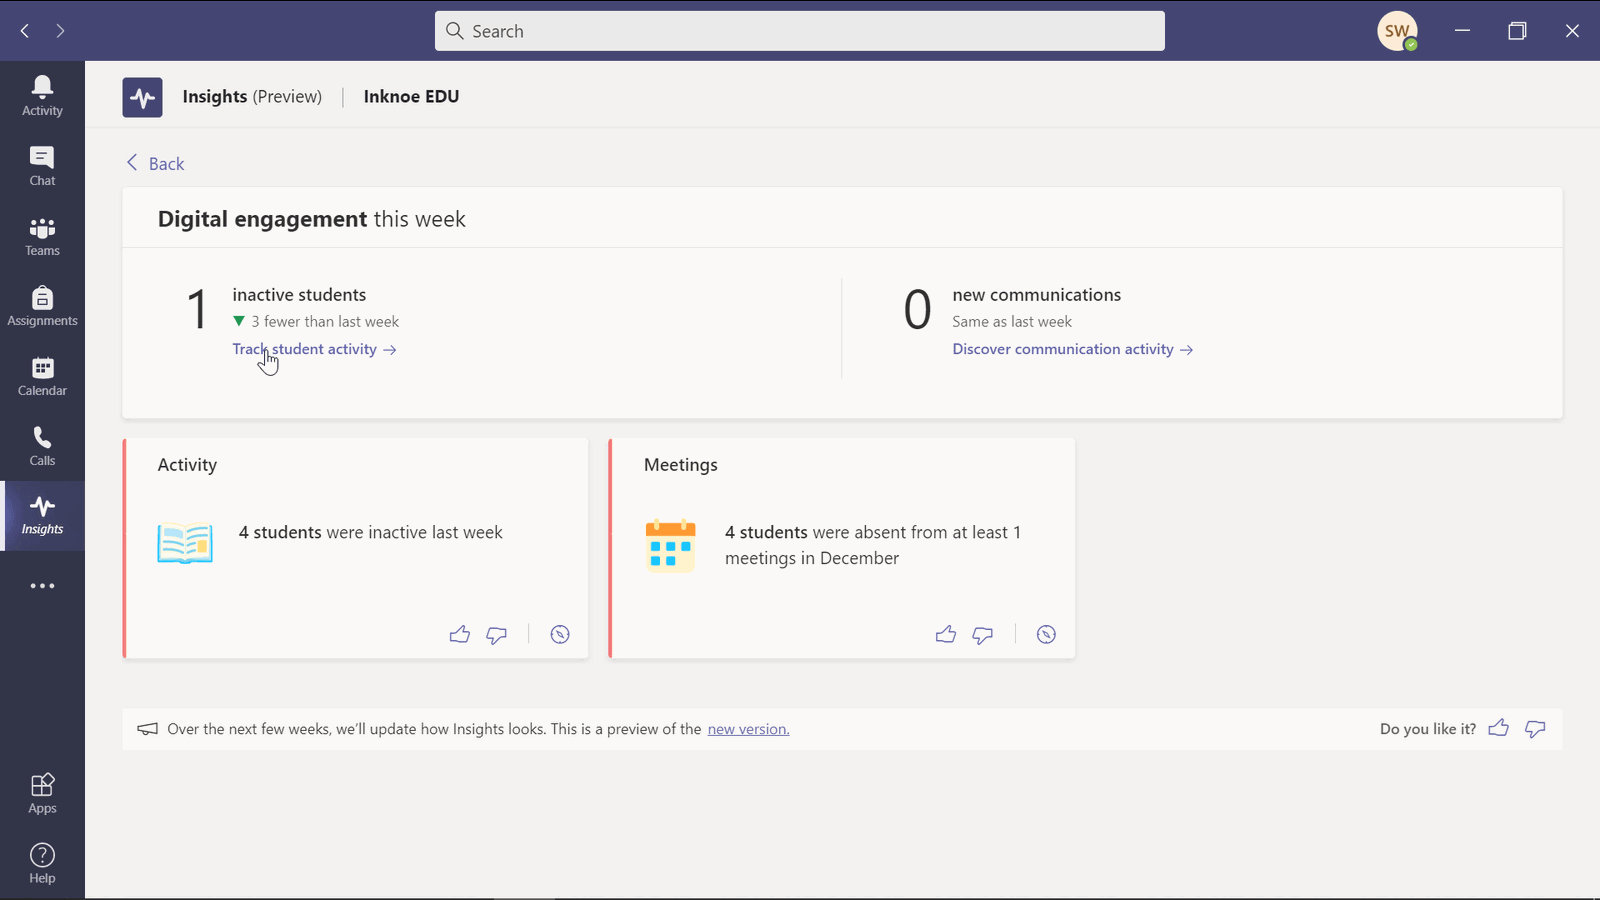
Tip 11: Check out the Insights tab
To further analyze how your students are utilizing teams, check out the Insights tab.
Within Insights, there is a dashboard to view students’ activities. You can view how active students are, where they spend most of their time, and which assignments troubled them the most. This is so helpful to see how your students are doing in your class. Filter these insights by student names, date range, or specific activites.
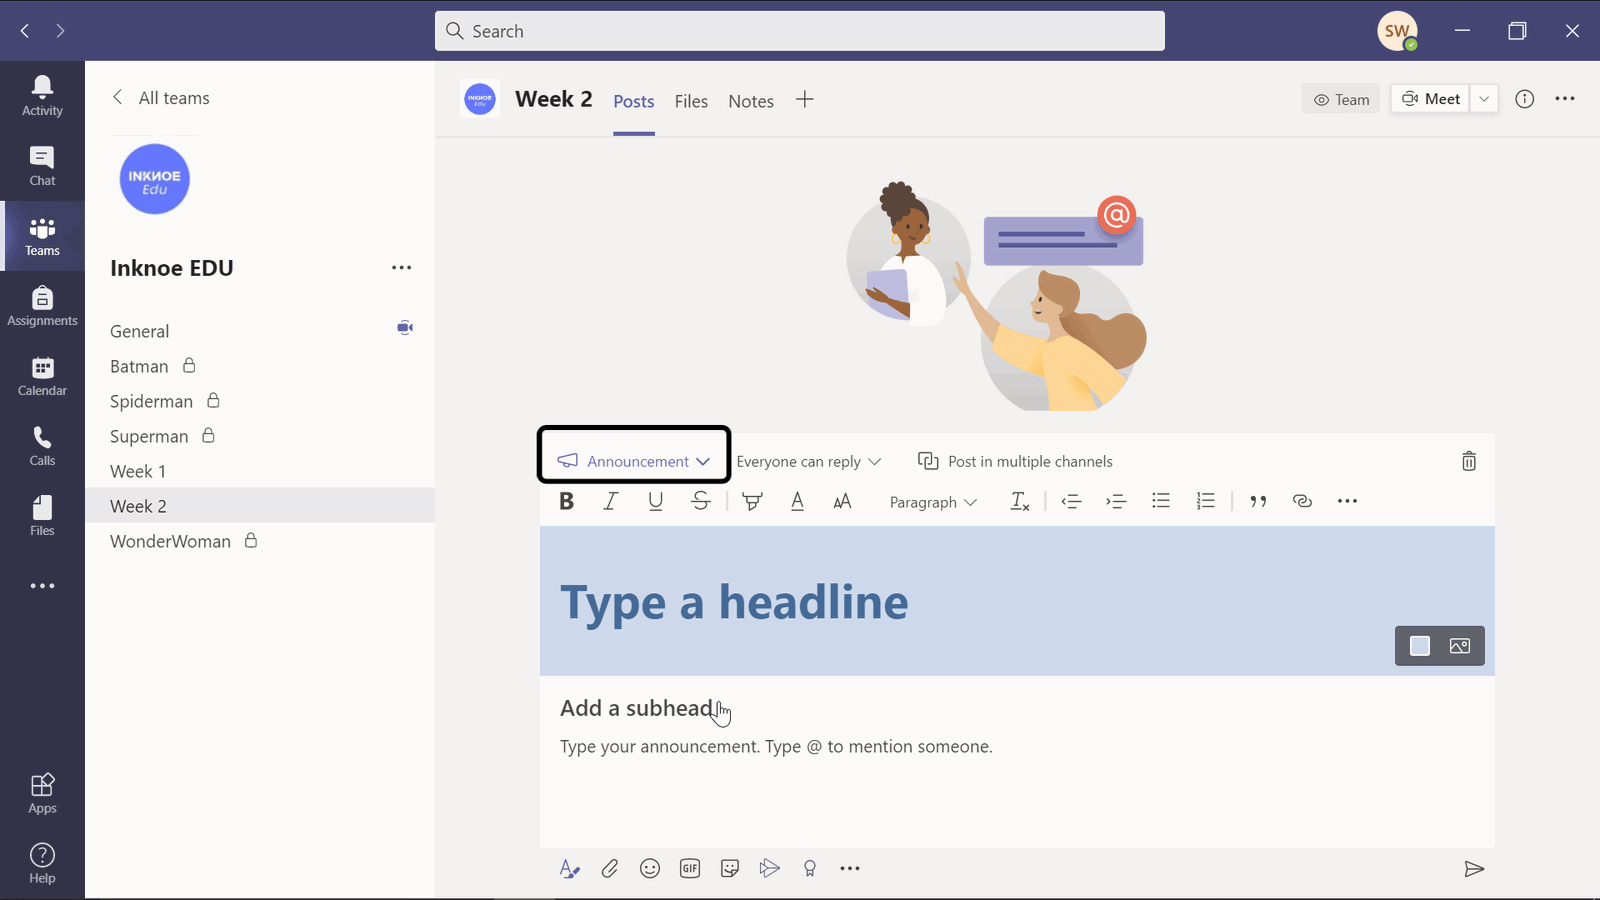
Tip 12: Post an announcement
To highlight an important post in your channel, change the post from a conversation to an announcement. This will allow you to have a banner in a different color to make your post stand out.
To do this, create a new post and under new conversation, click to change the post to an announcement.
Tip 13: Pin a post in a channel
You can pin any posts in Teams so that when you click on the channel information, the pinned post is at the top, instead of having to scroll through all the posts to find it.
On any post, click on the “…” and click Pin. To view it, click the “i” to view the channel information. Chat messages can be pinned in the same way to create a list of messages you need to respond to, or that you chat in often. You can unpin any messages or posts when you need to.
Tip 14: Create Polls
Adding Polls to your channel or during a meeting will get your student actively engaged.
Add a Forms Poll to any post. In a meeting, click on the Forms button and add a new poll right into the chat.
Read Next: How To Poll In Microsoft Teams: 2 Ways For Teachers
For more interactive polls & other question types to do with your students during your PowerPoint presentation, use ClassPoint.
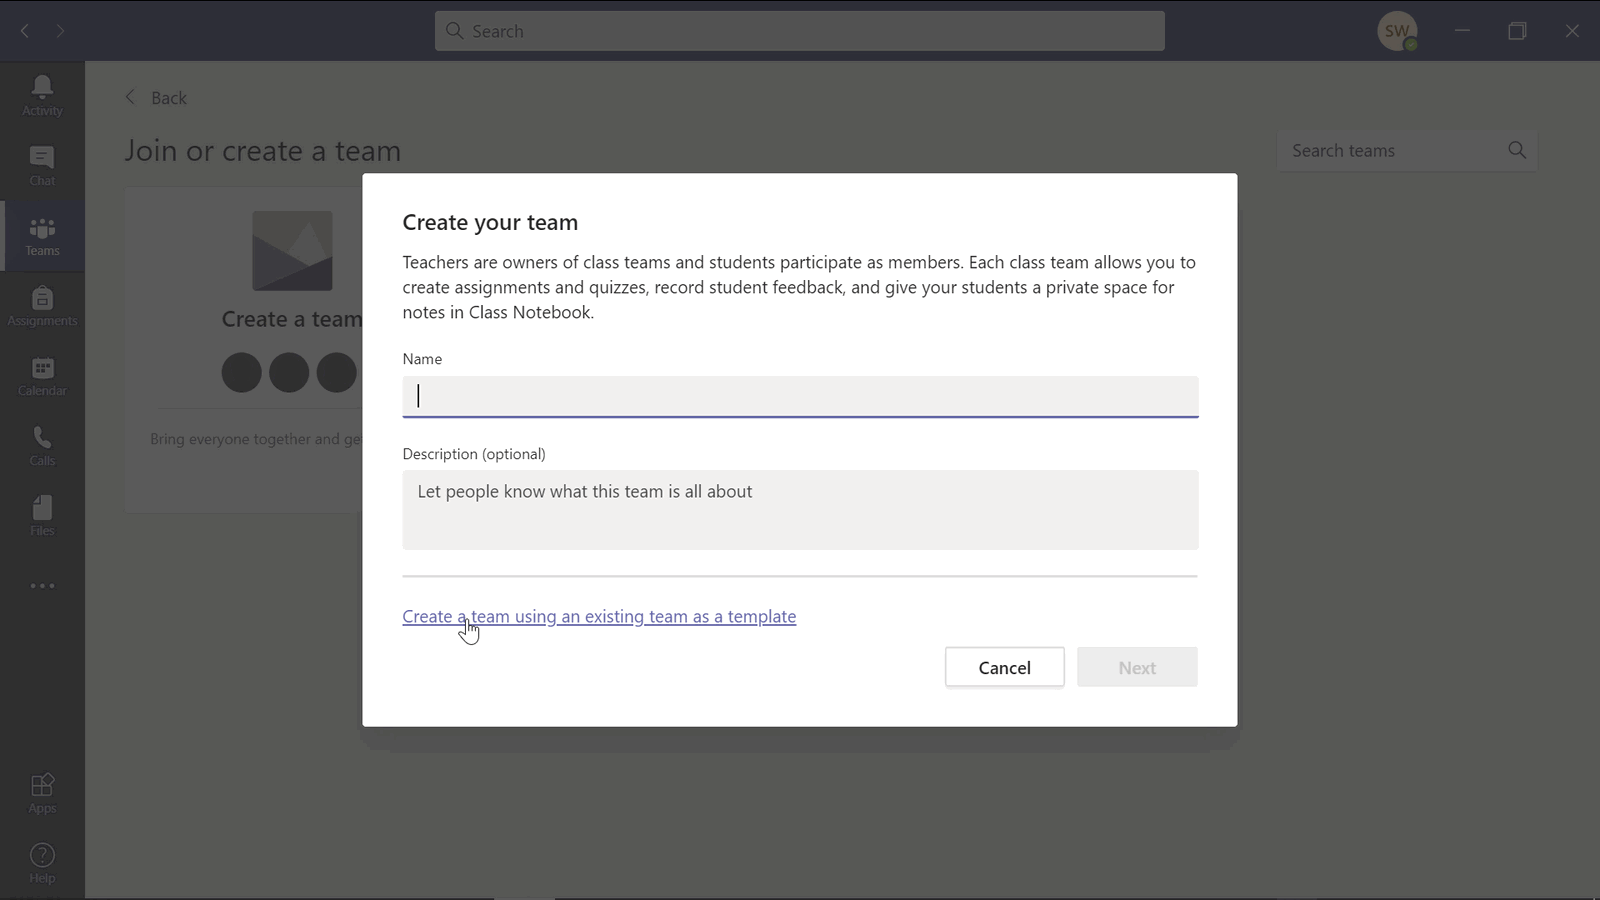
Tip 15: Create a new Team using a template
The next time you create a Team, you can use an existing team as a template. For many industries, Teams has preformatted templates but unfortunately, they have not made any for education yet. Hopefully soon!
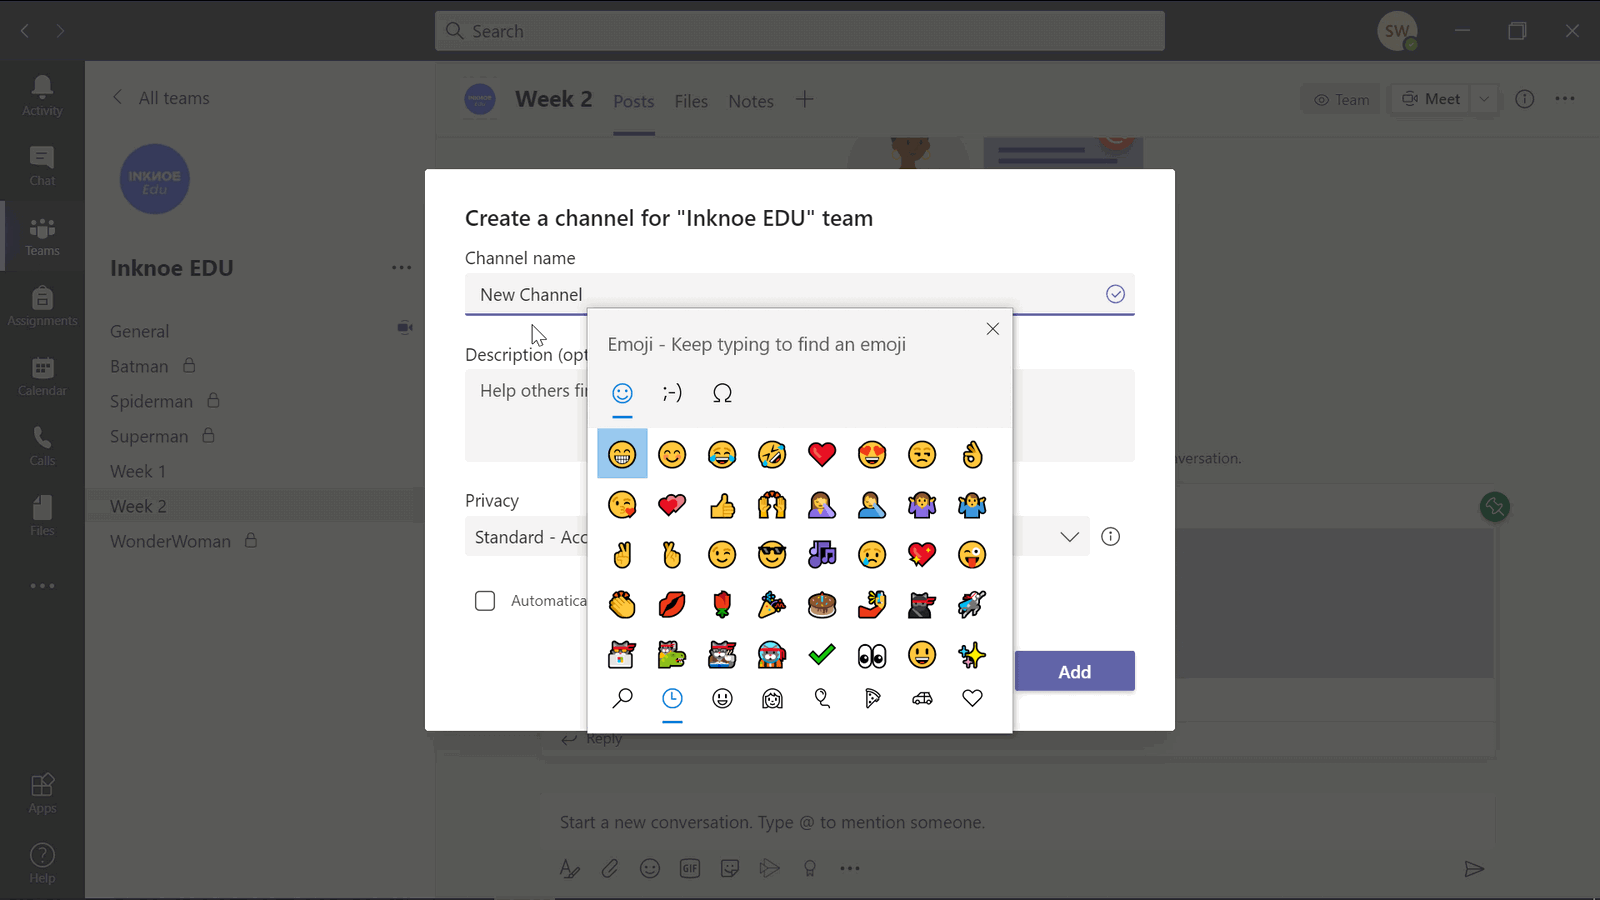
Bonus Tip 16: Use emojis
To add an interesting image to your channel or team names, add an emoji! When naming your channel or team, use the Windows key + “.” and your emoji keyboard will open. Select an emoji to add it to your title!
Common FAQ’s
Thanks for reading through these Microsoft Teams tips and tricks. Below are some of the most common questions teachers have regarding Teams.
How do I stop students from starting the meeting without me?
In your meeting options, you can change who is allowed to bypass the lobby. If you change this to “Only Me,” you are the only one who can begin the meeting. You students will have to wait to be admitted into the class until you have begun.
How can I stop students from unmuting themselves?
First, you must be the meeting organizer. Then, go into your meeting options, and switch “Allow attendees to unmute” to “No.” Then, set who can present to “Only me.”
Can I get some sort of attendance report for my class?
Yes! Before your meeting ends, you can download a report that lets you know when students joined the call, if any of them left during class time, and when they rejoined. Make sure you download this from the Participant Tab BEFORE your meeting ends.
For more information and Microsoft Teams tips, check out the following articles:
